Huffy
Indexation Expert
2
MONTHS
2 2 MONTHS OF SERVICE
LEVEL 1
300 XP
Hey Folks, in this tutorial we are going to talk about an vulnerability scanner tool called “WebMap“. It is an open source vulnerability scanner tool that is fully coded in python language. We can configure this tool in many ways and you can also read all the features available in this tool below.
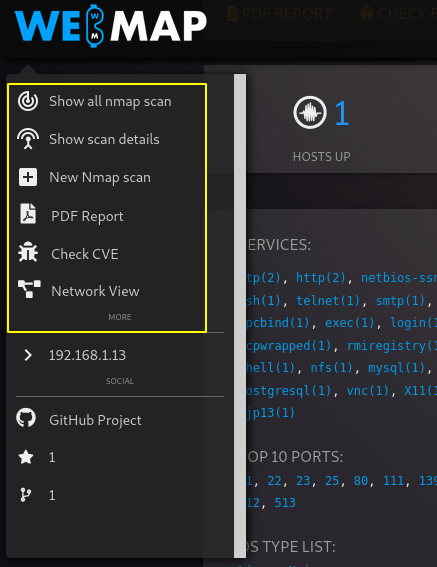
Features
- Attach labels on a host
- Insert notes for a specific host
- Create a PDF Report with charts, details, labels and notes
- Copy to clipboard as Nikto, Curl or Telnet commands
- Search for CVE and Exploits based on CPE collected by Nmap
- RESTful API
- Import and parse Nmap XML files
- Run and Schedule Nmap Scan from dashboard
- Statistics and Charts on discovered services, ports, OS, etc…
- Inspect a single host by clicking on its IP address
Let’s take a look
 !!
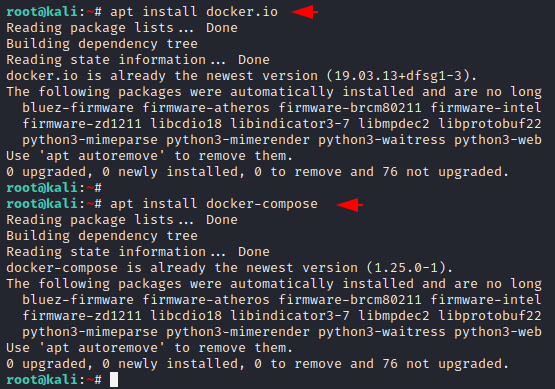
!!Docker Installation
To configure this tool we will install docker and some other require dependencies using the following command.
apt install docker.io
apt install docker-compose12apt install docker.ioapt install docker-compose
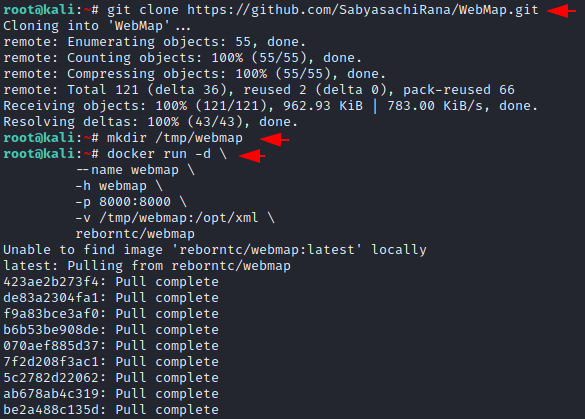
Clone the Tool
Now we will clone the repository of this tool using git command and
After cloning we will create a directory inside the “tmp” directory and execute the docker command to boot the GUI interface of this tool.
git clone https://github.com/SabyasachiRana/WebMap.git
mkdir /tmp/webmap
docker run -d \ --name webmap \ -h webmap \ -p 8000:8000 \ -v /tmp/webmap:/opt/xml \ reborntc/webmap123git clone
https://github.com/SabyasachiRana/WebMap.gitmkdir/tmp/webmapdocker run-d\--name webmap\-hwebmap\-p8000:8000\-v/tmp/webmap:/opt/xml\reborntc/webmap
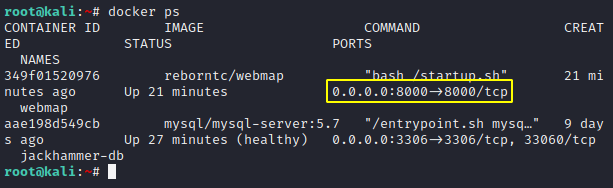
The tool will be hosted at the following address and also you can view once using the following command.
docker ps
http://localhost:800012docker ps
Loading…
localhost
Generate Token
In order to access to the WebMap dashboard, you need a token that you can create by using the following command.
docker exec -ti webmap /root/token1docker exec-ti webmap/root/token

Hmm
!! We need to enter a token here to enter the web application.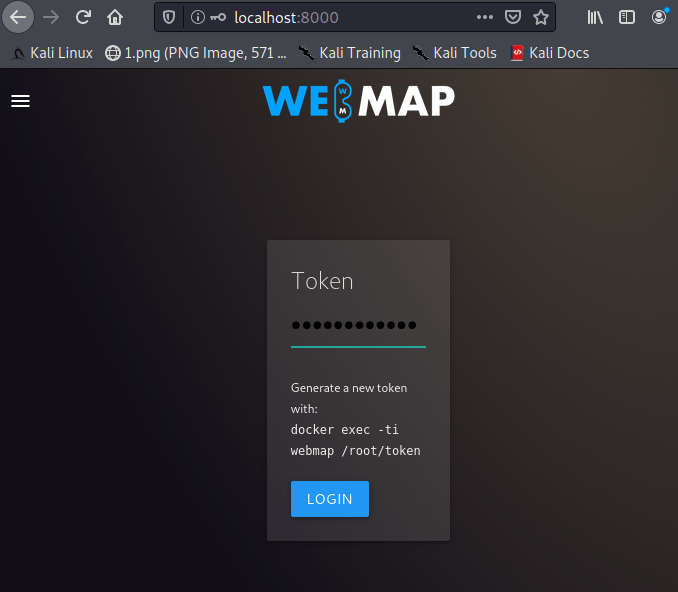
Great
!! Finally we have entered into the vulnerability scanner and you can see what it looks like.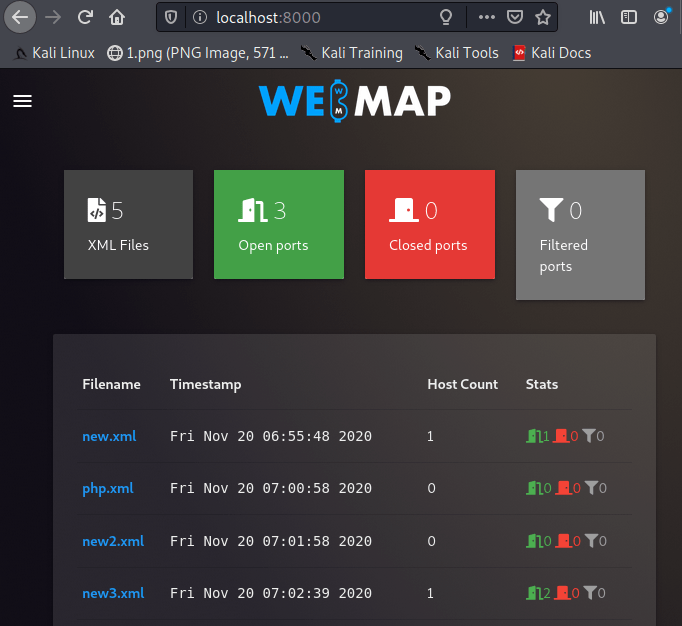
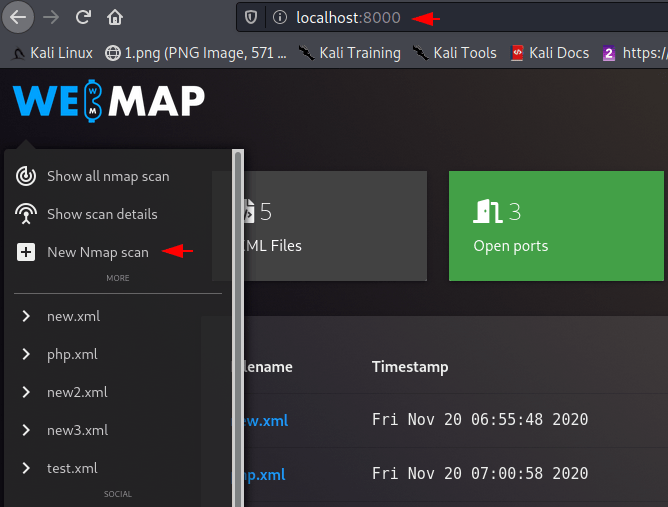
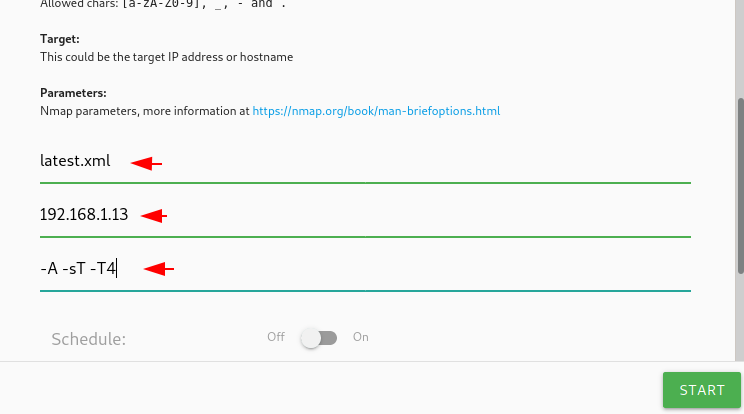
Let’s add your target details by clicking “New Namp Scan”.
Now here we will put our target details, output file name and parameters for preforming nmap scan.
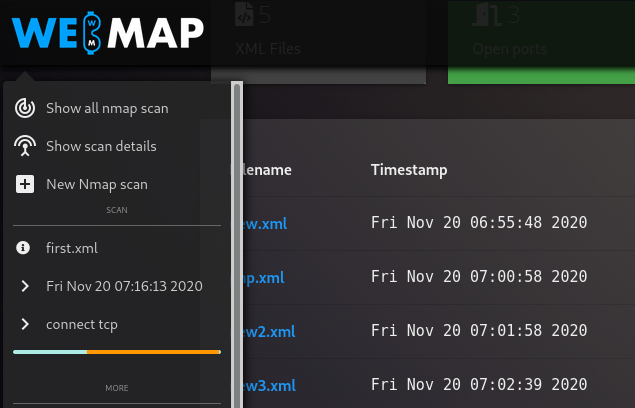
After submitting the details the scan will start which you can see in the side bar of the web application.
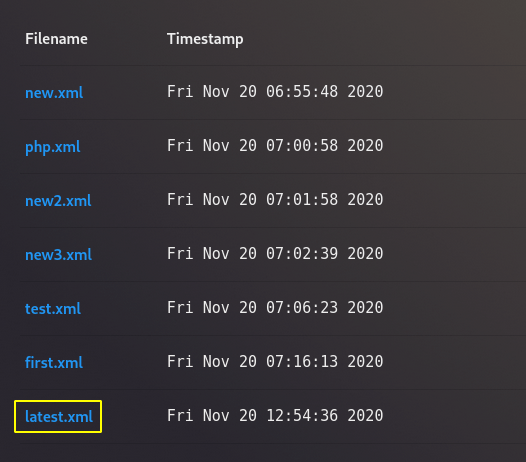
After scanning, they are automatically saved on the localhost machine and also appear on the web application which you can view by clicking on it.
Great
!! Now after clicking on the saved file you can see all the details about the host such as: open ports, closed ports, vulnerabilities etc.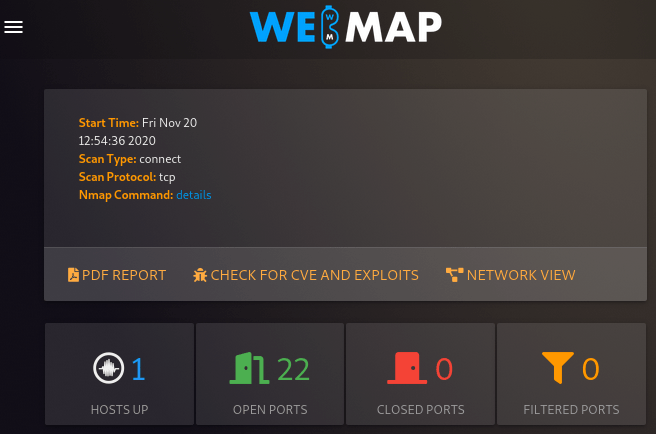
You can see in-depth details about active services running on the target machine.

Done
!! You can use all the features of this tool one by one and get more information about the target server.