GeNiuS
Pro Gamer
2
MONTHS
2 2 MONTHS OF SERVICE
LEVEL 1
300 XP
In this tutorial, I will guide you through the process of creating a Carousel, also known as an Image Slider, using HTML, CSS, and JavaScript. Carousels are widely used in modern web design to showcase images, content, or products in an interactive and visually appealing way.
The primary goal of this tutorial is to provide you with valuable insights and practical ideas for building an image slider that can be customized and integrated into your own projects. Whether you're designing a portfolio, an e-commerce website, or any application that benefits from dynamic content display, this feature can enhance user engagement and overall aesthetics.
By the end of this tutorial, you'll have a fully functional carousel that you can adapt to suit your future web development needs.
What is Carousel?
The Carousel I am referring to is an image slider commonly used in web applications. This feature is designed to display a series of images, allowing users to navigate between slides seamlessly. With intuitive controls, users can move to the previous or next image slide, enhancing their browsing experience.
Image sliders are a popular element in modern web design, often used in portfolios, product showcases, or landing pages to present visual content in an engaging and interactive way. By implementing this feature, you can create an eye-catching and functional component that improves the overall appeal of your web application.
Let’s learn how to build a carousel step-by-step, ensuring it’s both user-friendly and visually appealing for your projects.
Step 1: Creating the Interface
To get started, let’s design the sample web application interface by creating the main HTML file. Name the file index.html
. This file will include the HTML elements required for implementing the carousel feature. Refer to the script provided below for details.
Step 2: Creating the CSS
Next, we’ll create the CSS file for the application. Save the file with the name style.css
. This file will include the styles and designs for various elements of the application, including the components of the carousel.
Below, I have provided the CSS script to style the carousel and other elements of the application. Feel free to customize the design according to the requirements of your project.
Step 3: Creating the JavaScript
Finally, let’s create the main JavaScript (JS) file for the application. Save the new file as script.js
. This file will include the necessary code to make the carousel feature fully functional. Refer to the script provided below for implementation details.
And there you have it! Now you test the simple application with carousel that we created on your end and see if it works as we wanted.
Here's a screenshot of the application using the source code that I provided on this tutorial.
I have also provided the complete source code zip file on this article and it is free to download. The download button is located below this article content. Feel free to download and modify the codes the way you wanted.
I hope this Step-by-Step Guide to Creating a Carousel with HTML, CSS, and JavaScript will help you and you'll find something useful from the source code for your future web application projects.
Explore more on this website for more Tutorials, Free Source Code, and Articles covering various programming languages.
Happy Coding =)
Download
The primary goal of this tutorial is to provide you with valuable insights and practical ideas for building an image slider that can be customized and integrated into your own projects. Whether you're designing a portfolio, an e-commerce website, or any application that benefits from dynamic content display, this feature can enhance user engagement and overall aesthetics.
By the end of this tutorial, you'll have a fully functional carousel that you can adapt to suit your future web development needs.
What is Carousel?
The Carousel I am referring to is an image slider commonly used in web applications. This feature is designed to display a series of images, allowing users to navigate between slides seamlessly. With intuitive controls, users can move to the previous or next image slide, enhancing their browsing experience.
Image sliders are a popular element in modern web design, often used in portfolios, product showcases, or landing pages to present visual content in an engaging and interactive way. By implementing this feature, you can create an eye-catching and functional component that improves the overall appeal of your web application.
Let’s learn how to build a carousel step-by-step, ensuring it’s both user-friendly and visually appealing for your projects.
Step 1: Creating the Interface
To get started, let’s design the sample web application interface by creating the main HTML file. Name the file index.html
. This file will include the HTML elements required for implementing the carousel feature. Refer to the script provided below for details.
- <!DOCTYPE html>
- <html
lang
=
"en"
>
- <head
>
- <meta
charset
=
"UTF-8"
>
- <meta
name
=
"viewport"
content
=
"width=device-width, initial-scale=1.0"
>
- <title
>
Simple Carousel using HTML, CSS, and JS</
title
>
- <link
rel
=
"stylesheet"
href
=
"style.css"
>
- <script
src
=
"https://code.jquery.com/jquery-3.7.1.min.js"
crossorigin=
"anonymous"
></
script
>
- </
head
>
- <body
>
- <div
id
=
"main-wrapper"
>
- <h2
id
=
"page-title"
>
Simple Carousel using HTML, CSS, and JS</
h2
>
- <div
class
=
"carousel-container"
>
- <!-- Carousel Items -->
- <div
class
=
"carousel"
>
- <div
class
=
"carousel-item active"
>
- <img
src
=
"images/1.jpg"
alt
=
"Sample Image 1"
>
- </
div
>
- <div
class
=
"carousel-item"
>
- <img
src
=
"images/2.jpg"
alt
=
"Sample Image 2"
>
- </
div
>
- <div
class
=
"carousel-item"
>
- <img
src
=
"images/3.jpg"
alt
=
"Sample Image 3"
>
- </
div
>
- </
div
>
- <!-- Carousel Buttons -->
- <div
class
=
"carousel_actions"
>
- <button
class
=
"carousel-btn carousel-prev-button"
aria-label
=
"Previous Slide"
><</
button
>
- <button
class
=
"carousel-btn carousel-next-button"
aria-label
=
"Next Slide"
>
></
button
>
- </
div
>
- </
div
>
- </
div
>
- <script
src
=
"script.js"
></
script
>
- </
body
>
- </
html
>
Step 2: Creating the CSS
Next, we’ll create the CSS file for the application. Save the file with the name style.css
. This file will include the styles and designs for various elements of the application, including the components of the carousel.
Below, I have provided the CSS script to style the carousel and other elements of the application. Feel free to customize the design according to the requirements of your project.
- html,
body {
- margin
:
unset;
- padding
:
unset;
- width
:
100%
;
- max-width
:
100%
;
- height
:
100%
;
- max-height
:
100%
;
- }
- body {
- display
:
flex;
- flex-flow
:
column;
- align-items
:
center
;
- justify-content
:
center
;
- overflow
:
auto
;
- background-image
:
linear-gradient(
to top
,
#cfd9df
0%
,
#e2ebf0
100%
)
;
- }
- #main-wrapper
{
- display
:
block
;
- width
:
100%
;
- max-width
:
500px
;
- padding
:
15px
;
- }
- #page-title
{
- text-align
:
center
;
- font-weight
:
bolder
;
- }
- .carousel-container{
- position
:
relative
;
- width
:
100%
;
- max-width
:
500px
;
- }
- .carousel{
- position
:
relative
;
- width
:
100%
;
- height
:
300px
;
- overflow
:
hidden
;
- }
- .carousel-item{
- position
:
absolute
;
- width
:
100%
;
- height
:
100%
;
- display
:
none
;
- }
- .carousel-item
.active{
- display
:
block
;
- }
- .carousel-item
.carousel-prev-transition-from,
- .carousel-item
.carousel-prev-transition-to,
- .carousel-item
.carousel-next-transition-from,
- .carousel-item
.carousel-next-transition-to
- {
- display
:
block
;
- transition
:
all .5s
ease-in-out;
- }
- .carousel-item
.carousel-prev-transition-to{
- transform
:
translateX(
-100%
)
;
- }
- .carousel-item
.carousel-next-transition-to{
- transform
:
translateX(
100%
)
;
- }
- .carousel-item
img {
- width
:
100%
;
- height
:
100%
;
- object-fit
:
cover;
- object-position
:
center
center
;
- }
- .carousel_actions
{
- position
:
absolute
;
- display
:
flex;
- width
:
100%
;
- height
:
100%
;
- justify-content
:
space-between;
- top
:
0
;
- }
- .carousel-btn
{
- height
:
100%
;
- width
:
50px
;
- font-size
:
20px
;
- font-weight
:
900
;
- color
:
#fff
;
- background
:
#00000008
;
- border
:
unset;
- cursor
:
pointer
;
- }
- .carousel-btn
:
hover
{
- background
:
#0000001f
;
- }
Step 3: Creating the JavaScript
Finally, let’s create the main JavaScript (JS) file for the application. Save the new file as script.js
. This file will include the necessary code to make the carousel feature fully functional. Refer to the script provided below for implementation details.
- $(
document)
.ready
(
function
(
)
{
- $(
'.carousel-container'
)
.each
(
function
(
)
{
- var
carousel =
$(
this
)
- // Carousel items
- var
items =
carousel.find
(
".carousel .carousel-item"
)
;
- // Carousel Next Slide Button
- var
next_btn =
carousel.find
(
".carousel_actions .carousel-next-button"
)
- // Carousel Previous Slide Button
- var
prev_btn =
carousel.find
(
".carousel_actions .carousel-prev-button"
)
- // Event Listner when Next Slide Button has been triggerd
- next_btn.click
(
function
(
e)
{
- e.preventDefault
(
)
;
- // current active slide
- var
currentSlide =
carousel.find
(
".carousel .carousel-item.active"
)
- var
currentSlideIndx =
currentSlide.index
(
)
;
- // Identifying next slide index
- var
nextSlideIndx =
currentSlideIndx +
1
;
- if
(
nextSlideIndx ==
items.length
)
- nextSlideIndx =
0
;
- // Next Slide to Show
- var
nextSlide =
$(
items[
nextSlideIndx]
)
;
- // Animate Slide Transition from current active to the next slide
- currentSlide.addClass
(
"carousel-next-transition-from"
)
- nextSlide.addClass
(
"carousel-next-transition-to"
)
- setTimeout(
function
(
)
{
- nextSlide.css
(
"transform"
,
"translateX(0%)"
)
- currentSlide.css
(
"transform"
,
"translateX(-100%)"
)
- setTimeout(
function
(
)
{
- currentSlide.removeClass
(
"carousel-next-transition-from"
)
- currentSlide.removeClass
(
"active"
)
- nextSlide.removeClass
(
"carousel-next-transition-to"
)
- nextSlide.addClass
(
"active"
)
- currentSlide.removeAttr
(
"style"
)
- nextSlide.removeAttr
(
"style"
)
- }
- ,
1000
)
- }
,
10
)
- }
)
- // Event Listner when Next Slide Button has been triggerd
- prev_btn.click
(
function
(
e)
{
- e.preventDefault
(
)
;
- // current active slide
- var
currentSlide =
carousel.find
(
".carousel .carousel-item.active"
)
- var
currentSlideIndx =
currentSlide.index
(
)
;
- // Identifying previous slide index
- var
prevSlideIndx =
currentSlideIndx -
1
;
- if
(
prevSlideIndx <
0
)
- prevSlideIndx =
(
items.length
-
1
)
;
- var
prevSlide =
$(
items[
prevSlideIndx]
)
;
- // Animate Slide Transition from current active to the next slide
- currentSlide.addClass
(
"carousel-prev-transition-from"
)
- prevSlide.addClass
(
"carousel-prev-transition-to"
)
- setTimeout(
function
(
)
{
- prevSlide.css
(
"transform"
,
"translateX(0%)"
)
- currentSlide.css
(
"transform"
,
"translateX(100%)"
)
- setTimeout(
function
(
)
{
- currentSlide.removeClass
(
"carousel-prev-transition-from"
)
- currentSlide.removeClass
(
"active"
)
- prevSlide.removeClass
(
"carousel-prev-transition-to"
)
- prevSlide.addClass
(
"active"
)
- currentSlide.removeAttr
(
"style"
)
- prevSlide.removeAttr
(
"style"
)
- }
- ,
1000
)
- }
,
10
)
- }
)
- }
)
- }
)
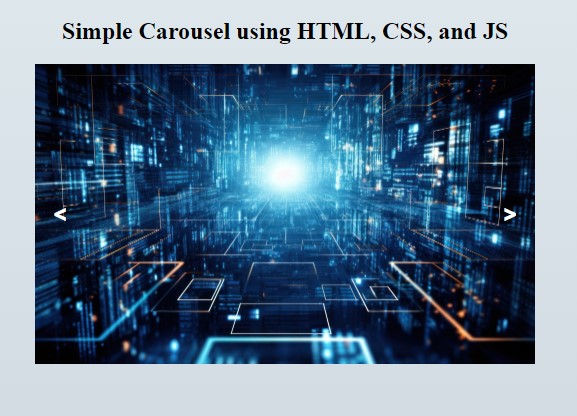
And there you have it! Now you test the simple application with carousel that we created on your end and see if it works as we wanted.
Here's a screenshot of the application using the source code that I provided on this tutorial.
I have also provided the complete source code zip file on this article and it is free to download. The download button is located below this article content. Feel free to download and modify the codes the way you wanted.
I hope this Step-by-Step Guide to Creating a Carousel with HTML, CSS, and JavaScript will help you and you'll find something useful from the source code for your future web application projects.
Explore more on this website for more Tutorials, Free Source Code, and Articles covering various programming languages.
Happy Coding =)
Download
You must upgrade your account or reply in the thread to view hidden text.