Anne-Marie
Shonen Hero
2
MONTHS
2 2 MONTHS OF SERVICE
LEVEL 1
300 XP
AlienVault OSSIM is an Open Source Security Information and Event Management (SIEM), which provides you with the feature-rich open source SIEM complete with event collection, normalization, and correlation. OSSIM is a unified platform which is providing the essential security capabilities like: –
It is already loaded with the power of the AlienVault Open Threat Exchange (OTX). The open threat intelligence community provides community-generated threat intelligence and allows you to collaborate with them and also automates the process of updating your security infrastructure with threat data from any source.
AlienVault is very useful for monitoring your system security event or vulnerability and can help you to audit assessment security like PCI-DSS.

So, without wasting more time or much theory let’s begin the installation process.AlienVault OSSIM ISO can be easily found on the AlienVault OSSIM product page.
Table of Content
Prerequisites
For the installation of AlienVault OSSIM, there are some minimum requirements as listed below.
(You can have multiple NICs for Log Management or network monitoring)
Installation
Once you’ve downloaded the AlienVault OSSIM ISO file, begin installation It on your virtual machine.
To install AlienVault OSSIM

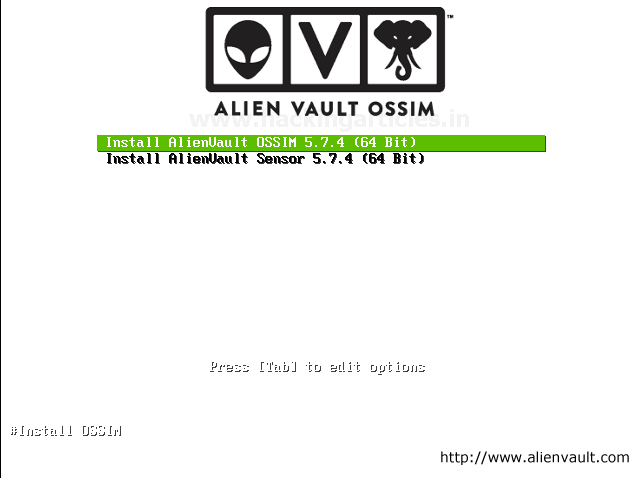
Once you launch the new AlienVault instance, select Install AlienVault OSSIM 5.7.4 (64 Bit) and Hit Enter As shown below
The installation process takes you through a tour of setup options choose as per your requirements.
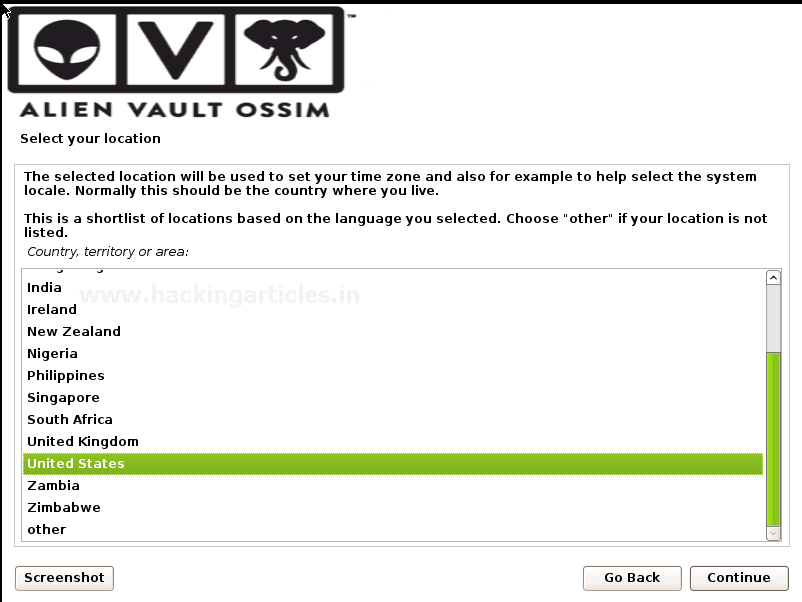
Select your location
Configure the network by Assigning
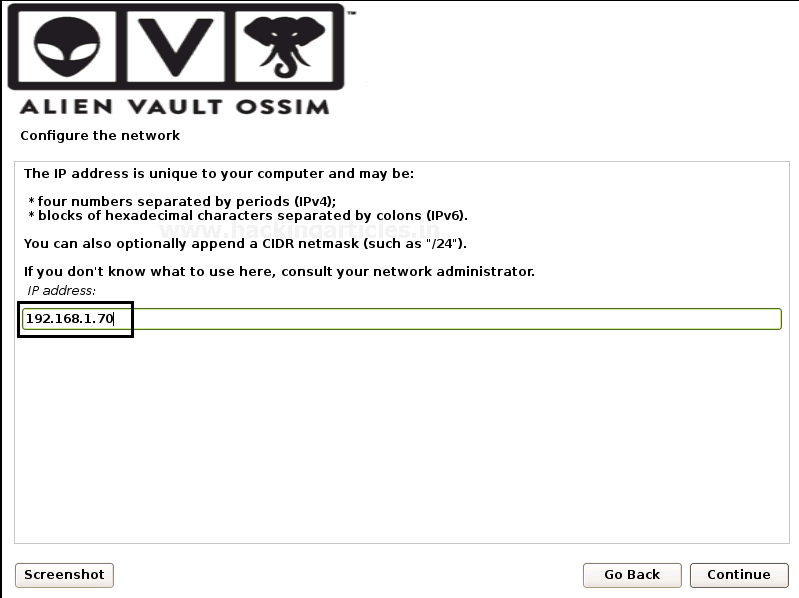
As we have 1 or more Network interface cards choose one for the primary network interface card for the management server. The IP address will be used to access AlienVault OSSIM Web UI. We are going to use eth0 for the management and the rest of the network is connected to eth1.

Assign a Unique IP address to the server as shown below. If you don’t know what to use here, consult your network administrator.
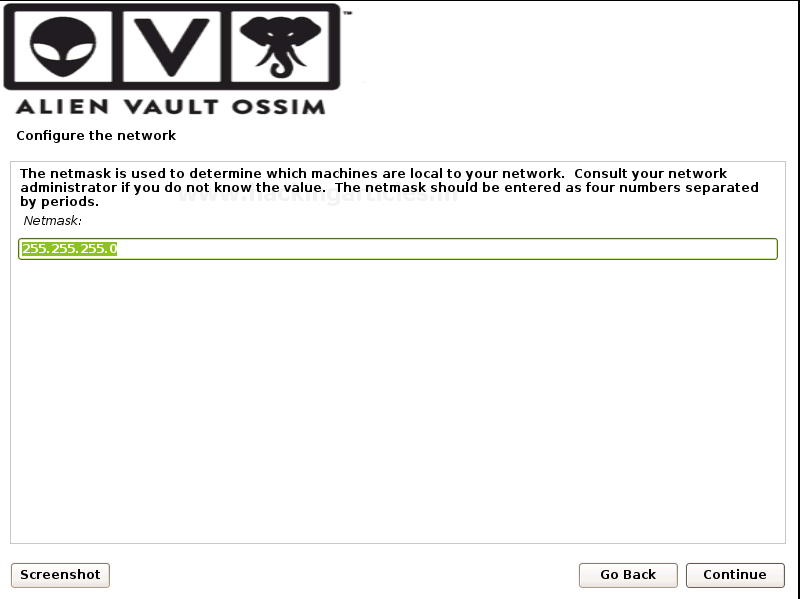
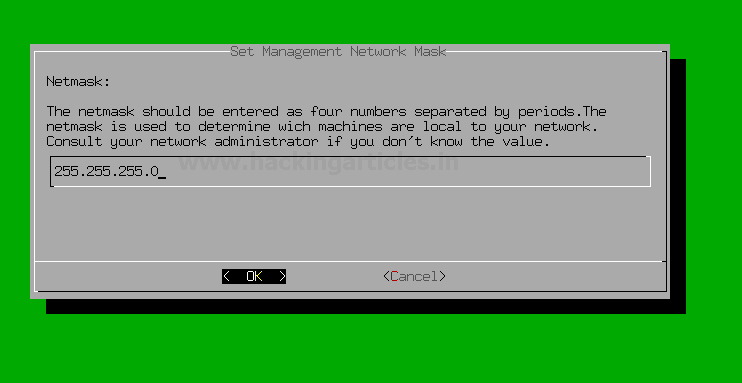
Assign the Netmask of the assigned unique IP address
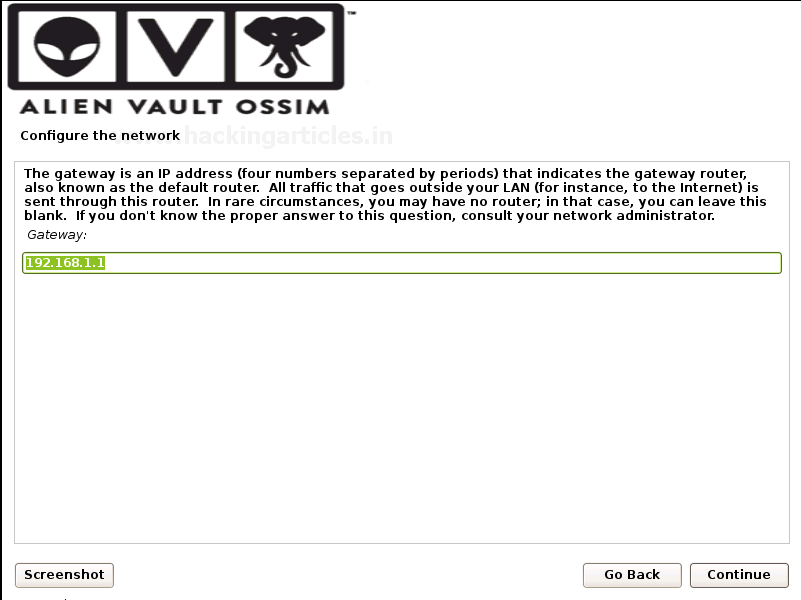
Provide the Gateway: That indicates the gateway router, as known as the default router. All traffic goes outside your LAN is sent through this router.
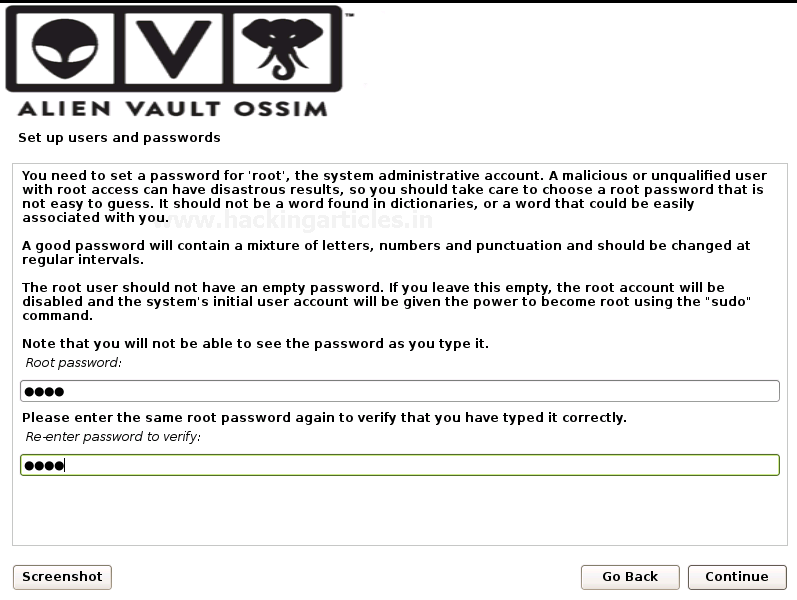
Then the installation process takes you to set up a root password this will be used for the root login account in the AlienVault OSSIM login console.
Then on the next prompt set up your time zone as the final step.
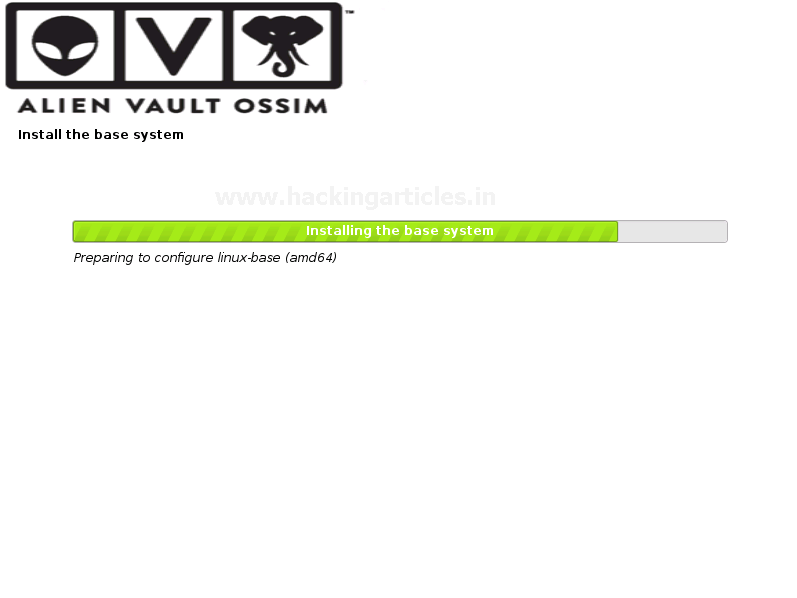
And then it will install the base system. It takes quite long depends on your system speed as usually, it takes 10-15 to finish the installation till then go get served you with a coffee .
.
You can now login to the AlienVault OSSIM console with the root user and enter the password that you designated in the setup process.
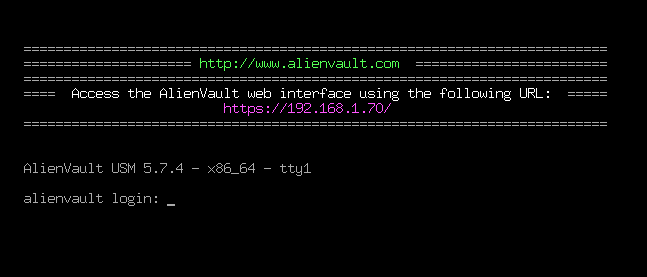
Login with credentials of the root account.
Setup log monitoring interface
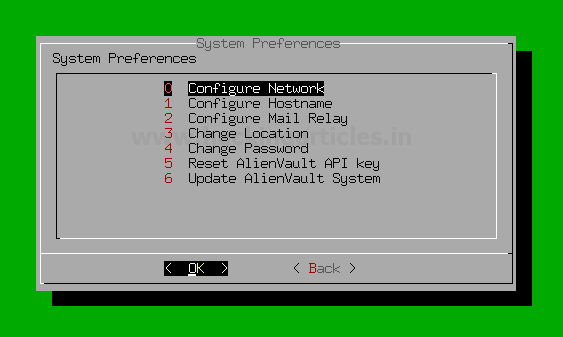
After successfully login, you must configure the log management interface.
To set up a network interface for log management and scanning follow the steps as described below.
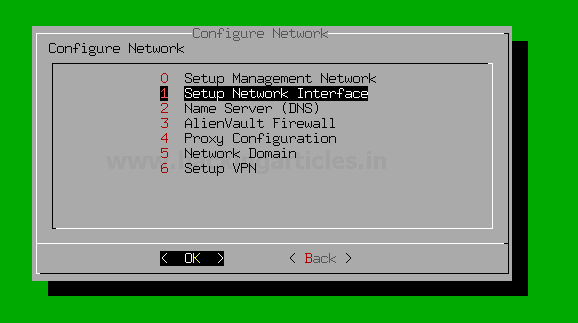
Click on System Preferences > Configure Network > Setup Network Interface > eth1 > IP address > netmask.
Go to System Preferences

Select Configure Network
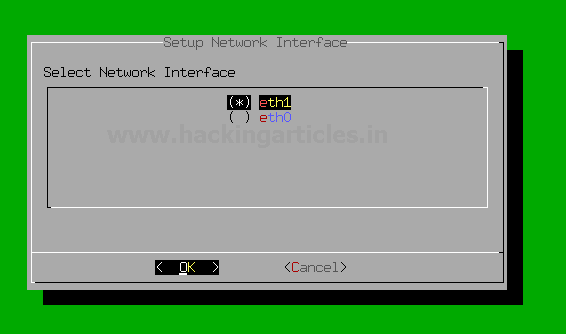
Select Network Interface
Select eth1 for log management and scanning.
Assign a unique IP address to set up a network management interface.

Assign the netmask of the designated IP address.
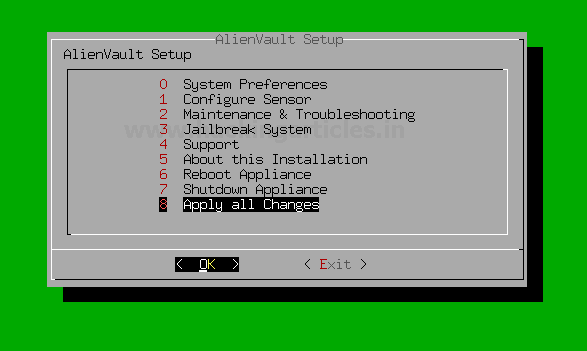
And then come back to the AlienVault setup by selecting back and back and then select Apply all Changes as shown below.
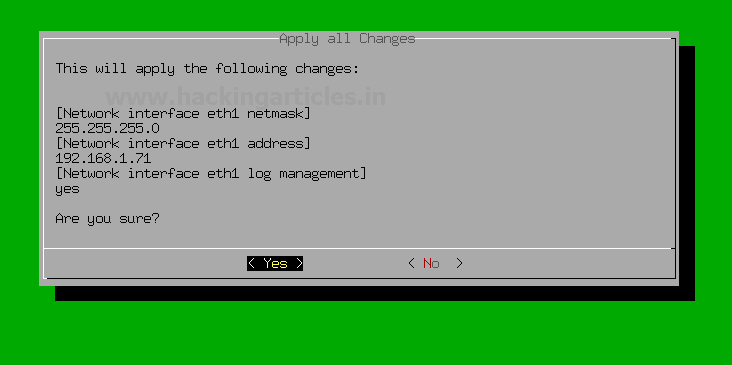
Verify the changes that you have done if correct then select yes.
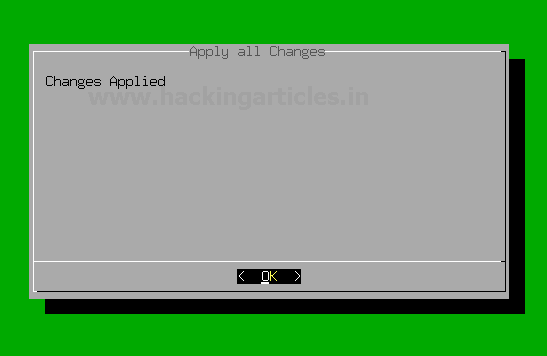
Now you have successfully set up the Network interface for the log management !!!
Hmm !! you have successfully installed and set upped AlienVault in VMware.
Web UI Access
The AlienVault OSSIM Appliance Web User Interface provides Access to all the tools and capabilities that OSSIM Appliance makes available for managing the security of your organization’s network and computer as well as all devices connected in a network.
From the OSSIM Appliance Web UI, you can view all essential information about network devices, user activity, monitor endpoints, applications, and network traffic in your environment.
As you monitor information coming inf from the network devices or endpoints, you can go about defining and refining policies and correlation directives to fine-tune the behaviour of your OSSIM Appliance system to alert you of potential security issues and vulnerabilities.
By completing the installation process, you can access the Web UI and setup your admin account.
To access Web UI, open up your favourite browser and visit

Further, the following windows appear after the completion of the administrator account.
Default login credentials of AlienVault OSSIM serve are
Username: – admin
Password: – that you designated in the previous step.
Use login credentials to access OSSIM Web UI.
After successful login to OSSIM Web UI appear for further settings
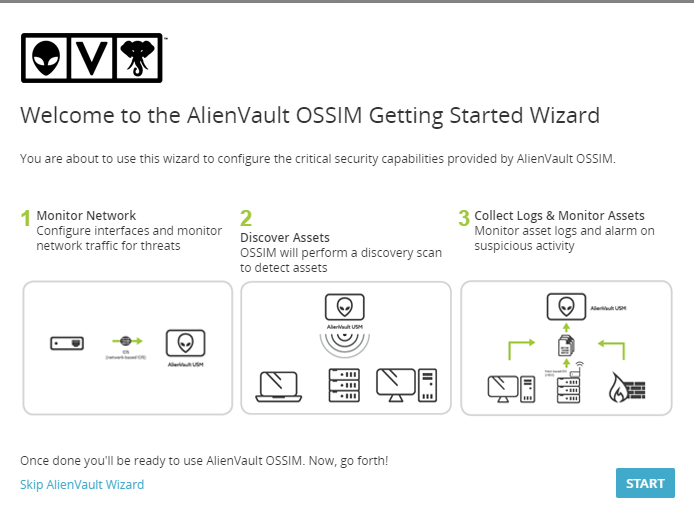
It shows you 3 options for the further configurations
Click on the start button for the further configuration of OSSIM Server
After clicking on the start button another window will prompt for the network configuration.
We configured network interfaces for the management and Log collection and management as shown below.
eth0: – Management
eth1: – Log Collection & Monitoring

Assets Discovery
In the 2nd step, OSSIM Server will automatically perform Assets Discovery in the network.
Types of ASSETS in the OSSIM Server are
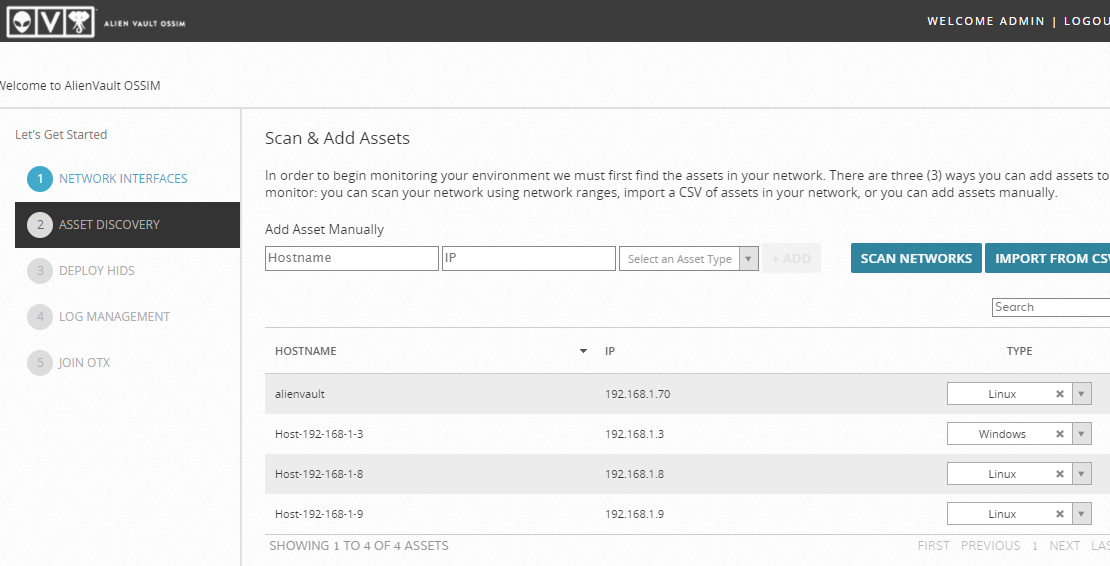
As you can see it automatically discover some of the Network Assets that are alive in the network.
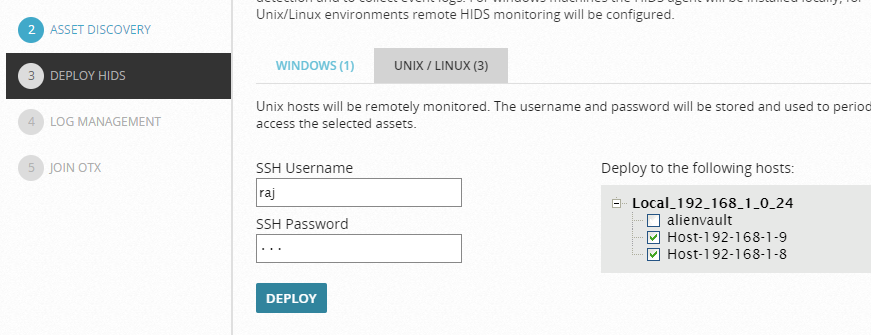
HIDS Deployment
In the 3rd step, we will Deploy HIDS (Host intrusion detection system) on Windows, Linux devices to perform Rootkit Detection, File integrity, monitoring, and collection of Event logs.
Enter log in details of the discovered Assets such as username or password for the Deployment of HIDS as shown below.
Select the desired host from the list to provide login credentials
For the Deployment of Windows Asset select Windows

Same as well for the Linux Asset as shown below
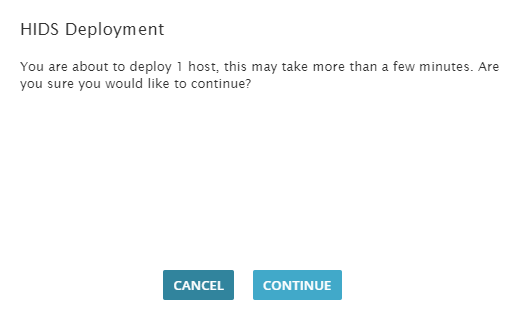
Further, then click the Deploy button for the Deployment of HIDS then click on the continue button to start the process of deployment.
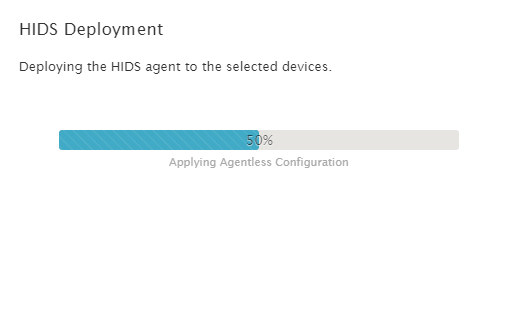
This process will take a few minutes as shown below.
Now the question is till the completion of the deployment process what you are going to do…??
The answer is quite simple
Till then relax or chill with some music….
Log Management
Those devices that were selected as “network devices” on the asset discovery screen OSSIM will ask you to capture their logs so what we need to do is simply select their Logs Vendor/Model and version and then select Enable.
If you don’t have network devices, then don’t need to worry simply skip this step.
OTX API Integration
On the next window, it will ask for OTX (Open Threat Exchange) registration Token.
Registration is still free, and it is required for automatically indicating or updating the latest threat signatures.
For the registration of OTX visit on: –
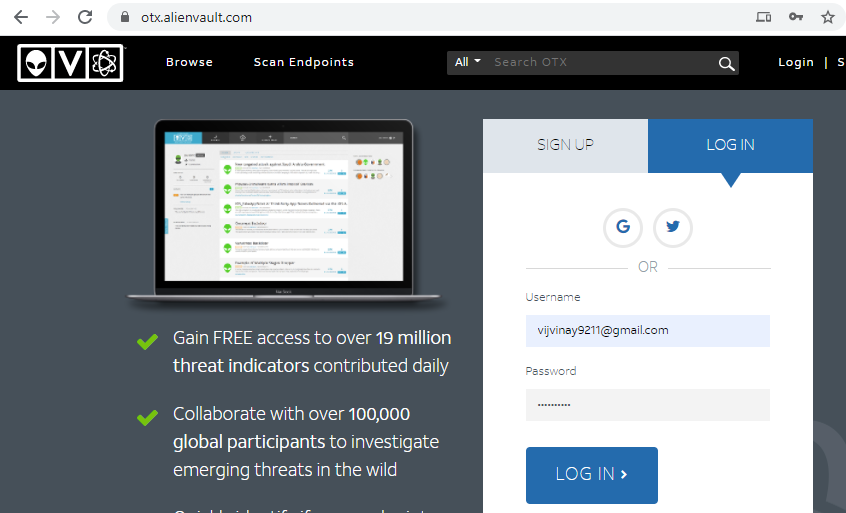
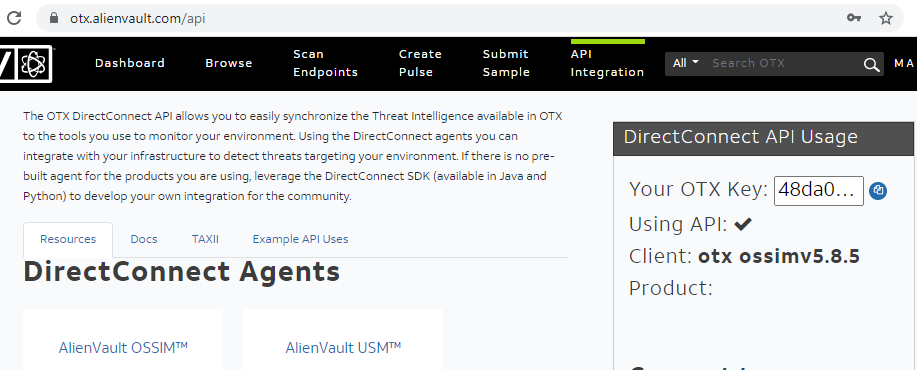
After creating account login to AlienVault OTX console and locate to the API integration and then copy OTX API Key as shown below
Then after coming back to OSSIM Web UI and paste the copied “OTX key” in the place of “Enter token” as shown below
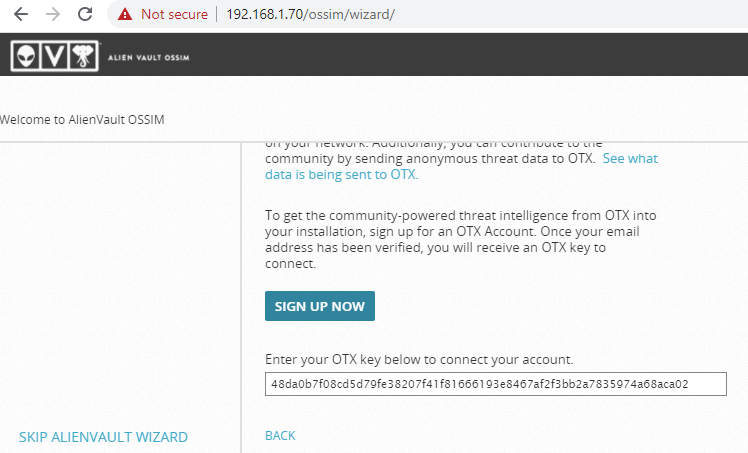
And then click “Finish” or “Skip” to bypass this step and then Finish configuration wizard

Congratulations !!! you have successfully configured You AlienVault Web UI
As we can we see it generated some Alarms we can explore them by Selecting Explore AlienVault OSSIM
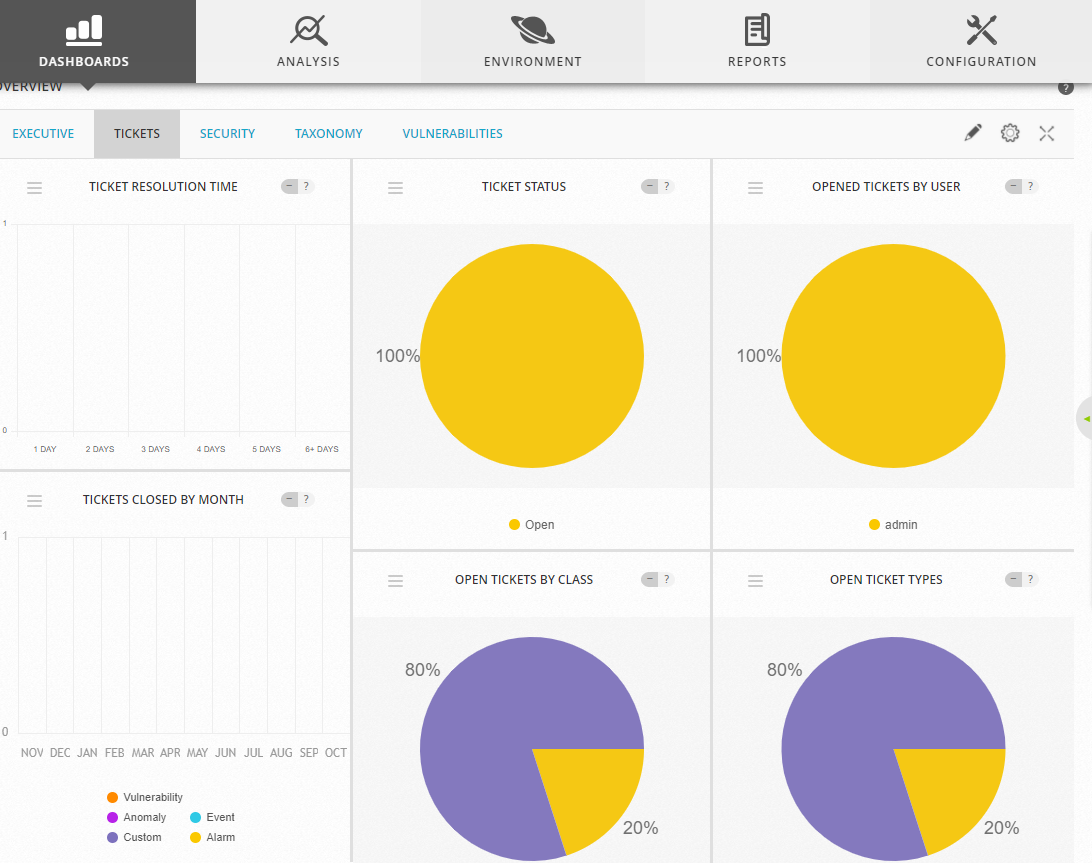
Let’s browse through OSSIM Dashboard.

By default, the Web UI displays a collection of high-level graphs and charts summarizing the activity of your network.
From this main Dashboard, you can choose different menu options or click other selectable links and buttons.
Primary menu — Provides access to the main functions or operations of USM Appliance. These include:
Secondary menu (or submenu) — For each primary menu selection, there are typically additional secondary or submenu options specific to a particular topic that are displayed when you click the primary selection, for example, Dashboard > overview > Tickets.
Hold tight! this is not enough…..
Have patience
Author – Vijay is a Certified Ethical Hacker, Technical writer and Penetration Tester at Hacking Articles. Technology and Gadget freak. Contact Here
- Asset discovery
- Vulnerability assessment
- Host Intrusion detection
- Network intrusion detection
- Behavioural monitoring
- SIEM event correlation
- Web UI Access
- Setup Network Monitoring
- Assets Discovery
- HIDS Deployment
- Log management
- OTX API integration
It is already loaded with the power of the AlienVault Open Threat Exchange (OTX). The open threat intelligence community provides community-generated threat intelligence and allows you to collaborate with them and also automates the process of updating your security infrastructure with threat data from any source.
AlienVault is very useful for monitoring your system security event or vulnerability and can help you to audit assessment security like PCI-DSS.
So, without wasting more time or much theory let’s begin the installation process.AlienVault OSSIM ISO can be easily found on the AlienVault OSSIM product page.
Table of Content
- Prerequisites
- Installation
- Setup log monitoring interface
- Web UI Access
Prerequisites
For the installation of AlienVault OSSIM, there are some minimum requirements as listed below.
- VMware or Virtual Box
- 2 NIC (Network interface card) E1000 compatible network cards
(You can have multiple NICs for Log Management or network monitoring)
- 4 CPU cores
- 4-8GB RAM
- 60GB HDD
Installation
Once you’ve downloaded the AlienVault OSSIM ISO file, begin installation It on your virtual machine.
To install AlienVault OSSIM
- In your virtual machine, create a new VM instance using the AlienVault OSSIM ISO as the installation source.
- Complete the requirements of AlienVault as shown below.
Once you launch the new AlienVault instance, select Install AlienVault OSSIM 5.7.4 (64 Bit) and Hit Enter As shown below
The installation process takes you through a tour of setup options choose as per your requirements.
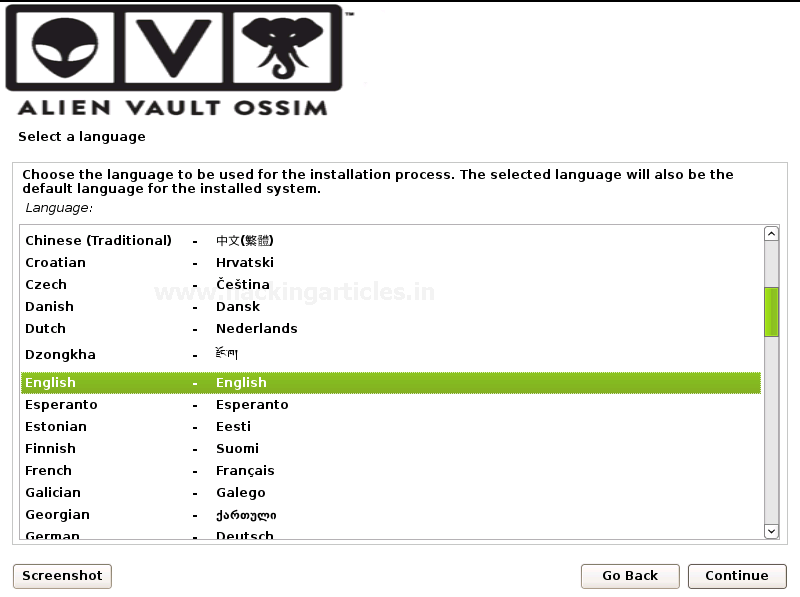
- Select language that you want to use
Select your location
Configure the network by Assigning
As we have 1 or more Network interface cards choose one for the primary network interface card for the management server. The IP address will be used to access AlienVault OSSIM Web UI. We are going to use eth0 for the management and the rest of the network is connected to eth1.
Assign a Unique IP address to the server as shown below. If you don’t know what to use here, consult your network administrator.
Assign the Netmask of the assigned unique IP address
Provide the Gateway: That indicates the gateway router, as known as the default router. All traffic goes outside your LAN is sent through this router.
Then the installation process takes you to set up a root password this will be used for the root login account in the AlienVault OSSIM login console.
Then on the next prompt set up your time zone as the final step.
And then it will install the base system. It takes quite long depends on your system speed as usually, it takes 10-15 to finish the installation till then go get served you with a coffee
.
You can now login to the AlienVault OSSIM console with the root user and enter the password that you designated in the setup process.
Login with credentials of the root account.
Setup log monitoring interface
After successfully login, you must configure the log management interface.
To set up a network interface for log management and scanning follow the steps as described below.
Click on System Preferences > Configure Network > Setup Network Interface > eth1 > IP address > netmask.
Go to System Preferences
Select Configure Network
Select Network Interface
Select eth1 for log management and scanning.
Assign a unique IP address to set up a network management interface.
Assign the netmask of the designated IP address.
And then come back to the AlienVault setup by selecting back and back and then select Apply all Changes as shown below.
Verify the changes that you have done if correct then select yes.
Now you have successfully set up the Network interface for the log management !!!
Hmm
!! you have successfully installed and set upped AlienVault in VMware.Web UI Access
The AlienVault OSSIM Appliance Web User Interface provides Access to all the tools and capabilities that OSSIM Appliance makes available for managing the security of your organization’s network and computer as well as all devices connected in a network.
From the OSSIM Appliance Web UI, you can view all essential information about network devices, user activity, monitor endpoints, applications, and network traffic in your environment.
As you monitor information coming inf from the network devices or endpoints, you can go about defining and refining policies and correlation directives to fine-tune the behaviour of your OSSIM Appliance system to alert you of potential security issues and vulnerabilities.
By completing the installation process, you can access the Web UI and setup your admin account.
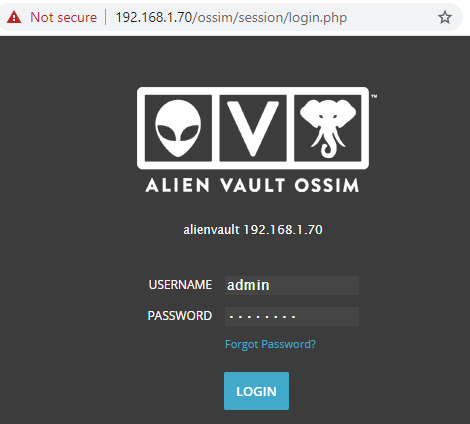
To access Web UI, open up your favourite browser and visit
Code:
https://192.168.1.70Further, the following windows appear after the completion of the administrator account.
Default login credentials of AlienVault OSSIM serve are
Username: – admin
Password: – that you designated in the previous step.
Use login credentials to access OSSIM Web UI.
After successful login to OSSIM Web UI appear for further settings
It shows you 3 options for the further configurations
- Monitor network: – configure your network interfaces for the Management and Log collection and scanning.
- Discover Assets: – Automatically discover your network devices, applications, endpoints in the network of your organization.
- Collect Logs & monitor Assets: – Monitor Asset logs and alarm on suspicious activity.
Click on the start button for the further configuration of OSSIM Server
After clicking on the start button another window will prompt for the network configuration.
We configured network interfaces for the management and Log collection and management as shown below.
eth0: – Management
eth1: – Log Collection & Monitoring
Assets Discovery
In the 2nd step, OSSIM Server will automatically perform Assets Discovery in the network.
Types of ASSETS in the OSSIM Server are
- Windows
- Linux
- Network devices
As you can see it automatically discover some of the Network Assets that are alive in the network.
HIDS Deployment
In the 3rd step, we will Deploy HIDS (Host intrusion detection system) on Windows, Linux devices to perform Rootkit Detection, File integrity, monitoring, and collection of Event logs.
Enter log in details of the discovered Assets such as username or password for the Deployment of HIDS as shown below.
Select the desired host from the list to provide login credentials
For the Deployment of Windows Asset select Windows
Same as well for the Linux Asset as shown below
Further, then click the Deploy button for the Deployment of HIDS then click on the continue button to start the process of deployment.
This process will take a few minutes as shown below.
Now the question is till the completion of the deployment process what you are going to do…??
The answer is quite simple
Till then relax or chill with some music….
Log Management
Those devices that were selected as “network devices” on the asset discovery screen OSSIM will ask you to capture their logs so what we need to do is simply select their Logs Vendor/Model and version and then select Enable.
If you don’t have network devices, then don’t need to worry simply skip this step.
OTX API Integration
On the next window, it will ask for OTX (Open Threat Exchange) registration Token.
Registration is still free, and it is required for automatically indicating or updating the latest threat signatures.
For the registration of OTX visit on: –
Code:
https://otx.alienvault.com/After creating account login to AlienVault OTX console and locate to the API integration and then copy OTX API Key as shown below
Then after coming back to OSSIM Web UI and paste the copied “OTX key” in the place of “Enter token” as shown below
And then click “Finish” or “Skip” to bypass this step and then Finish configuration wizard
Congratulations !!! you have successfully configured You AlienVault Web UI
As we can we see it generated some Alarms we can explore them by Selecting Explore AlienVault OSSIM
Let’s browse through OSSIM Dashboard.
By default, the Web UI displays a collection of high-level graphs and charts summarizing the activity of your network.
From this main Dashboard, you can choose different menu options or click other selectable links and buttons.
Primary menu — Provides access to the main functions or operations of USM Appliance. These include:
- Dashboards — display of all network security charts, tables, and graphs; deployment status and global of the USM Appliance system, network, and devices; and OTX threat and pulse visualizations.
- Analysis — Display providing search, sorting, filtered selection, and display of Alarms, Security Events (SIEM), Raw Logs, and Tickets.
- Environment — Provides display and management of Assets & Groups, Vulnerabilities, NetFlow data, Traffic Capture, Availability, and Detection.
- Reports — Provides display and management of various built-in and custom reports selectable by categories such as alarms, assets, compliance, raw logs, security operations, tickets, and user activities.
- Configuration — Provides options to view and manage deployed OSSIM Appliance components; Administration options let you manage users, system configuration, and backup and restore settings.
Secondary menu (or submenu) — For each primary menu selection, there are typically additional secondary or submenu options specific to a particular topic that are displayed when you click the primary selection, for example, Dashboard > overview > Tickets.
Hold tight! this is not enough…..
Have patience
Author – Vijay is a Certified Ethical Hacker, Technical writer and Penetration Tester at Hacking Articles. Technology and Gadget freak. Contact Here