xaavasv
Character Designer
2
MONTHS
2 2 MONTHS OF SERVICE
LEVEL 1
300 XP
In this article, we are going to learn about pen-testing in Memcached lab setup in Ubuntu 18.04. Memcached server is used by corporations in order to increase the speed of their network as it helps to store frequently used data. This helps to takethe loadof the hardware and decrease the time taken.
Table of Contents
Introduction to Memcached
Memcached is a distributed memory object caching system. It’s an open source and without any cost tool. It is used to speed up web applications by using a databasefromthe cachememory. It is an in-memory key-value store for little bits of self-assertive information (strings, objects) that is extracted from database calls, API calls, or page rendering. Memcached is basic however capable of advancing speed arrangement, ease of advancement, and understands numerous issues confronting expansive information caches. Its API is accessible for most prevalent languages.
Memcached Installation
To install, boot up your Ubuntu machine and open the terminal.
Note: Apache2 should be installed before installing Memcached. You can easily install Apache2 by just typing in a simple command.
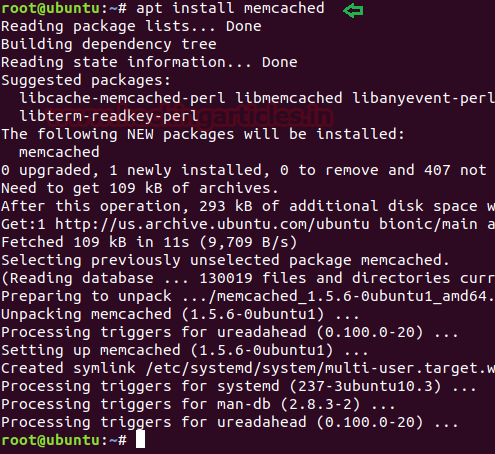
Now that we are all done, let’s setup Memcached by typing the commands shown below.
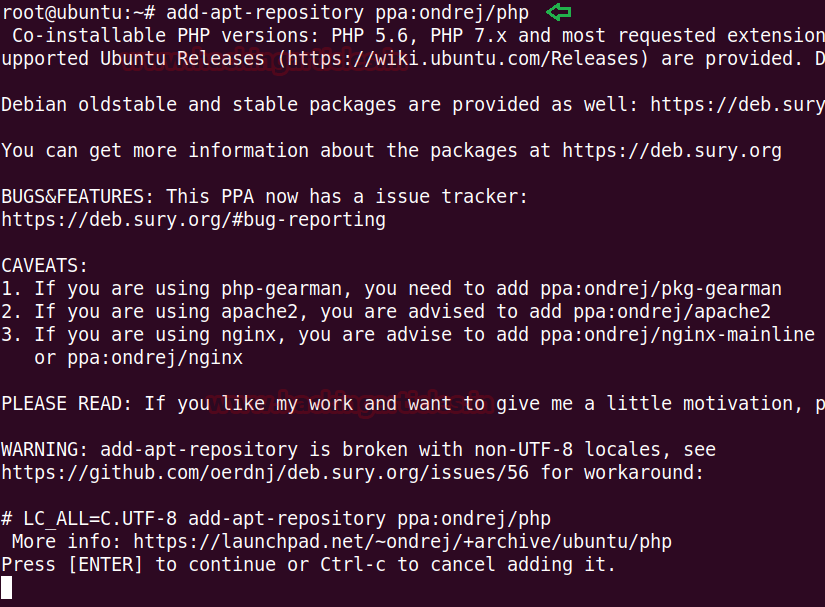
After installing Memcached addppa:ondrej/php PPA in your Ubuntu system’s repository to
download and install the latest version of PHP available. Follow the commands as shown below.
After adding the repository, update the system by typing in the following command.

Now, install PHP by executing the command shown below :

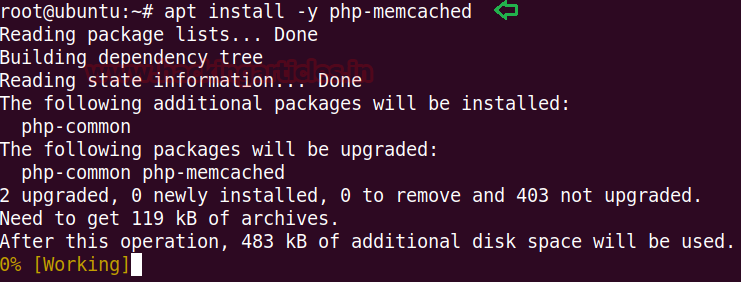
Now that PHP has been installed successfully in our system, we will go ahead and install the PHP Memcached module by executing the below command:
Once the installation is complete, restart the Apache2 service.

Now check whether the PHP extension is working fine or not by creatingan info.phpby using the code mentioned below with nano or any text editor you like.

Now save the file in /var/www/html
Once the file is saved, access it from your web browser by typing in the following URL.
You should see the results as shown in the image below.

Memcached Configuration
Now, here we are going to configure the Memcached Server. To do so, we have to edit its configuration file. You will find this configuration file through /etc/memcached.conf path. Open the memcached.conf file usingnano orany other text editor. The commands that are shown below will be given and activated by default. The purpose of this mentioning is to let you know that where you can find it; along with why and how to make changes to it., if necessary. Following are the said commands which are important for low-level Memcached Server configuration:
-m 64
Here,
–m:specifies the maximum memory limit which is used by Memcached daemon. By default, this limit is 64 MB
-p 11211
Here,
–p:specifies the port number. Bydefault, it’s 11211.
-u memcache
Here,
–u starts the daemon tool as root.
After this, uncomment “-l 127.0.0.1” by simply adding # as shown in the image, as it will not be so by default. By uncommenting, it will stop binding the IP address of Memcached listener to theloopbackIP. Hence, traffic can come from any IP over the internet.

Now once you saved the configuration file after making the changes, restart the service by using the following command :
Then use the following command to confirm whether Memcached configurations are working are not :

Once you are done with the above commands, connect Memcached through telnet and do a version check by typing in “version” command:

Now, you can use nmap to check if the Memcached service is running on the server.

Conclusion
To conclude, we can say that Memcached is a distributed memory caching system. It uses expiration timeouts i.e. if the server has no memory left, it will evict items to replace them with the new ones. The items it chooses to replace are the ones which have not been requested for a long period of time. And so, in the above article, we have provided a basic guide toset upthe Memcached penetration testing lab.
Author: Benoy Naskar is a Certified Ethical Hacker, Researcher and Technical Writer at Hacking Articles on Information Security. Contact here
Table of Contents
- Introduction to Memcached.
- Memcached Installation.
- Memcached Configuration.
Introduction to Memcached
Memcached is a distributed memory object caching system. It’s an open source and without any cost tool. It is used to speed up web applications by using a databasefromthe cachememory. It is an in-memory key-value store for little bits of self-assertive information (strings, objects) that is extracted from database calls, API calls, or page rendering. Memcached is basic however capable of advancing speed arrangement, ease of advancement, and understands numerous issues confronting expansive information caches. Its API is accessible for most prevalent languages.
Memcached Installation
To install, boot up your Ubuntu machine and open the terminal.
Note: Apache2 should be installed before installing Memcached. You can easily install Apache2 by just typing in a simple command.
Code:
apt install apache2Now that we are all done, let’s setup Memcached by typing the commands shown below.
Code:
apt install memcachedAfter installing Memcached addppa:ondrej/php PPA in your Ubuntu system’s repository to
download and install the latest version of PHP available. Follow the commands as shown below.
Code:
add-apt-repository ppa:ondrej/phpAfter adding the repository, update the system by typing in the following command.
Code:
apt updateNow, install PHP by executing the command shown below :
Code:
apt install –y php php-dev php-pear libapache2-mod-phpNow that PHP has been installed successfully in our system, we will go ahead and install the PHP Memcached module by executing the below command:
Code:
apt install -y php-memcachedOnce the installation is complete, restart the Apache2 service.
Code:
service apache2 restartNow check whether the PHP extension is working fine or not by creatingan info.phpby using the code mentioned below with nano or any text editor you like.
Code:
<?php
phpinfo();
?>
Now save the file in /var/www/html
Once the file is saved, access it from your web browser by typing in the following URL.
Code:
localhost/info.phpYou should see the results as shown in the image below.
Memcached Configuration
Now, here we are going to configure the Memcached Server. To do so, we have to edit its configuration file. You will find this configuration file through /etc/memcached.conf path. Open the memcached.conf file usingnano orany other text editor. The commands that are shown below will be given and activated by default. The purpose of this mentioning is to let you know that where you can find it; along with why and how to make changes to it., if necessary. Following are the said commands which are important for low-level Memcached Server configuration:
-m 64
Here,
–m:specifies the maximum memory limit which is used by Memcached daemon. By default, this limit is 64 MB
-p 11211
Here,
–p:specifies the port number. Bydefault, it’s 11211.
-u memcache
Here,
–u starts the daemon tool as root.
After this, uncomment “-l 127.0.0.1” by simply adding # as shown in the image, as it will not be so by default. By uncommenting, it will stop binding the IP address of Memcached listener to theloopbackIP. Hence, traffic can come from any IP over the internet.
Now once you saved the configuration file after making the changes, restart the service by using the following command :
Code:
service memcached restartThen use the following command to confirm whether Memcached configurations are working are not :
Code:
ss -tnlOnce you are done with the above commands, connect Memcached through telnet and do a version check by typing in “version” command:
Code:
telnet localhost 11211
version
Now, you can use nmap to check if the Memcached service is running on the server.
Code:
nmap -sV -p- 192.168.1.32Conclusion
To conclude, we can say that Memcached is a distributed memory caching system. It uses expiration timeouts i.e. if the server has no memory left, it will evict items to replace them with the new ones. The items it chooses to replace are the ones which have not been requested for a long period of time. And so, in the above article, we have provided a basic guide toset upthe Memcached penetration testing lab.
Author: Benoy Naskar is a Certified Ethical Hacker, Researcher and Technical Writer at Hacking Articles on Information Security. Contact here