slum
Code Injection Specialist
LEVEL 1
600 XP

Hey Folks, in this tutorial we are going to talk about an open source information gathering tool called “Osmedeusr“. Osmedeus allows you automated run the collection of awesome tools to reconnaissance and vulnerability scanning against the target.
Let’s take a look
 !!
!!Installation
We have to download this tool from github by using the git command and then go to the directory of this tool. After completing all the steps we will execute the bash command to setup this tool completely.
git clone https://github.com/j3ssie/Osmedeus
cd Osmedeus/
bash install.sh123git clone
https://github.com/j3ssie/Osmedeuscd Osmedeus/bash install.sh
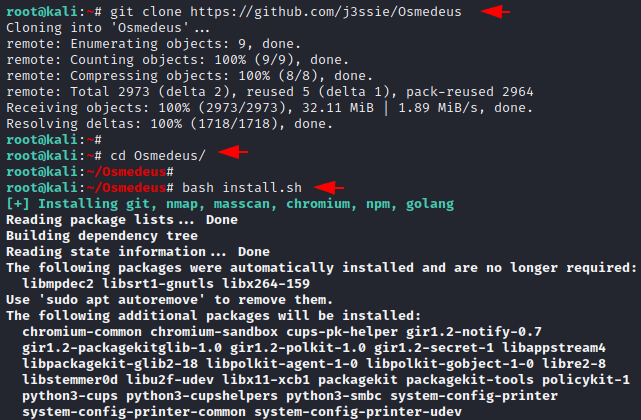
Done
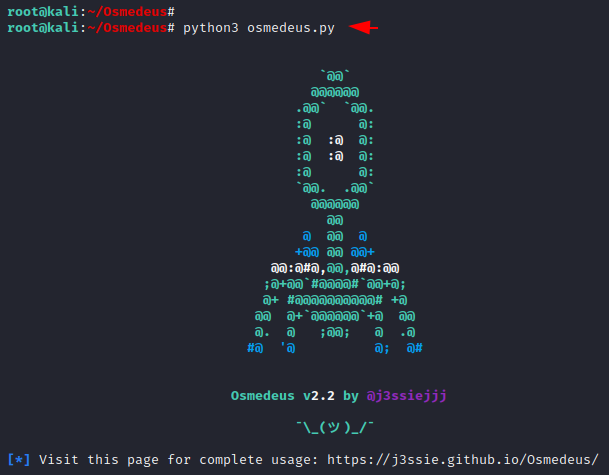
!! The tool has been setup successfully and now we can boot this tool using the following command.python3 osmedeus.py1python3 osmedeus.py
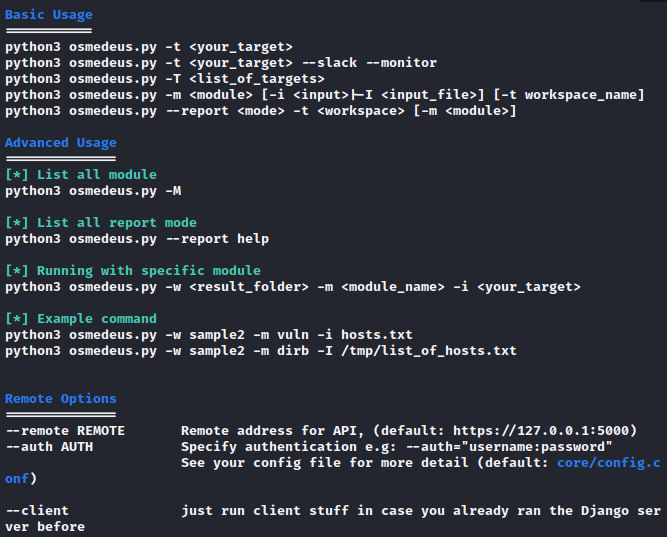
Usage Guide
You can see all the features available in this tool by executing the above command.
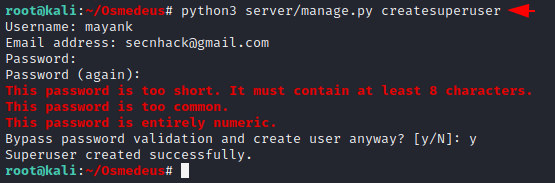
Create User
This provides us GUI interface to control and manage the output of the scanning, so we need to create a user for login to the web application.
python3 server/manage.py createsuperuser1python3 server/manage.py createsuperuser
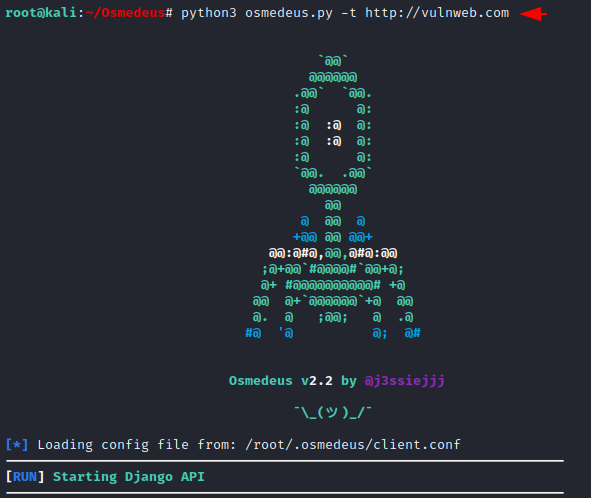
Basic Scan
This is a basic scan but it will dump almost everything at the same time. Just add your taregt details and execute the command.
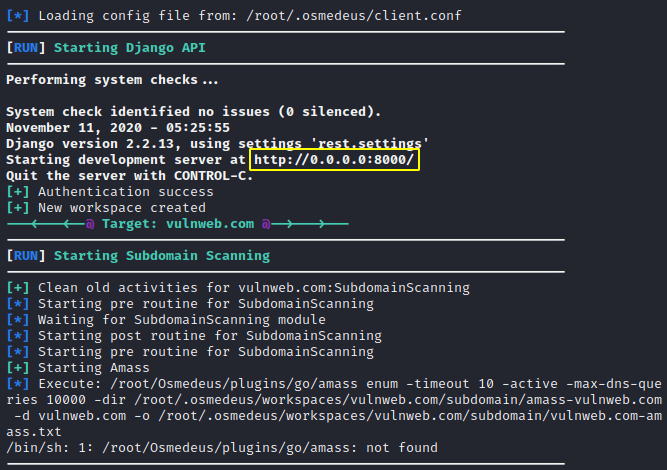
python3 osmedeus.py -t http://vulnweb.com1python3 osmedeus.py-t
Loading…
vulnweb.com
After executing the command it will give us the location where the web application is actually hosted and running locally. Just open the given location by the tool.
Good
!! The GUI interface looks great and now we need to enter the created credentials.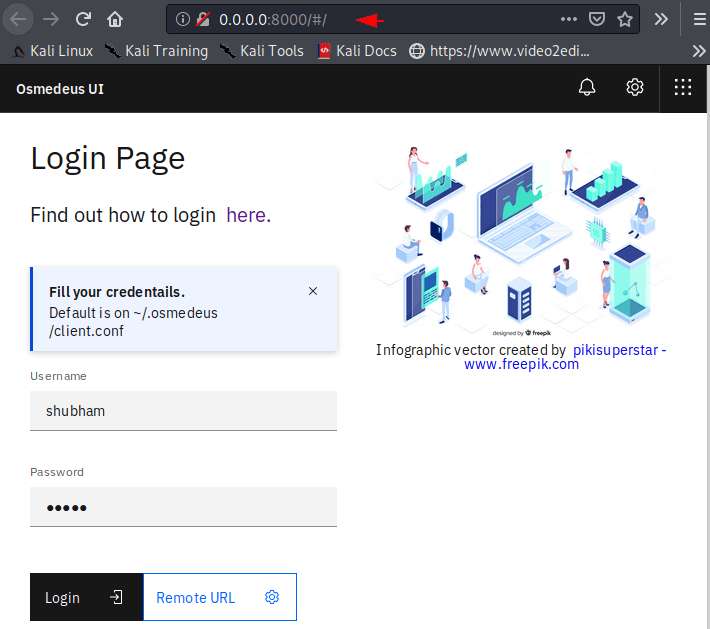
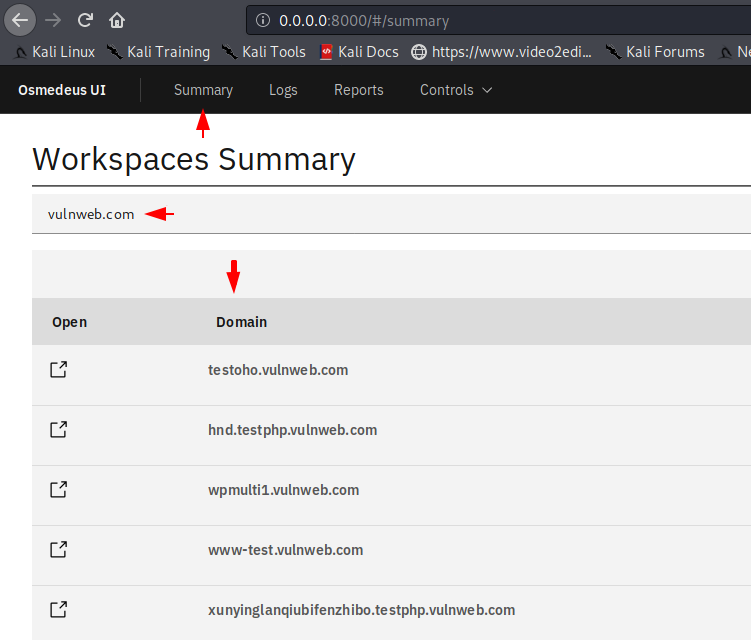
Summary
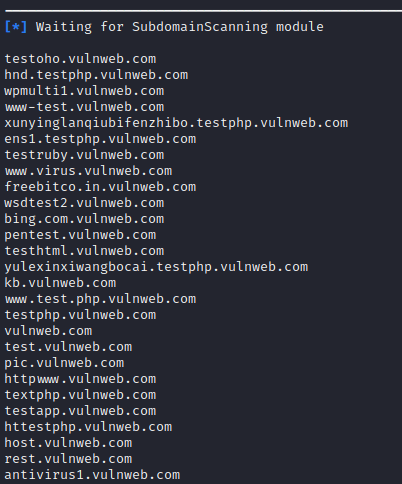
After successful login we get the following option inside the web application. In the summary section we get the list of subdomains.
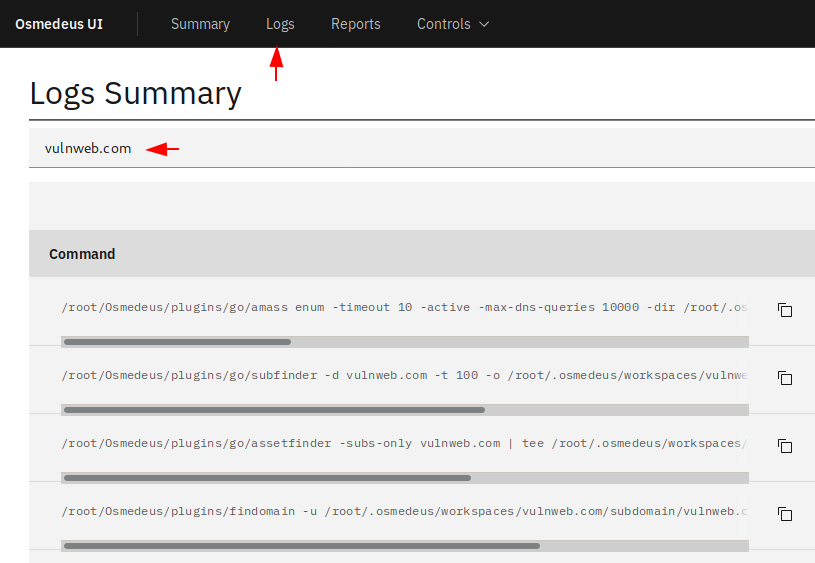
Logs Summary
On the other hand you can see all past and present ongoing scanning as well as their path where they are being saved.
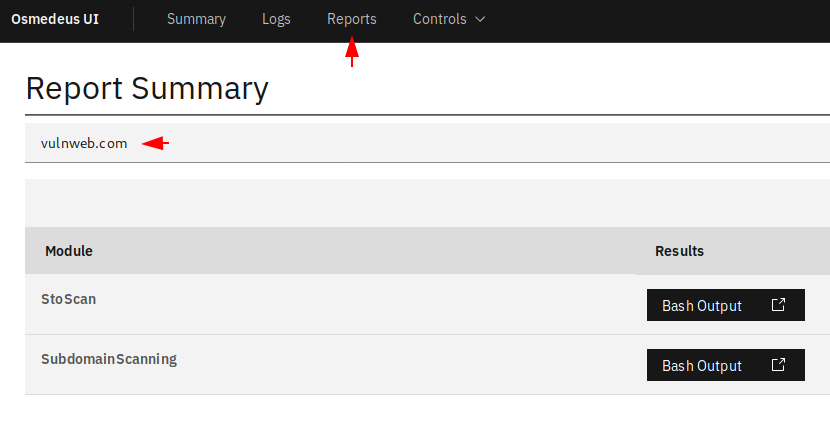
Report Summary
Through the following section we can directly see all the saved results of the specific host or the target.
Hmmm
!! As we told you that you can see the saved output by clicking the “Bash Output” button on the terminal.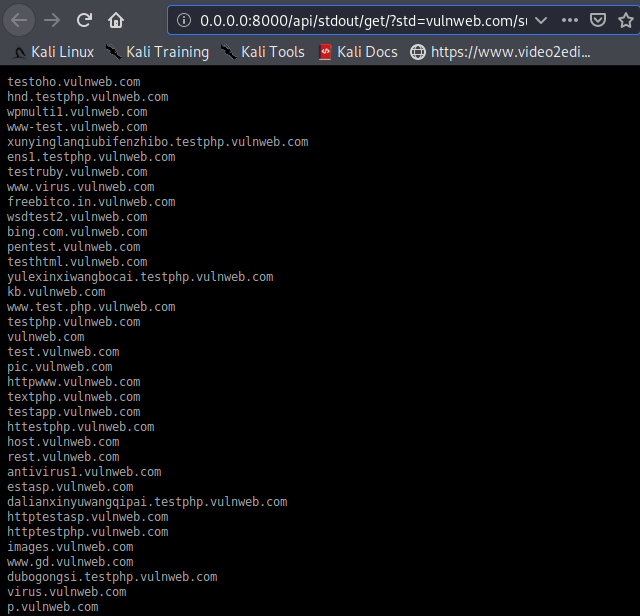
Also, if you don’t like the GUI interface, you can also see the result on the command line terminal.
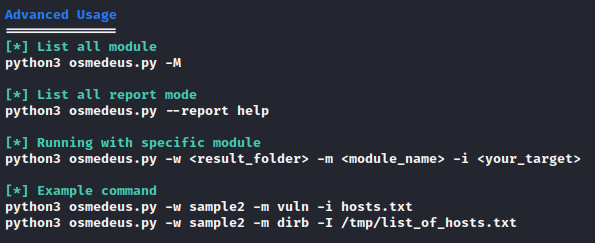
We cannot cover all the facilities at the same time, so thus you can use every single feature of the tool yourself.