drsen
Post Timing Expert
2
MONTHS
2 2 MONTHS OF SERVICE
LEVEL 1
300 XP
Hey Folks, In this tutorial we are going to talk about an automatic Network Exploitation, Reconnaissance & Vulnerability Engine ( NERVE ) tool. NERVE is a vulnerability scanner tailored to find low-hanging fruit level vulnerabilities, in specific application configurations, network services, and unpatched services. The tools claimed that It is not a replacement for Qualys, Nessus, or OpenVAS. It does not do authenticated scans, and operates in black-box mode only. But we analyze that the tool provides us with some great features, through which we can get more information against a particular host.
Prerequisites
- Available For = CentOS 7.x and Ubuntu 18.x
- !! NERVE requires root access !!
Let’s get started
 !!
!!Installation with Docker
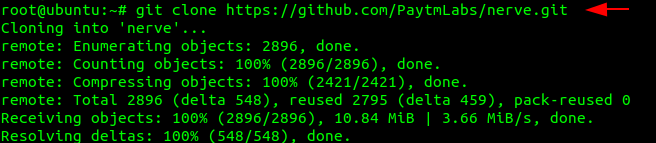
It is an open source tool which is available on github and we can configure it in two ways but first we will configure it through docker. As we know that docker is a tool designed to make it easier to create, deploy, and run applications by using containers and If you haven’t configured it before then you can use “ap-get install docker.io” command to install it. Now first of all we will download the entire tool from github by using the following command.
git clone https://github.com/PaytmLabs/nerve.git1git clone
Loading…
github.com
The following command will build the application so we will execute it without any changes.
cd nerve
docker build -t nerve .12cd nervedocker build-tnerve.

Look at the command given below in which all you have to do is change the name and password accordingly and execute it. But if you do not change anything then there will be no error comes.
docker run -e username="secnhack" -e password="sec1234" -d -p 80:8080 nerve1docker run-eusername="secnhack"-epassword="sec1234"-d-p80:8080nerve

Thats it
!! The service has been successfully created and now we have to enter the username and password that we gave on the previous command. To see the interface such in the image below, you need to execute the following URL on the browser.Loading…
localhost
Done
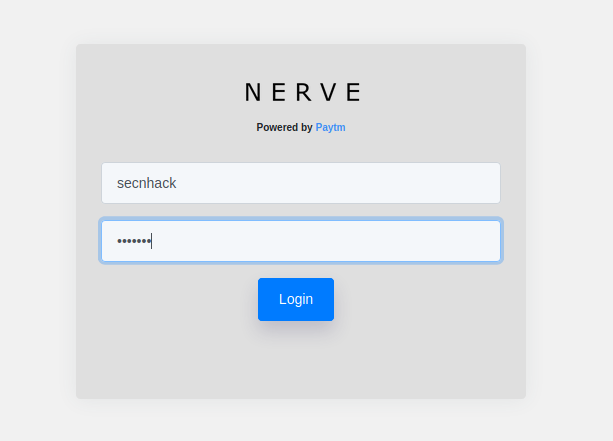
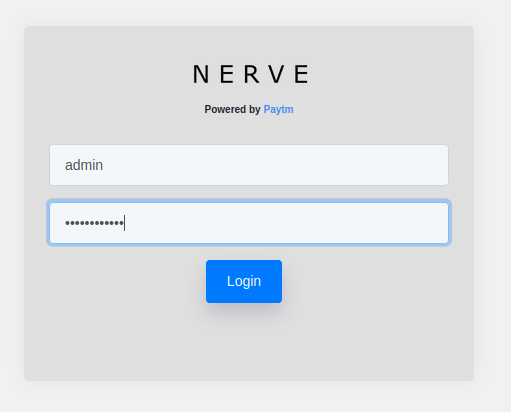
!! As you can see, after entering the username and password we have successfully entered the web application.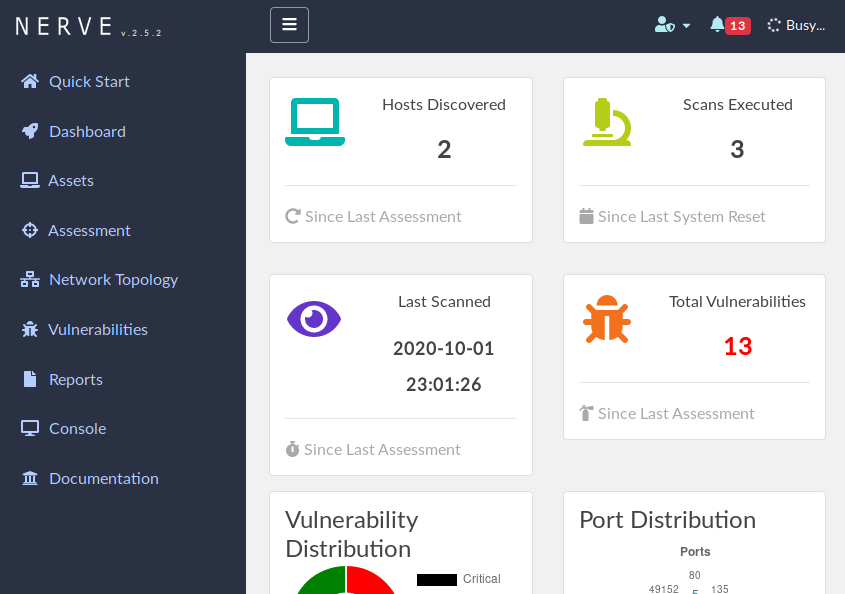
Installation ( Ubuntu )
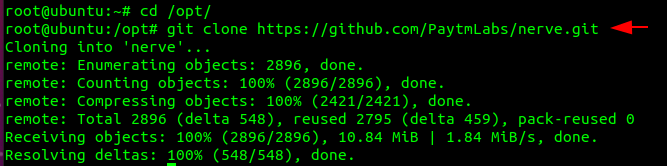
Now we will configure this tool in ubuntu operating system. First we will go to the “opt” directory and install this tool there.
cd /opt/
git clone https://github.com/PaytmLabs/nerve.git12cd/opt/git clone
Loading…
github.com
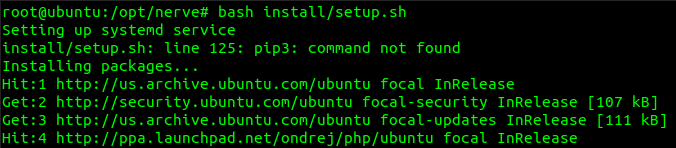
After that we will go to the directory of this tool and configure it by executing the “setup.sh” file using the bash command.
cd nerve
bash install/setup.sh12cd nervebash install/setup.sh
Done
!! They are the last command to install this tool and once all the requirements are established it will give us the credentials which we will have to entered on the following location.Loading…
localhost
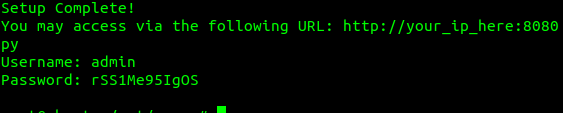
After executing the above URL you will get this type of interface, where you have to enter those credentials to login to the web application.
Scanning
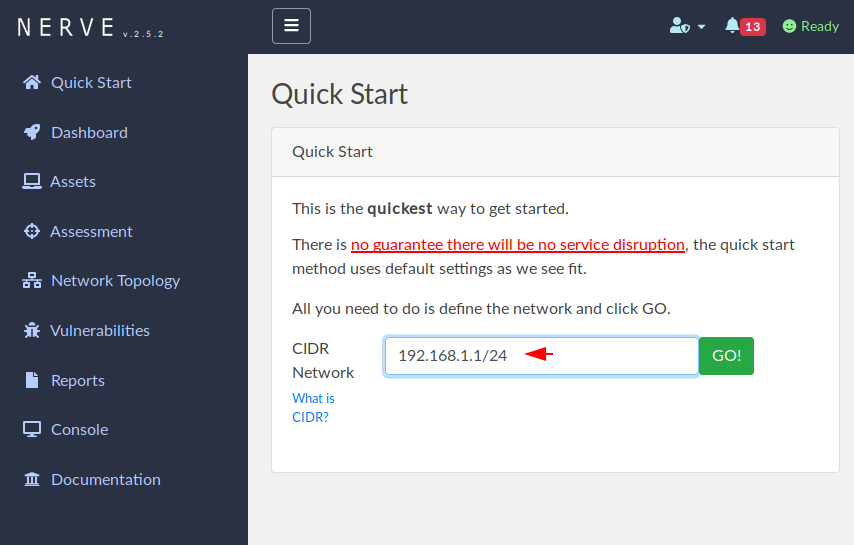
Installation is finally complete so let’s start scanning and reconnaissance over the LAN network. It will be up to you what your NID and CIDR are. For example if your IP address is something like “192.168.0.100”, then you have to enter “192.168.1.0/24”, but in our case our NID is related to “192.168.1.0” hence we enter “192.168.1.0/24”.
Results
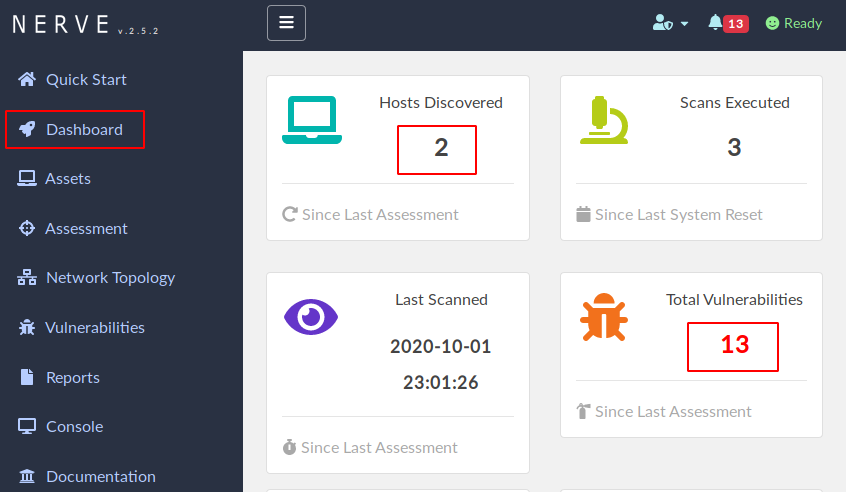
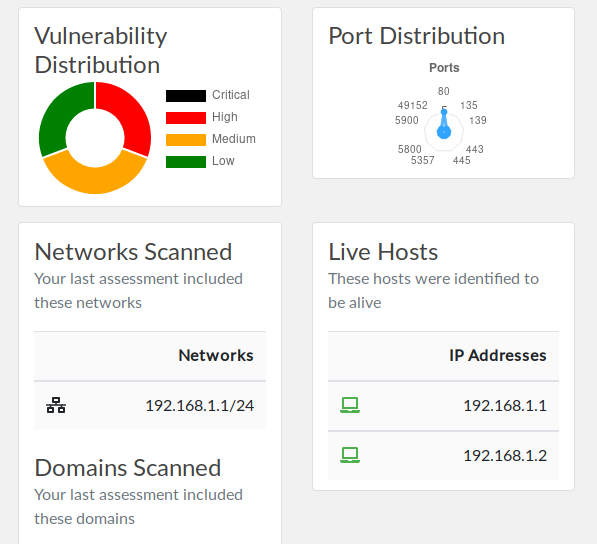
Once the range of IP addresses is submitted it will automatically receive and give us active IP addresses, their vulnerabilities and more details. But through the dashboard you can see the overview
Read Continue …….
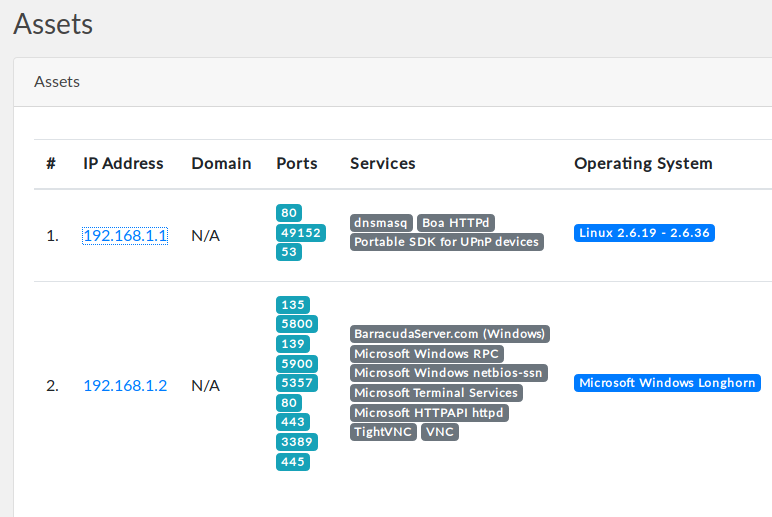
Assets
This feature give us the complete details about the particular active hosts such as : ports, OS, services etc.
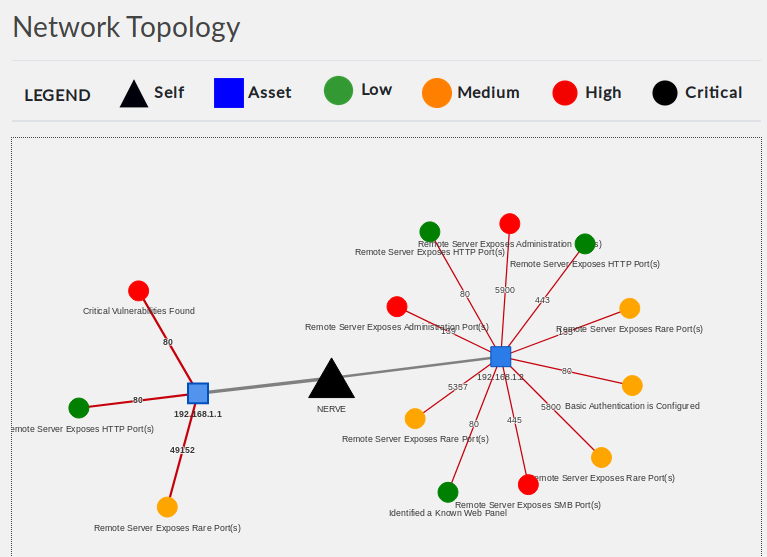
Network Topology
Through this tab you can identify the entire network topology of the active hosts even it distribute in sequence like : low, high, medium.
Vulnerability
It will check the latest and all kind of available vulnerability on the active hosts and give us the results in sequence.
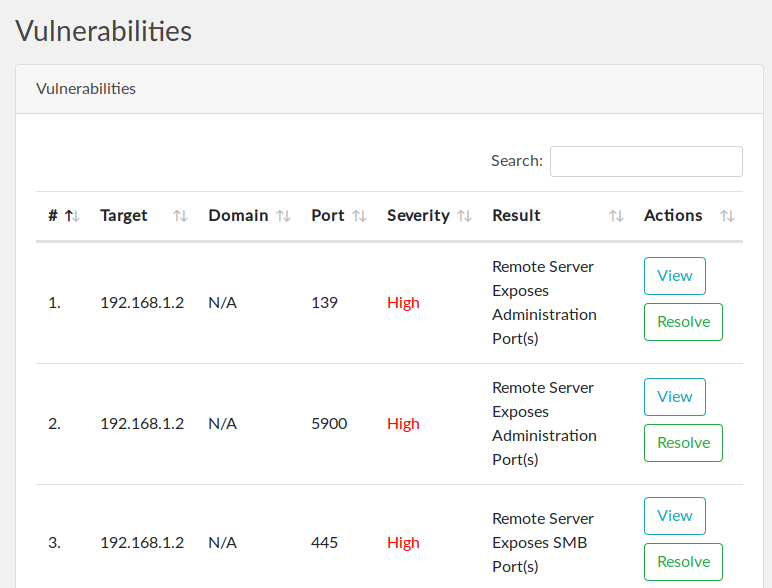
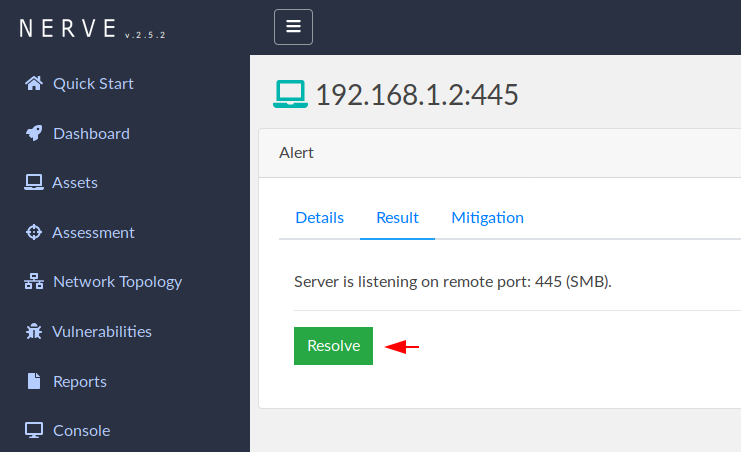
Here you can see that it has successfully grab the available vulnerability from the active hosts to which we can take advantage.
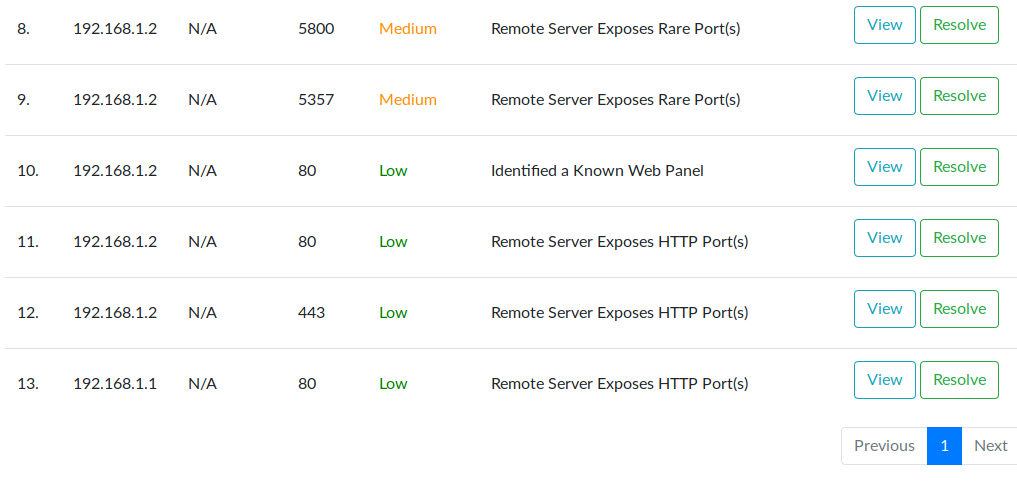
Another major feature of this is by which we can resolve those available vulnerabilities.
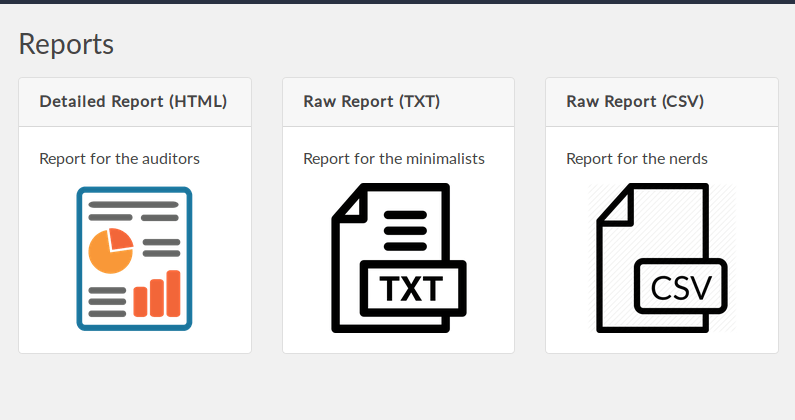
We can save them in any text format even after viewing the entire result.
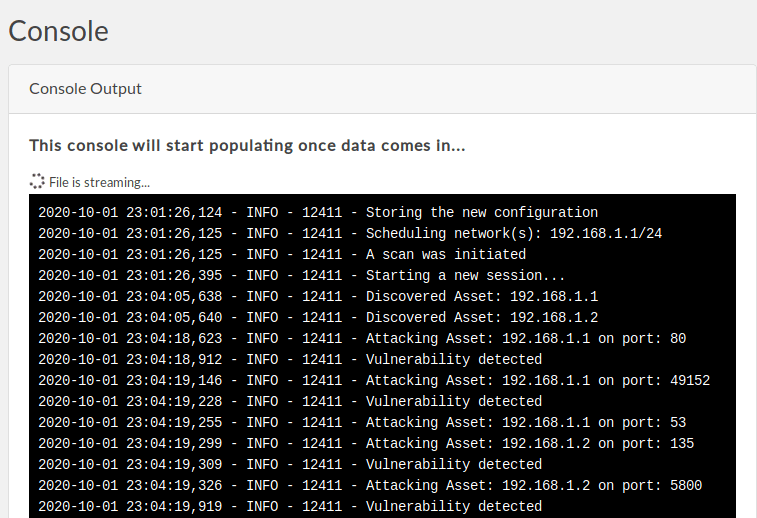
Console
Through this tab you can see exactly what the tool is doing and we think it has another great features.