aldogdl
Continuous Integration Master
2
MONTHS
2 2 MONTHS OF SERVICE
LEVEL 1
300 XP
VyOS is a Linux-based network operating system that provides software-based network routing, firewall, and VPN functionality. Its configuration syntax and command-line interface are loosely derived from Juniper JUNOS as modeled by the XORP project.
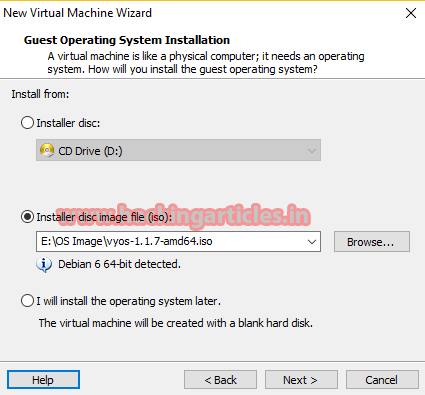
First Download Vyos iso image from here
Open VMWARE tool, create a new virtual machine. Select Installer disc image file and select the OS image of vyos and click on next.
Enter your virtual machine name and location. Click next.

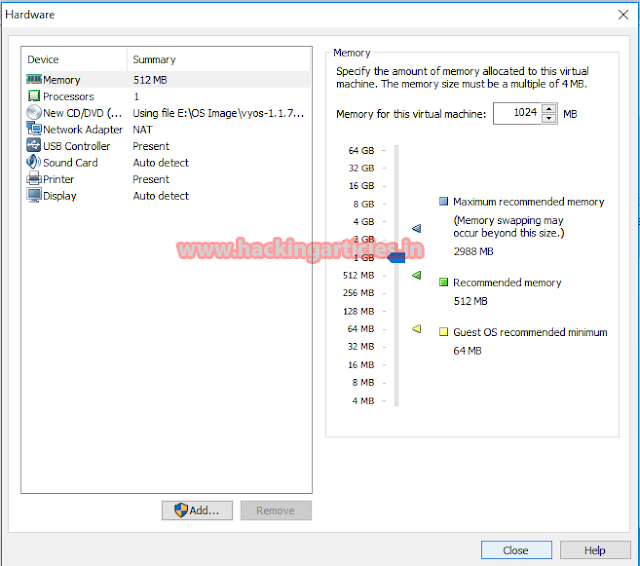
Set Ram up to 1 GB for vyos and click to the network adapter
Next, we are choosing our first network adapter. Connect it to the Bridge Adapter and click on close.

Then click on finish.

Now the installation process will start automatically. It takes a few seconds for the VM to boot and VyOS to load.
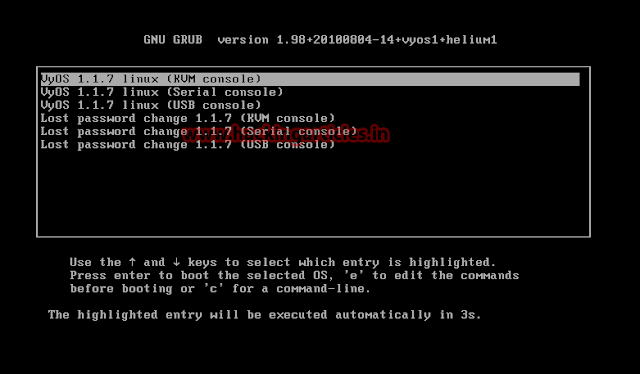
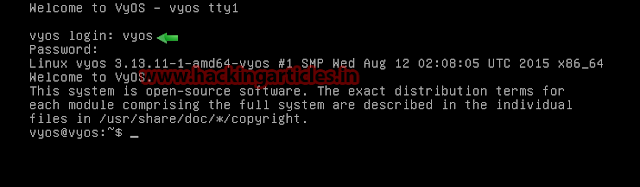
After boot screen hit enter and login to vyos using the following credentials:
Username: vyos
Password: vyos
Installation of Vyos on local disk. In order to do that simply execute the command: install image and press enter
Now type yes and press enter in next option Select auto partition press enter

In next option type yes to continue press enter
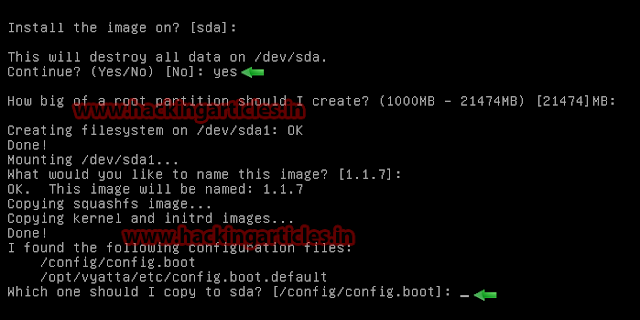
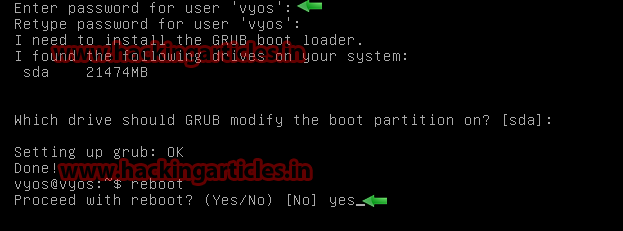
After the installation is complete Issue the reboot command Again type: yes press enter
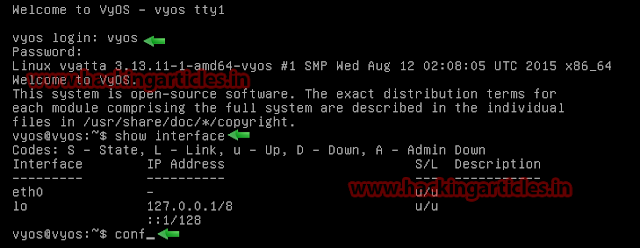
Login again to vyos and we will start with setting
Now we will check network interfaces using show interfaces command
Now Enter configuration mode by typing “conf” and have a look at the current interfaces:
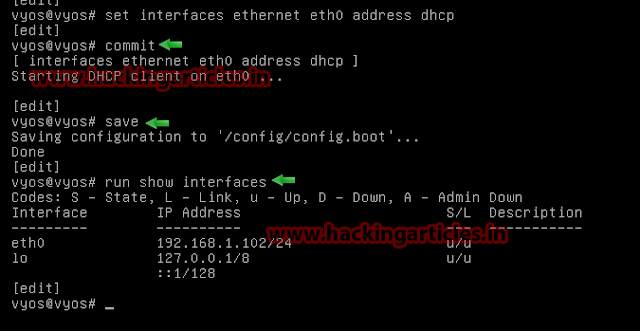
After you made some changes, you need to enter the “commit” and “save” commands.
Now we will setup network interfaces:
Now again you need to enter the “commit” and “save” commands. Now we will check network interfaces using run show interfaces command.
Now before we are able to connect to our router with SSH, we will enable SSH In order to do it execute the following commands:
Now before we are able to connect to our router with TELNET, we need to enable that. To do so, issue the following commands
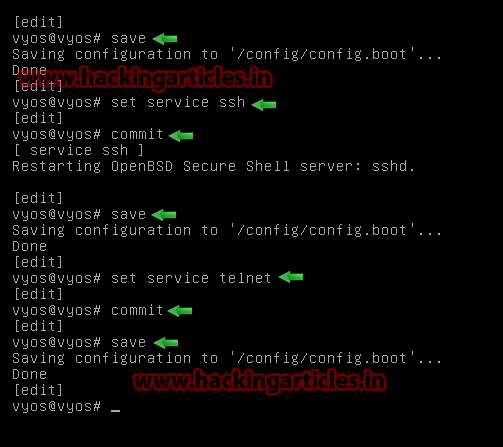
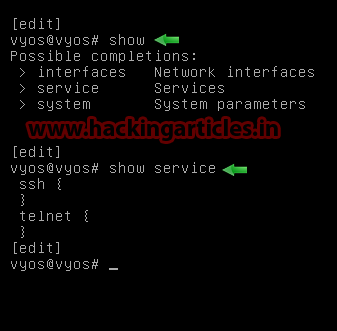
To check all enable service type the following command
Author: Aarti Singh is a Researcher and Technical Writer at Hacking Articles an Information Security Consultant Social Media Lover and Gadgets Here.
First Download Vyos iso image from here
Open VMWARE tool, create a new virtual machine. Select Installer disc image file and select the OS image of vyos and click on next.
Enter your virtual machine name and location. Click next.
Set Ram up to 1 GB for vyos and click to the network adapter
Next, we are choosing our first network adapter. Connect it to the Bridge Adapter and click on close.
Then click on finish.
Now the installation process will start automatically. It takes a few seconds for the VM to boot and VyOS to load.
After boot screen hit enter and login to vyos using the following credentials:
Username: vyos
Password: vyos
Installation of Vyos on local disk. In order to do that simply execute the command: install image and press enter
Now type yes and press enter in next option Select auto partition press enter
In next option type yes to continue press enter
After the installation is complete Issue the reboot command Again type: yes press enter
Login again to vyos and we will start with setting
Now we will check network interfaces using show interfaces command
Now Enter configuration mode by typing “conf” and have a look at the current interfaces:
After you made some changes, you need to enter the “commit” and “save” commands.
Now we will setup network interfaces:
Code:
set interfaces ethernet eth0 address dhcpNow again you need to enter the “commit” and “save” commands. Now we will check network interfaces using run show interfaces command.
Now before we are able to connect to our router with SSH, we will enable SSH In order to do it execute the following commands:
Code:
set service ssh
commit
save
Now before we are able to connect to our router with TELNET, we need to enable that. To do so, issue the following commands
Code:
set service telnet
commit
save
To check all enable service type the following command
Code:
show serviceAuthor: Aarti Singh is a Researcher and Technical Writer at Hacking Articles an Information Security Consultant Social Media Lover and Gadgets Here.