truongfiu
Tech Evolution Advocate
2
MONTHS
2 2 MONTHS OF SERVICE
LEVEL 1
400 XP
Hey Folks, in this tutorial we will show you how to install WordPress CMS through Docker. The only reason to install wordpress via docker is to reduce efforts. In this tutorial we will show two shortest ways through which you can install WordPress CMS in minimum time.
Let’s take a look
 !!
!!Install Docker
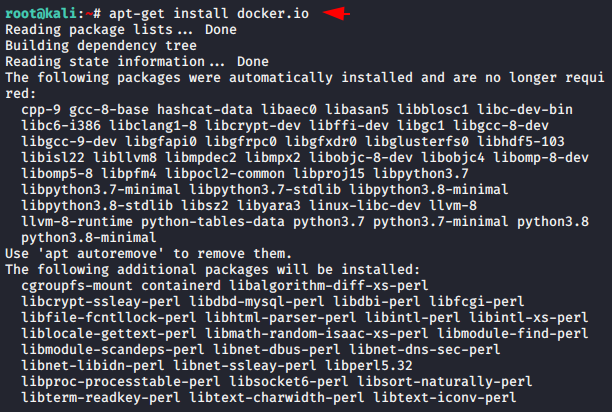
It is not that you should have knowledge of docker and you will get familiar with it after using it two or three times. To install wordpress CMS, we have to install the latest version of docker.io by using the apt command.
apt-get install docker.io1apt-get install docker.io
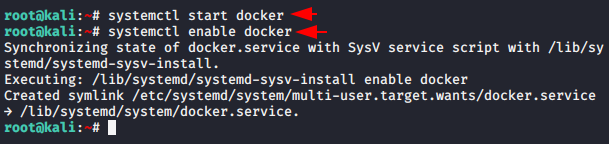
Docker is disabled by default, so we have to enable it using both of these commands.
systemctl start docker
systemctl enable docker12systemctl start dockersystemctl enable docker
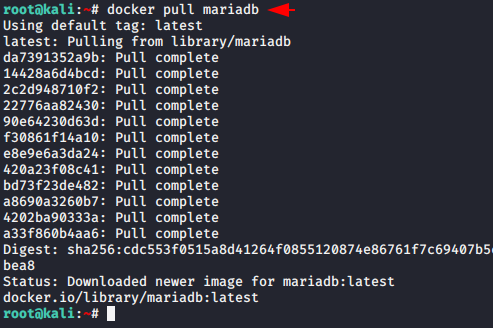
Install the MariaDB Container ( Database )
Now we will download a new MariaDB images from docker registry using the docker pull command in the system.
docker pull mariadb1docker pull mariadb
Install WordPress CMS
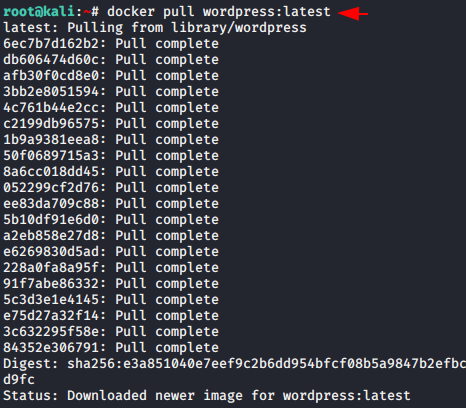
The time has come to download the wordpress CMS from the docker registry using the below command.
docker pull wordpress:latest1docker pull wordpress:latest
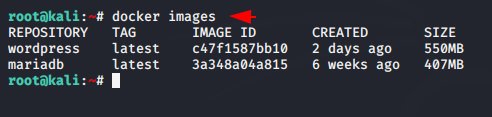
Check Images
You can view all available or downloaded images in the docker using the following command.
docker images1docker images
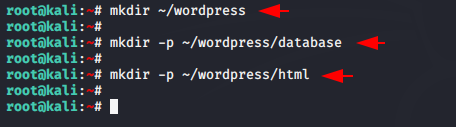
- Step: 1 Create a WordPress directory in the root folder.
- Step: 2 Create a sub directory inside WordPress called “database”.
- Step: 3 Create another sub directory inside a WordPress folder called “HTML”.
mkdir ~/wordpress
mkdir -p ~/wordpress/database
mkdir -p ~/wordpress/html123mkdir~/wordpressmkdir-p~/wordpress/databasemkdir-p~/wordpress/html
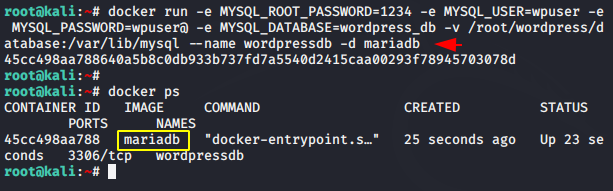
Activate MariaDB Database Server
Now we will create new MariaDB container along with database, user and password of mysql database server. You can change the database name and other configuration accordingly. After executing the command we check the availability of containers using the “docker ps” command.
docker run -e MYSQL_ROOT_PASSWORD=1234 -e MYSQL_USER=wpuser -e MYSQL_PASSWORD=wpuser@ -e MYSQL_DATABASE=wordpress_db -v /root/wordpress/database:/var/lib/mysql --name wordpressdb -d mariadb1docker run-eMYSQL_ROOT_PASSWORD=1234-eMYSQL_USER=wpuser-eMYSQL_PASSWORD=wpuser@-eMYSQL_DATABASE=wordpress_db-v/root/wordpress/database:/var/lib/mysql--name wordpressdb-dmariadb
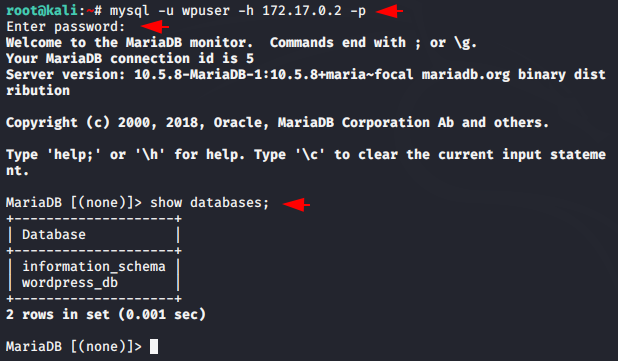
Check Connectivity ( MySQL Database )
Connect to the MySQL database server using the below command to check connectivity or manage database.
mysql -u wpuser -h 172.17.0.2 -p
TYPE PASSWORD: wpuser@
show databases;123mysql-uwpuser-h172.17.0.2-pTYPE PASSWORD:wpuser@show databases;
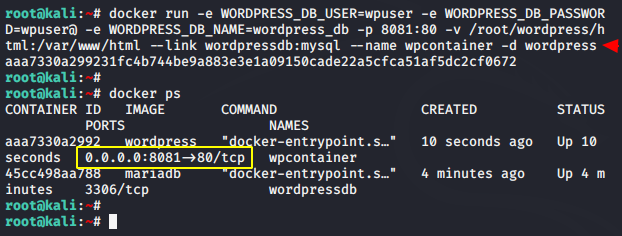
Create WordPress CMS Container
Now we will start another new container for wordpress from the images by using the following command. Keep add the same database, user and password you created earlier.
docker run -e WORDPRESS_DB_USER=wpuser -e WORDPRESS_DB_PASSWORD=wpuser@ -e WORDPRESS_DB_NAME=wordpress_db -p 8081:80 -v /root/wordpress/html:/var/www/html --link wordpressdb:mysql --name wpcontainer -d wordpress1docker run-eWORDPRESS_DB_USER=wpuser-eWORDPRESS_DB_PASSWORD=wpuser@-eWORDPRESS_DB_NAME=wordpress_db-p8081:80-v/root/wordpress/html:/var/www/html--link wordpressdb:mysql--name wpcontainer-dwordpress
Alright
!! If the command is executed successfully, you can use the “docker ps” command to locate the WordPress web page. Copy the highlighted location and paste it on the browser.Usage
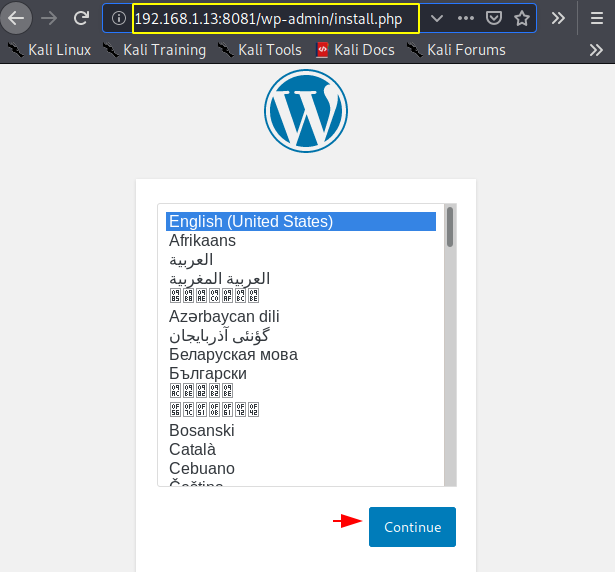
!! http://<localhost>:8081WordPress Installation
After browsing the location, you have to select the language.
Great
!! As you can see we did not need to enter database credentials as we had given earlier. After selecting the language we come to the following web page where we create administrative credentials.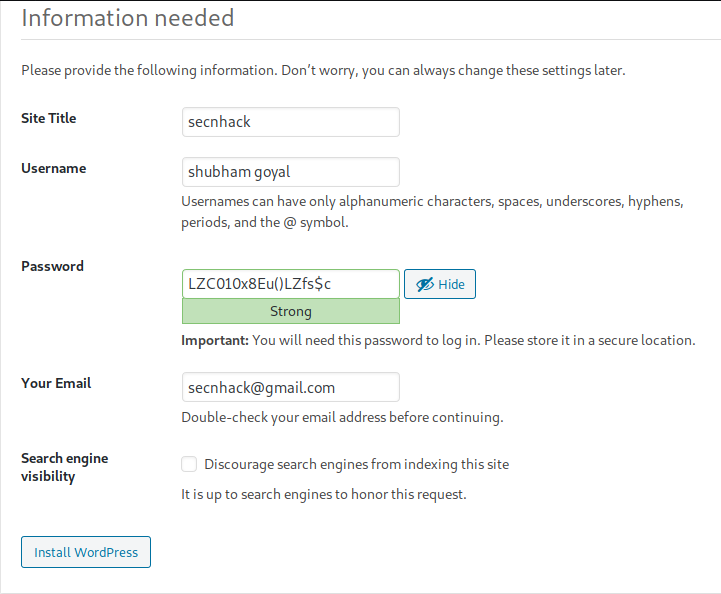
Done
!! Looks like everything is done. Let’s hit enter on the login button and access the admin panel.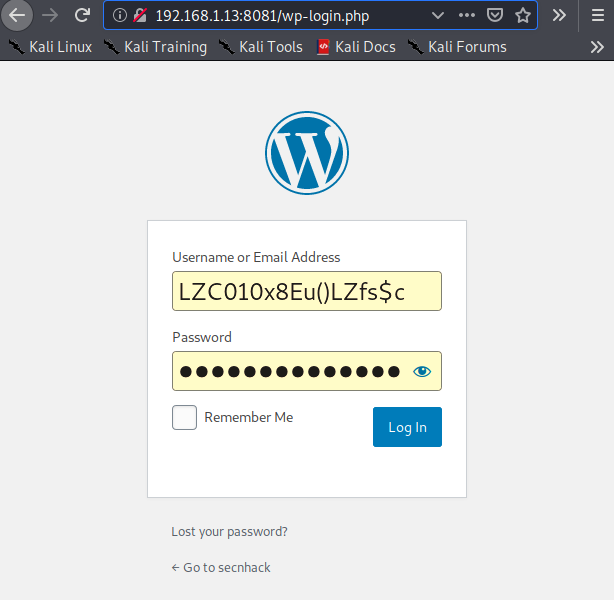
Complete
!! Now you can see that we have got the admin panel of WordPress CMS from where we can create our website and publish any content.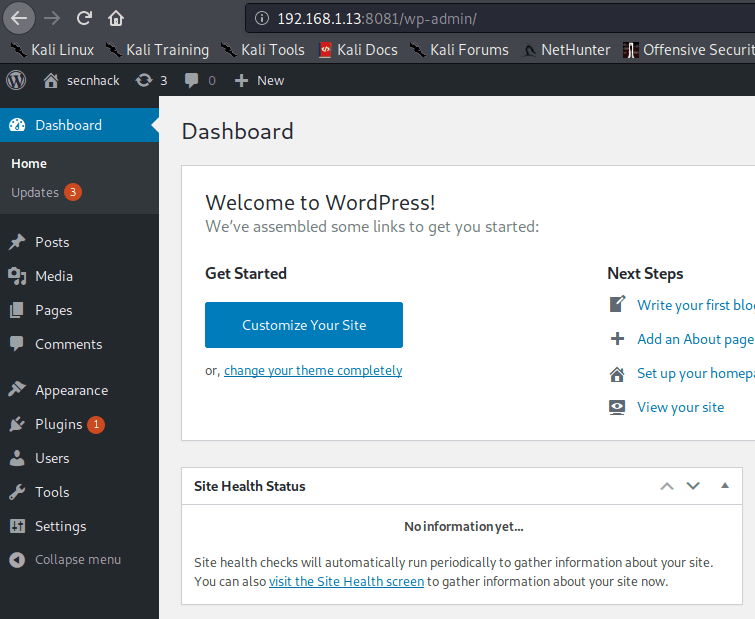
Install WordPress through Docker Composer
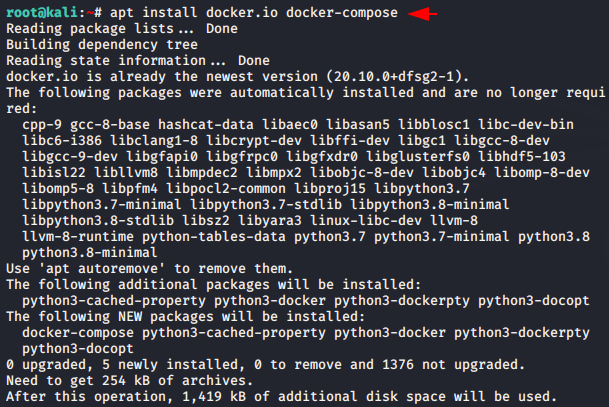
Let’s try to reduce the efforts. To install wordpress using docker in this method, we have to set up another dependencies of the docker using the following command.
apt install docker.io docker-compose1apt install docker.io docker-compose
Now create a file as per your own with .YML extension.
nano docker-compose.yml1nano docker-compose.yml
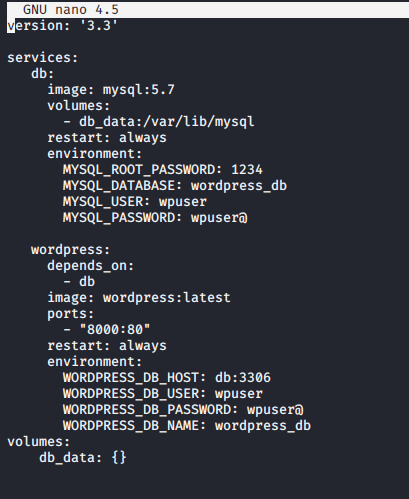
Paste the entire code below into the .yml file and save the configuration.
version: '3.3'
services:
db:
image: mysql:5.7
volumes:
- db_data:/var/lib/mysql
restart: always
environment:
MYSQL_ROOT_PASSWORD: 1234
MYSQL_DATABASE: wordpress_db
MYSQL_USER: wpuser
MYSQL_PASSWORD: wpuser@
wordpress:
depends_on:
- db
image: wordpress:latest
ports:
- "8000:80"
restart: always
environment:
WORDPRESS_DB_HOST: db:3306
WORDPRESS_DB_USER: wpuser
WORDPRESS_DB_PASSWORD: wpuser@
WORDPRESS_DB_NAME: wordpress_db
volumes:
db_data: {}12345678910111213141516171819202122232425262728version:'3.3'services:db:image:mysql:5.7volumes:-db_data:/var/lib/mysqlrestart:alwaysenvironment:MYSQL_ROOT_PASSWORD:1234MYSQL_DATABASE:wordpress_dbMYSQL_USER:wpuserMYSQL_PASSWORD:wpuser@wordpress:depends_on:-dbimage:wordpress:latestports:-"8000:80"restart:alwaysenvironment:WORDPRESS_DB_HOST:db:3306WORDPRESS_DB_USER:wpuserWORDPRESS_DB_PASSWORD:wpuser@WORDPRESS_DB_NAME:wordpress_dbvolumes:db_data:{}
Source Code : https://docs.docker.com/compose/wordpress/
After executing the given command, all the services inside the .yml file will start along the given credential.
docker-compose up -d1docker-compose up-d
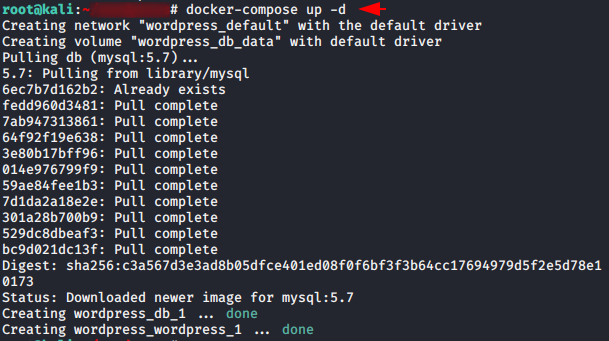
Hmm
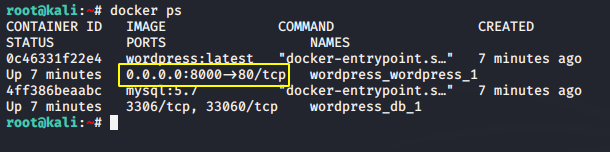
!! You can see that all the necessary services such as mysql and others are started automatically. Browse the highlighted location.docker ps1docker ps
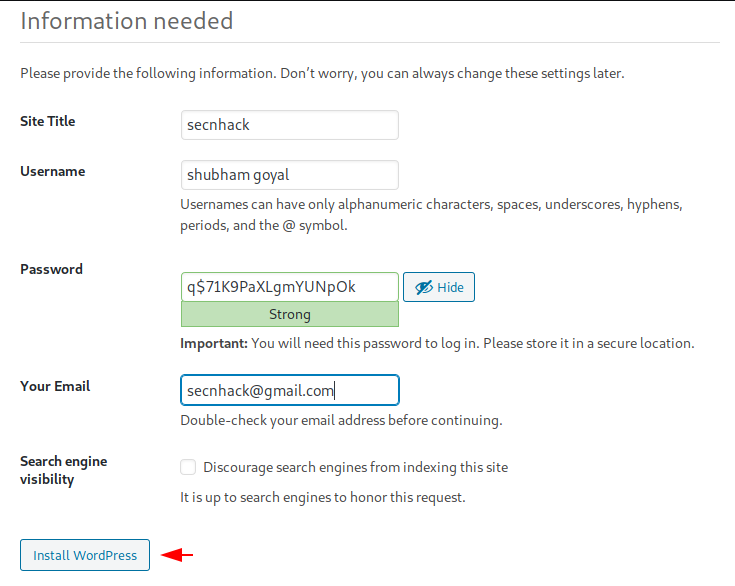
All you have to do is enter the username and password to secure the admin panel.
Wondering
!! And that’s it, we have successfully installed WordPress CMS on our localhost web server using docker.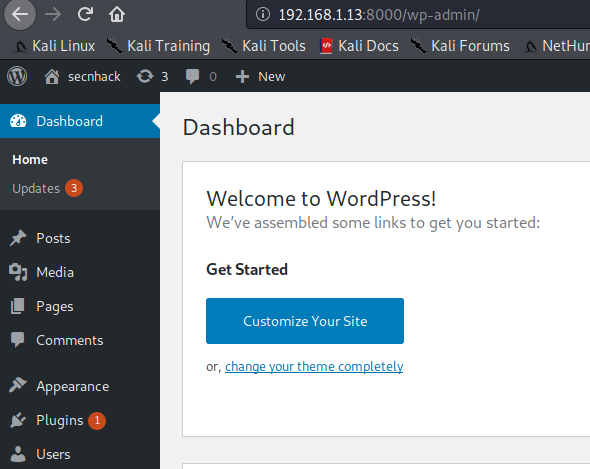
Tags : WordPress installation with docker | how to install wordpress with docker| install wordpress docker | install wordpress with docker compose |install wordpress docker | wordpress installation |
About the AuthorShubham Goyal Certified Ethical Hacker, information security analyst, penetration tester and researcher. Can be Contact on Linkedin.