mustafa2019
AI Model Designer
LEVEL 1
300 XP
In this tutorial, I'm going to show how to create a report in Visual Basic using Crystal reports. As I know, some of programmers have a difficulty on how to add or create a report on their application, especially the those enthusiast individuals who are about to start their journey to become a better programmer. So I hope this tutorial of mine will be useful for your works. To start with, this application, here’s the following steps:
Step 1. Create a new Database called “books” and Save it as 2002 -2003 file format.
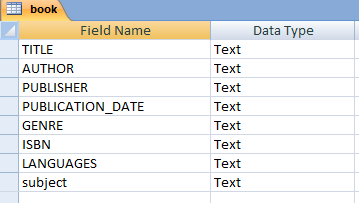
Step 2. Create a new table called “book”, and follow the fields and data type for this table. It looks like as shown below:
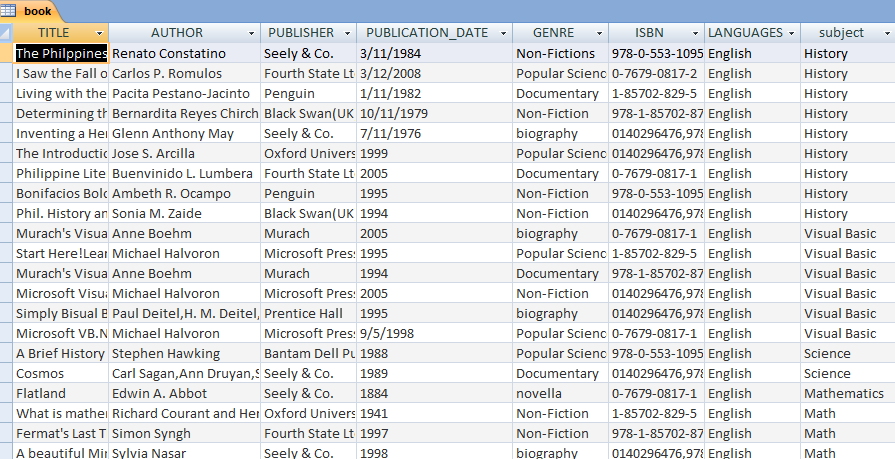
Step 3. Here’s the sample data for this table.
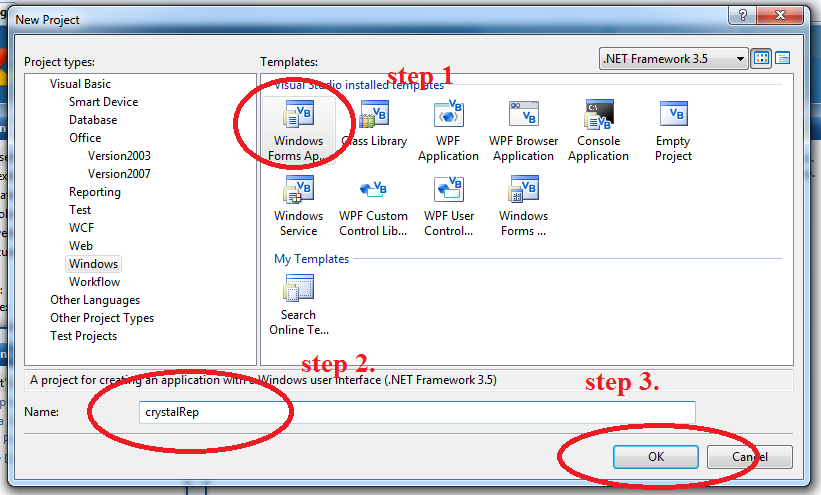
Step 4. Open visual studio, and create a new Visual Basic project and save it as “crystalRep”.
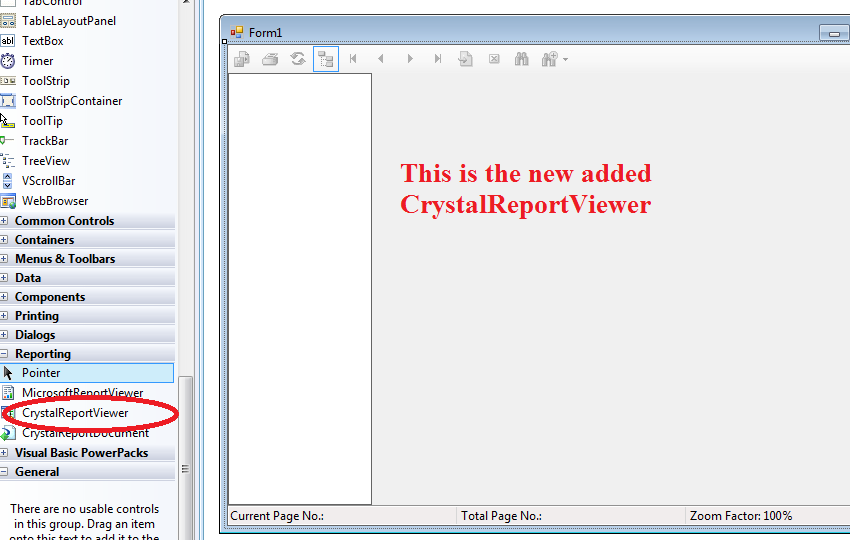
Step 5. From the Toolbox, under the “Reporting” add a CrystalReportViewer into the form. And this look like as shown below:
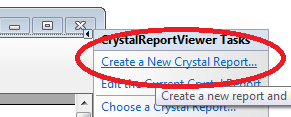
Step 6. On the CrystalReportViewwer task, Select Create New Crystal report. This look like as shown below:
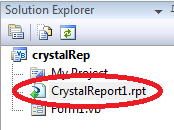
Step 7. It will automatically add a crystal report in your project and you can it in your solution explorer. Then double click the “CrystalReport1.rpt”.
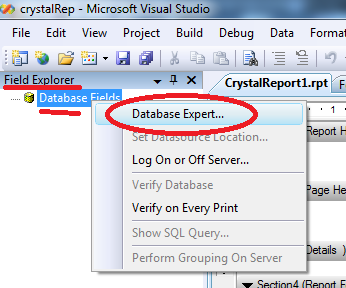
Step 8. For your Field Explorer, right click the “Database Fields” and click “Database Expert..”.
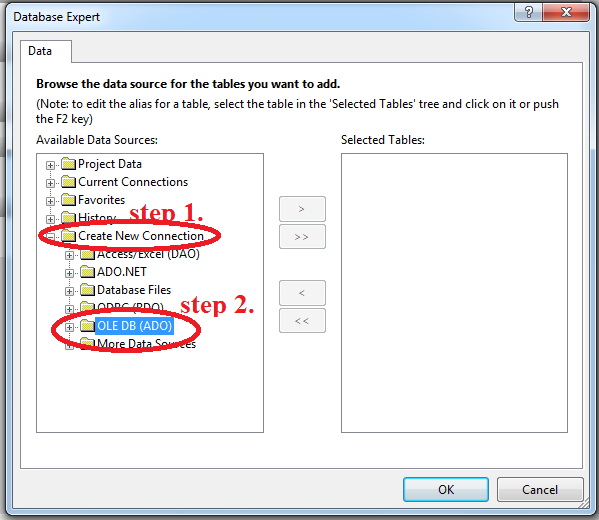
Step 9. Select “Create New Connection”, Then “OLE DB (ADO)”.
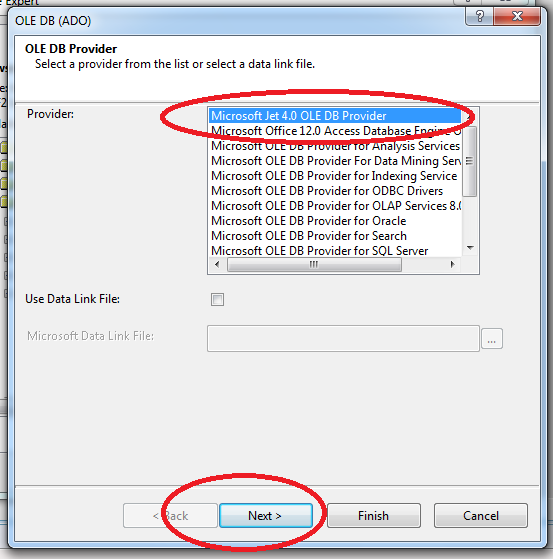
Step 10. Click “Make New Connection”. And another dialog will show. Then for Provider, Select “Microsoft Jet 4.0 OLE DB Provider” and click “Next”.
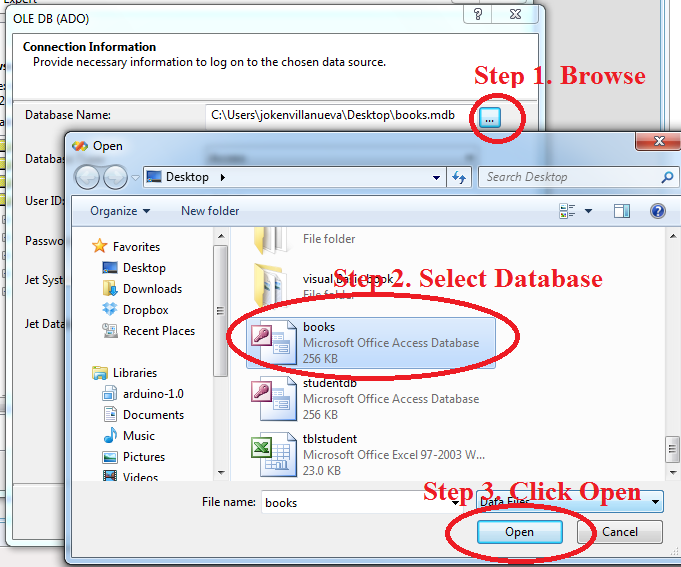
Step 11. For Database information, just browse to where your database is located.
Step 12. Click Finish. Then it will look like as shown below:
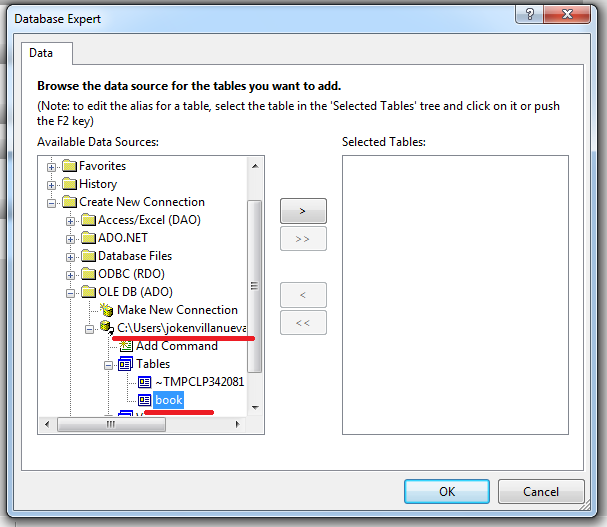
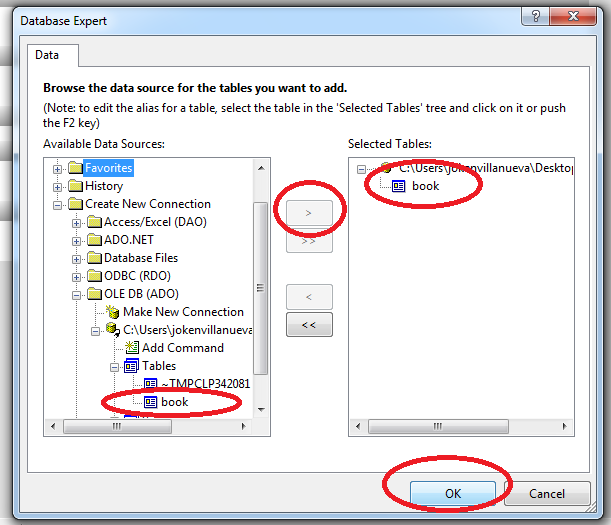
Step 13. Click book, so that it will be added to our selected tables. Then click “OK”.
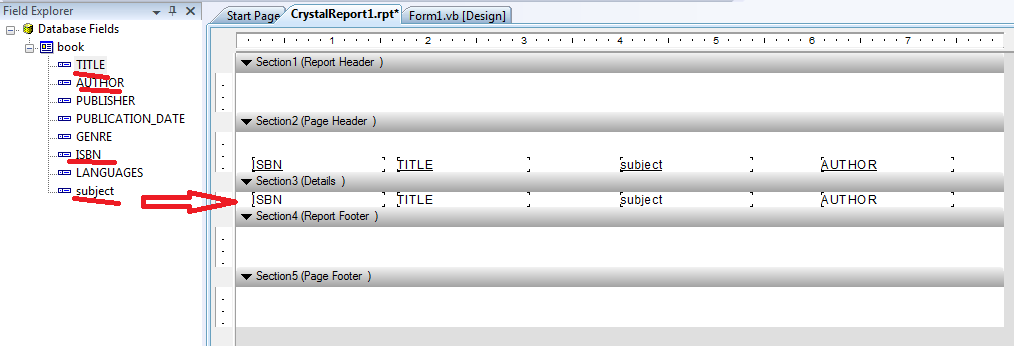
Step 14. And as you have observed the Field Explorer now has the Table “book” with fields. This time you can simply drag each field from Field Explorer to Crystal Report (Section 3 (Details)). And this look like as shown below:
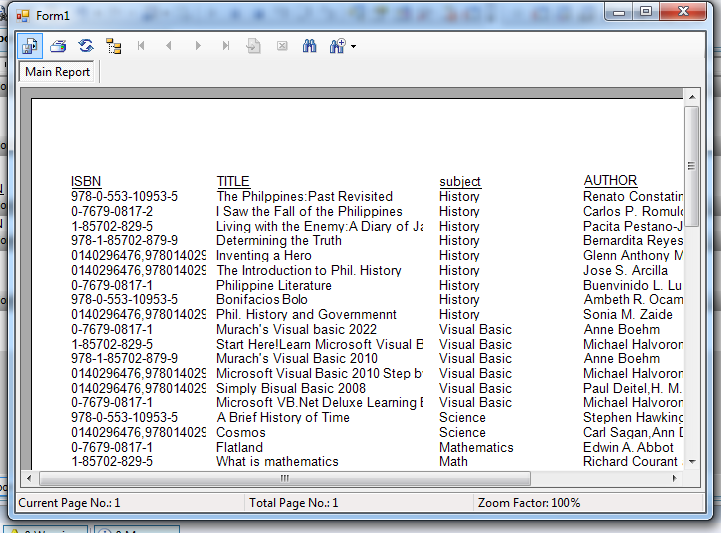
Step 15. Run your application you can observe that it will give you a list of books. And this looks like as shown below:
At this time its up to you how can design you own report, by adding some header or footer or some important details about your report.
If you want to see some new Source Code or Application and Tutorials Just click here.
Download
Step 1. Create a new Database called “books” and Save it as 2002 -2003 file format.
Step 2. Create a new table called “book”, and follow the fields and data type for this table. It looks like as shown below:
Step 3. Here’s the sample data for this table.
Step 4. Open visual studio, and create a new Visual Basic project and save it as “crystalRep”.
Step 5. From the Toolbox, under the “Reporting” add a CrystalReportViewer into the form. And this look like as shown below:
Step 6. On the CrystalReportViewwer task, Select Create New Crystal report. This look like as shown below:
Step 7. It will automatically add a crystal report in your project and you can it in your solution explorer. Then double click the “CrystalReport1.rpt”.
Step 8. For your Field Explorer, right click the “Database Fields” and click “Database Expert..”.
Step 9. Select “Create New Connection”, Then “OLE DB (ADO)”.
Step 10. Click “Make New Connection”. And another dialog will show. Then for Provider, Select “Microsoft Jet 4.0 OLE DB Provider” and click “Next”.
Step 11. For Database information, just browse to where your database is located.
Step 12. Click Finish. Then it will look like as shown below:
Step 13. Click book, so that it will be added to our selected tables. Then click “OK”.
Step 14. And as you have observed the Field Explorer now has the Table “book” with fields. This time you can simply drag each field from Field Explorer to Crystal Report (Section 3 (Details)). And this look like as shown below:
Step 15. Run your application you can observe that it will give you a list of books. And this looks like as shown below:
At this time its up to you how can design you own report, by adding some header or footer or some important details about your report.
If you want to see some new Source Code or Application and Tutorials Just click here.
Download
You must upgrade your account or reply in the thread to view the hidden content.