Fun
Punchline Pro
LEVEL 1
300 XP
In my last tutorial I teach you how to save multiple data in MySQL database. This time, I will teach you how to delete multiple data with a selector which is a CheckBox. With this, you can choose whatever data you want to delete and it is very useful.
Now lets begin:
I already created the MySQL Database in my first tutorial. Just click here.
1. Open the Visual Basic 2008.
2. Create a Project.
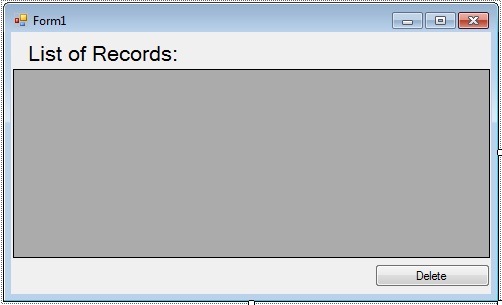
3. Set your Form just like this.
Double click the Form and do this code above the Form_load
.
This code is for setting up the connection of MySQL Database and declaring all the variables and classes that you needed.
After that, create a Sub procedure for retrieving data in MySQL Database. So that, you can call the SubName and put it in different places that you want.
Under the Form_Load
, do the following codes for adding the CheckBox column and call the SubName for retrieving the data in MySQL Database.
Go back to the Design Views, double click the Delete Button. And under the Button1_Click
, do the following codes to delete the records in MySQL Database.
Reminders: Read all the comments that I put , so that you will understand well what is happening and what are the functionalities in every code that I made.
You can download the complete Source Code and run it on your computer.
Download
Now lets begin:
I already created the MySQL Database in my first tutorial. Just click here.
1. Open the Visual Basic 2008.
2. Create a Project.
3. Set your Form just like this.
Double click the Form and do this code above the Form_load
.
This code is for setting up the connection of MySQL Database and declaring all the variables and classes that you needed.
- 'set your imports
- Imports
MySql.
Data
.
MySqlClient
- Public
Class
Form1
- 'set up your connection of MySQL database
- Dim
con As
MySqlConnection =
New
MySqlConnection(
"server=localhost;user id=root;database=test"
)
- 'a set of COMMANDS in MySQL
- Dim
cmd As
New
MySqlCommand
- 'a bridge between the database and the datatable for saving and retrieving data
- Dim
da As
New
MySqlDataAdapter
- 'a specfic table in the database
- Dim
dt As
New
DataTable
- 'variable string for storing value
- Dim
sql As
String
- 'variable integer for storing value
- Dim
result As
Integer
- End
Class
After that, create a Sub procedure for retrieving data in MySQL Database. So that, you can call the SubName and put it in different places that you want.
- 'a Sub Procedure for retrieving data
- Public
Sub
listrecords(
)
- Try
- 'opening the connection
- con.
Open
(
)
- 'store your select query to a variable(sql)
- sql =
"SELECT * FROM member"
- 'set a new specific table in the database
- dt =
New
DataTable
- 'Set your MySQL COMMANDS
- With
cmd
- .
Connection
=
con
- .
CommandText
=
sql
- End
With
- da =
New
MySqlDataAdapter(
sql, con)
- 'set the MySqlDataAdapter to add or refresh rows in a specified range in the dataset
- 'to match those in the data source the data Table name.
- da.
Fill
(
dt)
- 'to get or set the data source to diplay in the DataGridView
- DataGridView1.
DataSource
=
dt
- Catch
ex As
Exception
- MsgBox
(
ex.
Message
)
- End
Try
- 'Releases all resources used by the MySqlDataAdapter
- da.
Dispose
(
)
- 'close the connection
- con.
Close
(
)
- End
Sub
Under the Form_Load
, do the following codes for adding the CheckBox column and call the SubName for retrieving the data in MySQL Database.
- Private
Sub
Form1_Load(
ByVal
sender As
System.
Object
, ByVal
e As
System.
EventArgs
)
Handles
MyBase
.
Load
- 'set a variable as a checkbox column in the DataGridView
- Dim
chkbox As
New
DataGridViewCheckBoxColumn
- 'set the width of the column in the DataGridView
- With
chkbox
- .
Width
=
30
- End
With
- With
DataGridView1
- 'Adding the checkbox column in the DataGridView
- .
Columns
.
Add
(
chkbox)
- 'set the rows header to invisible
- .
RowHeadersVisible
=
False
- End
With
- 'Put a Sub procedure name for Listing Records on the first load
- listrecords(
)
- End
Sub
Go back to the Design Views, double click the Delete Button. And under the Button1_Click
, do the following codes to delete the records in MySQL Database.
- Private
Sub
Button1_Click(
ByVal
sender As
System.
Object
, ByVal
e As
System.
EventArgs
)
Handles
Button1.
Click
- Try
- 'opening the connection
- con.
Open
(
)
- 'DataGridViewRow represents a row in the DataGridView Control
- 'Rows is to get the collection of rows in the DataGridView control
- 'the syntax is , getting the rows one by one
- For
Each
row As
DataGridViewRow In
DataGridView1.
Rows
- 'Cells is to get the collection of cell that populate the row
- 'FormattedValue is to get the value of the cell as formtted for display
- 'the condition is, if the checkbox is checked then it delete the data in the database
- If
row.
Cells
(
0
)
.
FormattedValue
=
True
Then
- 'store your delete query to a variable(sql)
- sql =
"DELETE FROM member WHERE id = '"
_
- &
CStr
(
row.
Cells
(
1
)
.
FormattedValue
)
&
"'"
- 'Set your MySQL COMMANDS
- With
cmd
- .
Connection
=
con
- .
CommandText
=
sql
- End
With
- 'Execute the Data
- result =
cmd.
ExecuteNonQuery
- End
If
- Next
- 'the condition is, if the result is equals to zero
- 'then the message will appear and says "No Deleted Record."
- 'and if not the message will appear and says "The Record(s) has been deleted."
- If
result =
0
Then
- MsgBox
(
"No Deleted Record."
)
- Else
- MsgBox
(
"The Record(s) has been deleted."
)
- End
If
- Catch
ex As
Exception
- MsgBox
(
ex.
Message
)
- End
Try
- 'Close the connection
- con.
Close
(
)
- 'call the SubName for retrieving data to resfresh the list of Records in the DataGridView
- listrecords(
)
- End
Sub
Reminders: Read all the comments that I put , so that you will understand well what is happening and what are the functionalities in every code that I made.
You can download the complete Source Code and run it on your computer.
Download
You must upgrade your account or reply in the thread to view hidden text.