Serpico
Asynchronous Code Expert
2
MONTHS
2 2 MONTHS OF SERVICE
LEVEL 1
100 XP
Operating System
Android
First create a new scene by pressing ctrl + n then save it in the scene directory as "Level Menu".
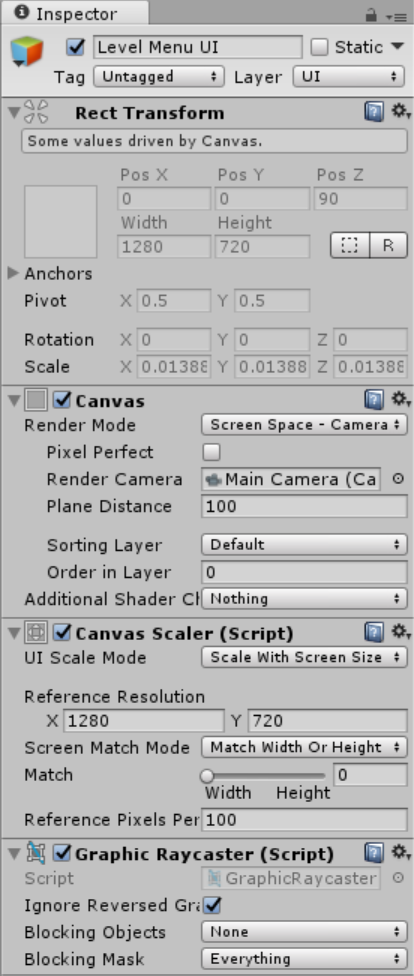
Set the component value of the canvas as shown below.
Level Menu UI
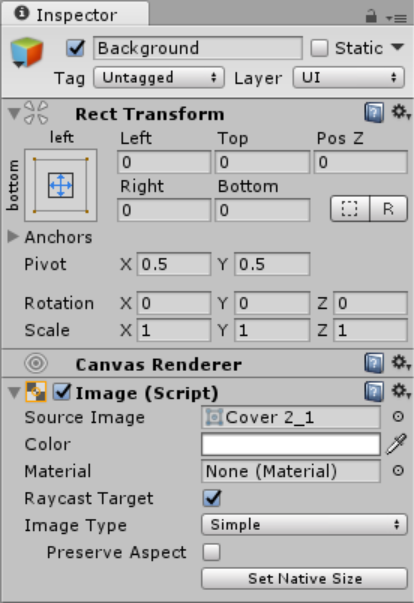
Next create a image and new canvas will be created at the same time. Then rename the canvas as "Level Menu UI" and the image as "Background"
Then for the Image
Level Buttons
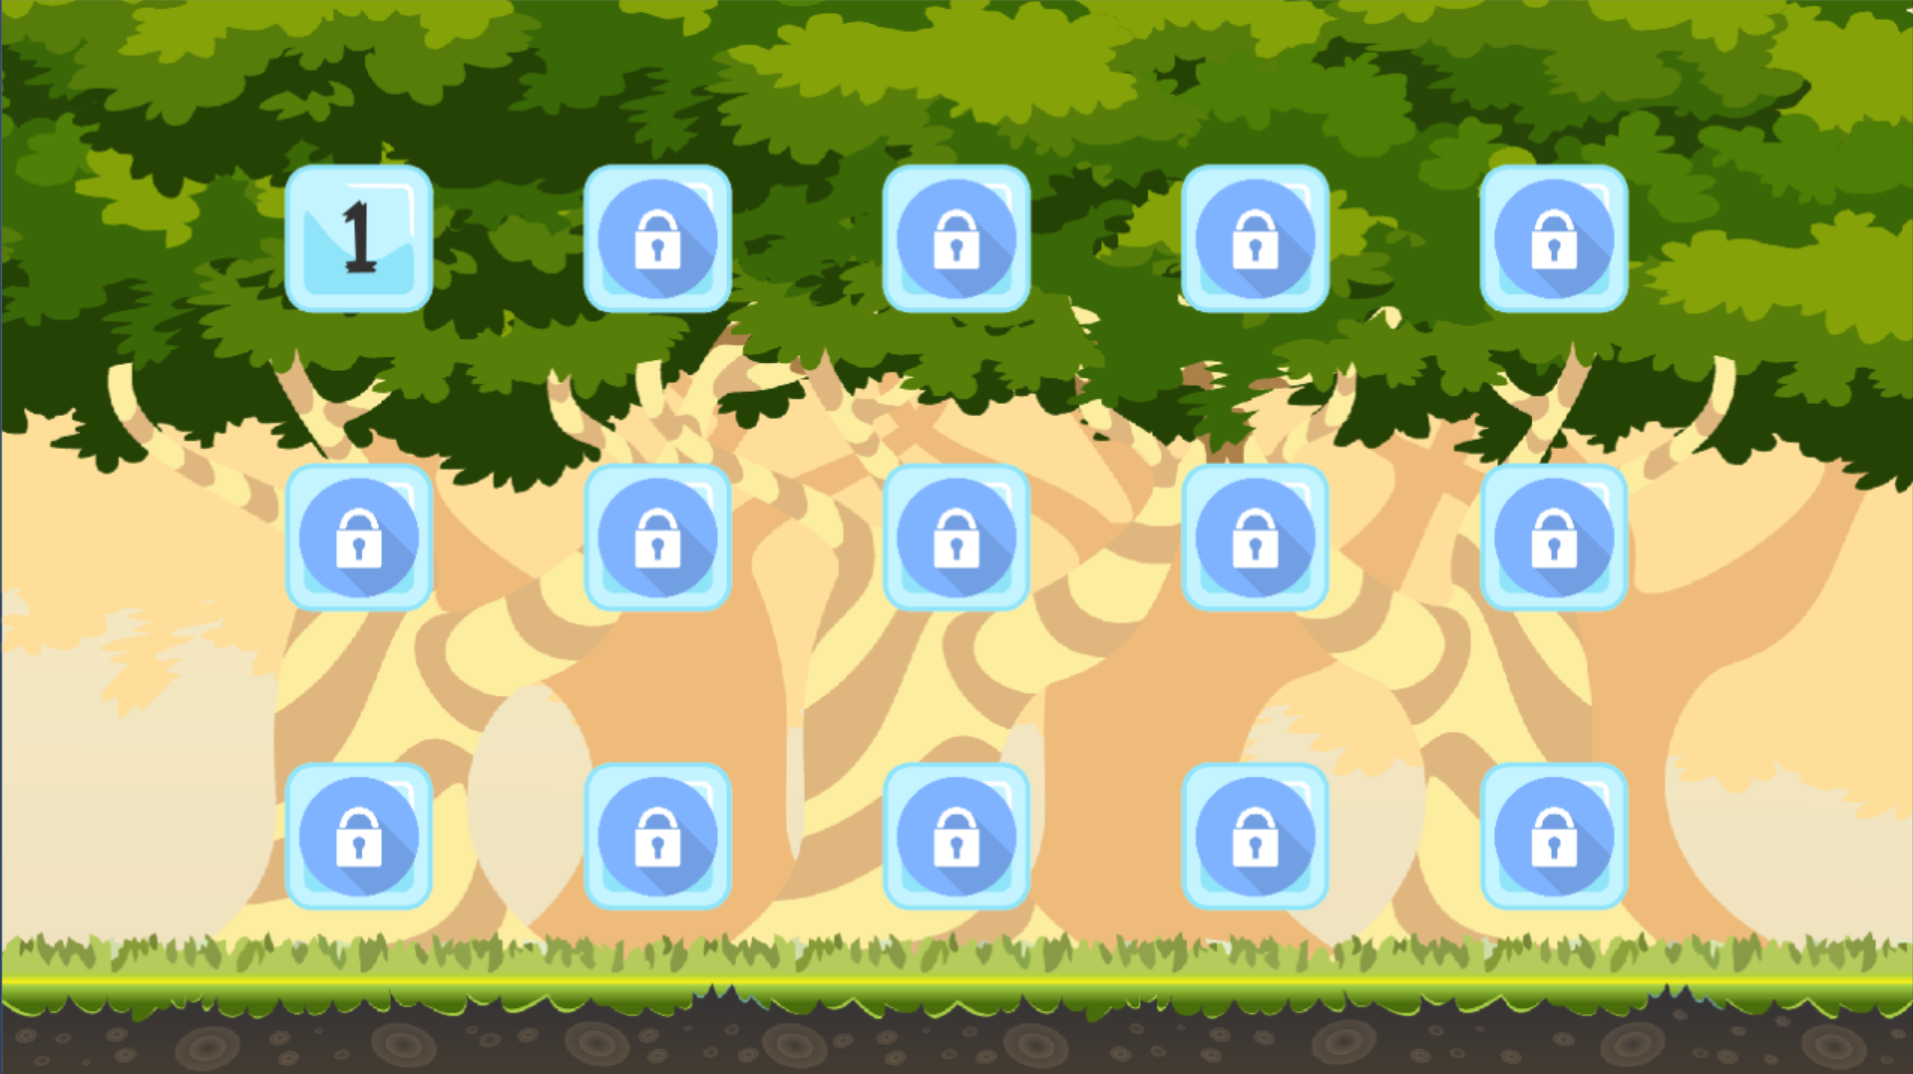
Now that we have the background we will now add the buttons that will proceed as to next level. First create a new GameObject called it Level Button Holder this will hold all the buttons. After that create a buttons(15) as a children of the newly created GameObject. Next is to add Image inside the button and set it component as shown below.
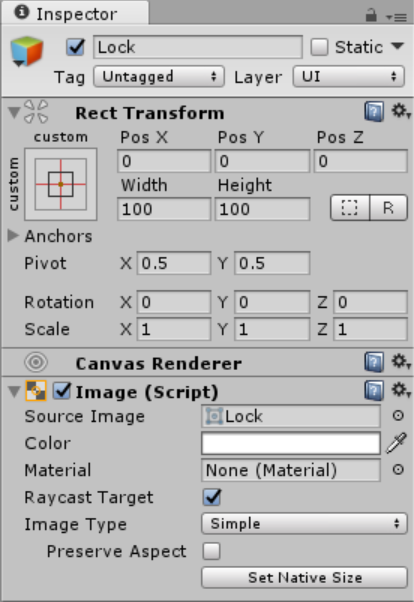
And for the Text just enter an increment number that correspond to your level selection. Once your done make sure it the same as shown below.
Creating Level Menu Controller
Now that we have the level menu ui, we will now create the Level Menu Controller just like what we did on the main menu. The Level Menu Controller handles the selection for the stages. To this just simply create a new GameObject name it as Level Menu Controller, then create a script and name it LevelMenuController.
Inside the Level Menu Controller script, create a certain variable that we will use. Write these variables inside the Main Menu Controller class.
Then add this several methods to your script.
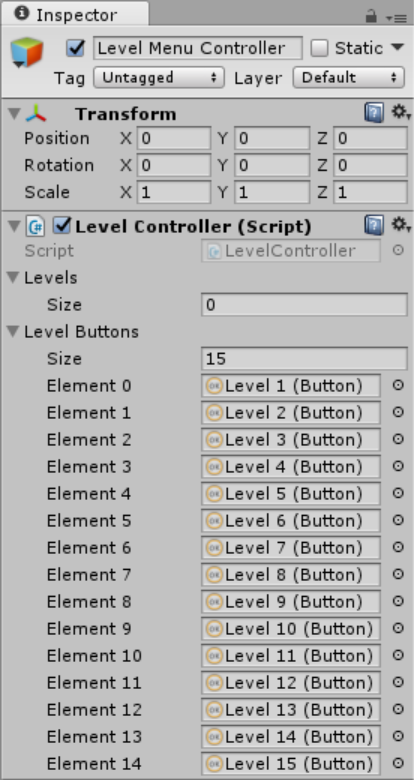
After that attach the script to the Level Menu Controller GameObject, then also attach all the necessary Objects in the script.
Note: Due to the size or complexity of this submission, the author has submitted it as a .zip file to shorten your download time. After downloading it, you will need a program like Winzip to decompress it.
Virus note: All files are scanned once-a-day by SourceCodester.com for viruses, but new viruses come out every day, so no prevention program can catch 100% of them.
FOR YOUR OWN SAFETY, PLEASE:
1. Re-scan downloaded files using your personal virus checker before using it.
2. NEVER, EVER run compiled files (.exe's, .ocx's, .dll's etc.)--only run source code.
Download
Android
First create a new scene by pressing ctrl + n then save it in the scene directory as "Level Menu".
Set the component value of the canvas as shown below.
Level Menu UI
Next create a image and new canvas will be created at the same time. Then rename the canvas as "Level Menu UI" and the image as "Background"
Then for the Image
Level Buttons
Now that we have the background we will now add the buttons that will proceed as to next level. First create a new GameObject called it Level Button Holder this will hold all the buttons. After that create a buttons(15) as a children of the newly created GameObject. Next is to add Image inside the button and set it component as shown below.
And for the Text just enter an increment number that correspond to your level selection. Once your done make sure it the same as shown below.
Creating Level Menu Controller
Now that we have the level menu ui, we will now create the Level Menu Controller just like what we did on the main menu. The Level Menu Controller handles the selection for the stages. To this just simply create a new GameObject name it as Level Menu Controller, then create a script and name it LevelMenuController.
Inside the Level Menu Controller script, create a certain variable that we will use. Write these variables inside the Main Menu Controller class.
- public
bool
[
]
levels;
- public
Button[
]
levelButtons;
Then add this several methods to your script.
- // Use this for initialization
- void
Start (
)
{
- InitilizeGameVariables (
)
;
- }
- // Update is called once per frame
- void
Update (
)
{
- if
(
Input.
GetKeyDown
(
KeyCode.
Escape
)
)
{
- SceneManager.
LoadScene
(
SceneManager.
GetActiveScene
(
)
.
buildIndex
-
1
)
;
- }
- }
- void
InitilizeGameVariables(
)
{
- if
(
GameController.
instance
!=
null
)
{
- levels =
GameController.
instance
.
levels
;
- for
(
int
i =
1
;
i <
levels.
Length
;
i++
)
{
- if
(
levels [
i]
)
{
- levelButtons [
i]
.
transform
.
GetChild
(
1
)
.
transform
.
gameObject
.
SetActive
(
false
)
;
- }
else
{
- levelButtons [
i]
.
interactable
=
false
;
- }
- }
- }
- }
- public
void
LevelSelect(
)
{
- string
level =
UnityEngine.
EventSystems
.
EventSystem
.
current
.
currentSelectedGameObject
.
name
;
- switch
(
level)
{
- case
"Level 1"
:
- if
(
GameController.
instance
!=
null
)
{
- GameController.
instance
.
currentLevel
=
1
;
- }
- break
;
- case
"Level 2"
:
- if
(
GameController.
instance
!=
null
)
{
- GameController.
instance
.
currentLevel
=
2
;
- }
- break
;
- case
"Level 3"
:
- if
(
GameController.
instance
!=
null
)
{
- GameController.
instance
.
currentLevel
=
3
;
- }
- break
;
- case
"Level 4"
:
- if
(
GameController.
instance
!=
null
)
{
- GameController.
instance
.
currentLevel
=
4
;
- }
- break
;
- case
"Level 5"
:
- if
(
GameController.
instance
!=
null
)
{
- GameController.
instance
.
currentLevel
=
5
;
- }
- break
;
- case
"Level 6"
:
- if
(
GameController.
instance
!=
null
)
{
- GameController.
instance
.
currentLevel
=
6
;
- }
- break
;
- case
"Level 7"
:
- if
(
GameController.
instance
!=
null
)
{
- GameController.
instance
.
currentLevel
=
7
;
- }
- break
;
- case
"Level 8"
:
- if
(
GameController.
instance
!=
null
)
{
- GameController.
instance
.
currentLevel
=
8
;
- }
- break
;
- case
"Level 9"
:
- if
(
GameController.
instance
!=
null
)
{
- GameController.
instance
.
currentLevel
=
9
;
- }
- break
;
- case
"Level 10"
:
- if
(
GameController.
instance
!=
null
)
{
- GameController.
instance
.
currentLevel
=
10
;
- }
- break
;
- case
"Level 11"
:
- if
(
GameController.
instance
!=
null
)
{
- GameController.
instance
.
currentLevel
=
11
;
- }
- break
;
- case
"Level 12"
:
- if
(
GameController.
instance
!=
null
)
{
- GameController.
instance
.
currentLevel
=
12
;
- }
- break
;
- case
"Level 13"
:
- if
(
GameController.
instance
!=
null
)
{
- GameController.
instance
.
currentLevel
=
13
;
- }
- break
;
- case
"Level 14"
:
- if
(
GameController.
instance
!=
null
)
{
- GameController.
instance
.
currentLevel
=
14
;
- }
- break
;
- case
"Level 15"
:
- if
(
GameController.
instance
!=
null
)
{
- GameController.
instance
.
currentLevel
=
15
;
- }
- break
;
- }
- SceneManager.
LoadScene
(
level)
;
- }
After that attach the script to the Level Menu Controller GameObject, then also attach all the necessary Objects in the script.
Note: Due to the size or complexity of this submission, the author has submitted it as a .zip file to shorten your download time. After downloading it, you will need a program like Winzip to decompress it.
Virus note: All files are scanned once-a-day by SourceCodester.com for viruses, but new viruses come out every day, so no prevention program can catch 100% of them.
FOR YOUR OWN SAFETY, PLEASE:
1. Re-scan downloaded files using your personal virus checker before using it.
2. NEVER, EVER run compiled files (.exe's, .ocx's, .dll's etc.)--only run source code.
Download
You must upgrade your account or reply in the thread to view the hidden content.