jamo
Shonen Battle Strategist
2
MONTHS
2 2 MONTHS OF SERVICE
LEVEL 1
400 XP
In my last tutorial, I had posted an article about Multiple File and Drop Upload using HTML5 and jQuery. In this article, the user allows to select and upload multiple images in a single shot.
Creating Database Table
Creating Markup
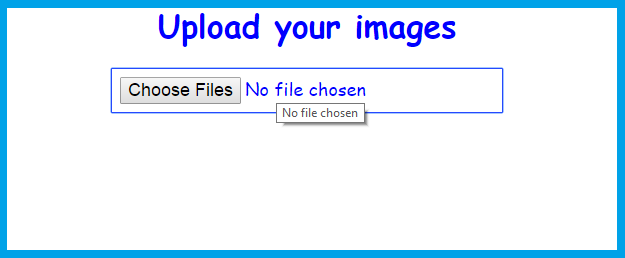
Creating form field where the user can select images to upload.
JavaScript Source Code
Kindly copy and paste this script and link to your HEAD tag of your page.
Was this article helpful?
Kindly click the "Download Code" button below for full source code. Thank you very much.
Hope that this tutorial will help you a lot.
Share us your thoughts and comments below. Thank you so much for dropping by and reading this tutorial post. For more updates, don’t hesitate and feel free to visit this website more often and please share this with your friends or email me at [email protected]. Practice Coding. Thank you very much.
Download
Creating Database Table
- CREATE
TABLE
`user_uploads`
(
- `id`
INT
(
11
)
NOT
NULL
,
- `image_name`
VARCHAR
(
100
)
NOT
NULL
,
- `user_id`
INT
(
11
)
NOT
NULL
,
- `date_upload`
VARCHAR
(
100
)
NOT
NULL
- )
ENGINE=
InnoDB DEFAULT
CHARSET=
latin1;
Creating Markup
Creating form field where the user can select images to upload.
- <div
align
=
"center"
>
- <div
id
=
'preview_Upload_images'
>
- </
div
>
- <form
id
=
"form_Images"
method
=
"post"
enctype
=
"multipart/form-data"
action
=
'ajaxImageUpload.php'
style
=
"clear:both"
>
- <h1
>
Upload your images</
h1
>
- <div
id
=
'status_image_Loading'
style
=
'display:none'
><img
src
=
"loader.gif"
alt
=
"Uploading...."
/
></
div
>
- <div
id
=
'button_Image_loading'
>
- <input
type
=
"file"
name
=
"photos[]"
class
=
"file_image"
id
=
"image_Photo"
multiple
=
"true"
/
>
- </
div
>
- </
form
>
- </
div
>
JavaScript Source Code
Kindly copy and paste this script and link to your HEAD tag of your page.
- <script
src
=
"js/jquery.min.js"
></
script
>
- <script
src
=
"js/jquery.wallform.js"
></
script
>
- <script
>
- $(document).ready(function() {
- $('#image_Photo').die('click').live('change', function() {
- //$("#preview_Upload_images").html('');
- $("#form_Images").ajaxForm({target: '#preview_Upload_images',
- beforeSubmit:function(){
- console.log('ttest');
- $("#status_image_Loading").show();
- $("#button_Image_loading").hide();
- },
- success:function(){
- console.log('test');
- $("#status_image_Loading").hide();
- $("#button_Image_loading").show();
- },
- error:function(){
- console.log('xtest');
- $("#status_image_Loading").hide();
- $("#button_Image_loading").show();
- } }).submit();
- });
- });
- </
script
>
Was this article helpful?
Kindly click the "Download Code" button below for full source code. Thank you very much.
Hope that this tutorial will help you a lot.
Share us your thoughts and comments below. Thank you so much for dropping by and reading this tutorial post. For more updates, don’t hesitate and feel free to visit this website more often and please share this with your friends or email me at [email protected]. Practice Coding. Thank you very much.
Download
You must upgrade your account or reply in the thread to view hidden text.