rolanstates2212
Historical OSINT Analyst
2
MONTHS
2 2 MONTHS OF SERVICE
LEVEL 1
300 XP
This time, I’m going to teach you how to add multiple columns and rows in the Datagridview programmatically using C#. This method will illustrate on how to control the columns and rows by creating it manually inside the datagridview. This is a big help for you when you are a beginner in programming.
Creating an Application
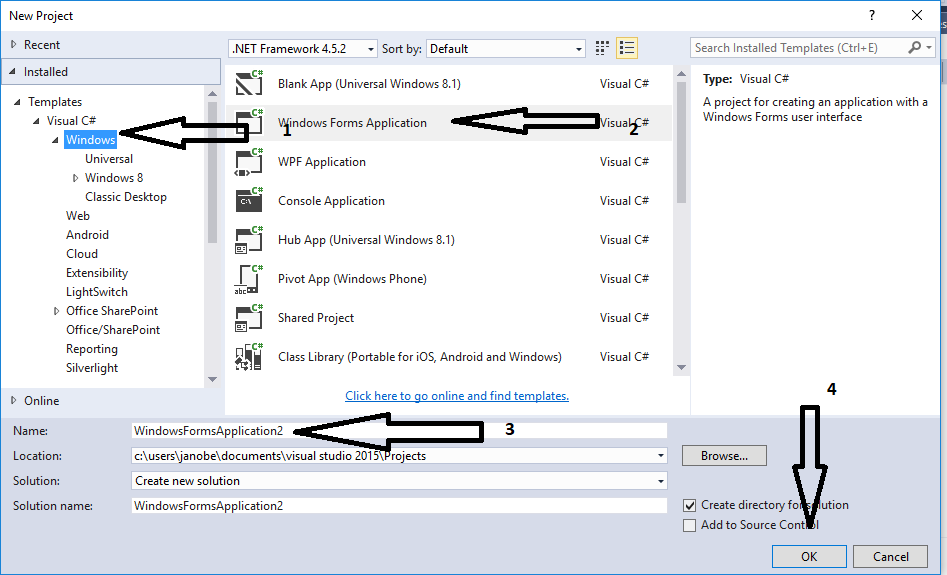
Step 1
Open Microsoft Visual Studio 2015 and create a new windows form application in C#.
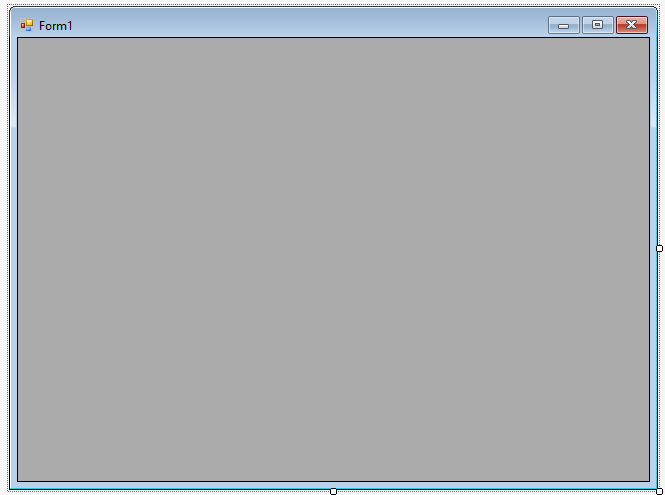
Step 2
Do the form just like shown below.
Step 3
Press F7 to open the code editor. In the code editor, create a method for adding multiple columns and rows in the datagridview
Step 4
Do the following codes to execute the method that you have created in the first load of the form.
For any questions about this article. You can contact me @
Email – [email protected]
Mobile No. – 09305235027 – TNT
Or feel free to comment below
Creating an Application
Step 1
Open Microsoft Visual Studio 2015 and create a new windows form application in C#.
Step 2
Do the form just like shown below.
Step 3
Press F7 to open the code editor. In the code editor, create a method for adding multiple columns and rows in the datagridview
- private
void
add_Columns_Rows(
)
- {
- //setup the columns to be added.
- dataGridView1.
ColumnCount
=
5
;
- //Set the columns name
- dataGridView1.
Columns
[
0
]
.
Name
=
"ID"
;
- dataGridView1.
Columns
[
1
]
.
Name
=
"Item"
;
- dataGridView1.
Columns
[
2
]
.
Name
=
"Price"
;
- dataGridView1.
Columns
[
3
]
.
Name
=
"Quantity"
;
- dataGridView1.
Columns
[
4
]
.
Name
=
"Sub-Total"
;
- //Set a value to be added in a row
- string
[
]
row =
new
string
[
]
{
"1"
, "Cellphone"
, "15,000"
, "2"
, "30,000"
}
;
- //adding rows in the datagridview
- dataGridView1.
Rows
.
Add
(
row)
;
- //Set a value to be added in a row
- row =
new
string
[
]
{
"2"
, "Laptop"
, "21,000"
, "1"
, "21,000"
}
;
- //adding rows in the datagridview
- dataGridView1.
Rows
.
Add
(
row)
;
- //Set a value to be added in a row
- row =
new
string
[
]
{
"3"
, "Speaker"
, "2,000"
, "2"
, "4,000"
}
;
- //adding rows in the datagridview
- dataGridView1.
Rows
.
Add
(
row)
;
- //Set a value to be added in a row
- row =
new
string
[
]
{
"4"
, "Desktop Computer"
, "10,000"
, "5"
, "50,000"
}
;
- //adding rows in the datagridview
- dataGridView1.
Rows
.
Add
(
row)
;
- }
Step 4
Do the following codes to execute the method that you have created in the first load of the form.
- private
void
Form1_Load(
object
sender, EventArgs e)
- {
- //displaying the columns and rows.
- add_Columns_Rows(
)
;
- }
For any questions about this article. You can contact me @
Email – [email protected]
Mobile No. – 09305235027 – TNT
Or feel free to comment below