wiltodos
Altcoin Explorer
Divine
2
MONTHS
2 2 MONTHS OF SERVICE
LEVEL 1
400 XP
This tutorial is a continuation of previous topic called "How to Create a Stocks Inventtory System". At this time, we’re going to focus on how to set up our database connection. In setting database connection, there are two way on how to do it. First is using the IDE of visual by specifying the data source of the database. And the other way is setting up the database manually.
To start building our project, let’s open visual basic and we will create a new porject then, we will save it as “Stockinven”. After this, let’s proceed to our main goal for this tutorial on setting the database connection. First I’m going to show you first how how to set up database dynamically.
And here are the steps:
Step 1:
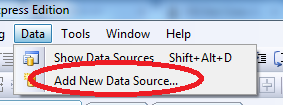
On the menu bar, choose Data menu and click “Add new Data source”.
Step 2:
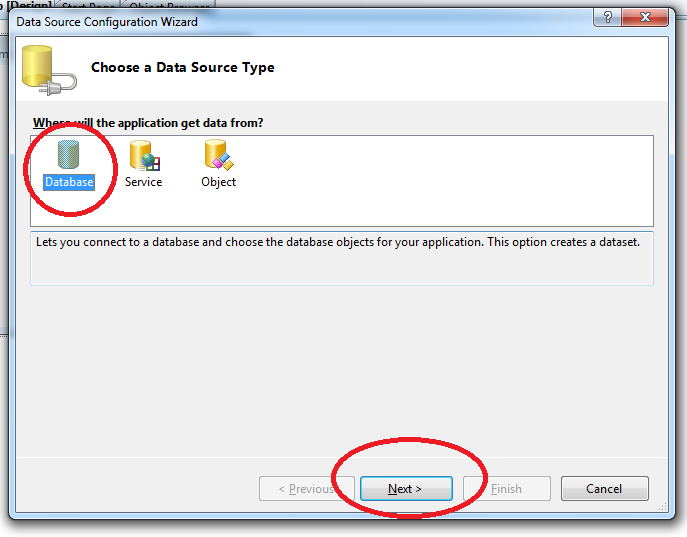
Data SourceConfiguration Wizard dialog will show, then choose Database and click next.
Step 3:
Choose data Connection. Click “New Connection”, then the Add Connection dialog will appear. And on the Data source, click “change”.

Step 4:
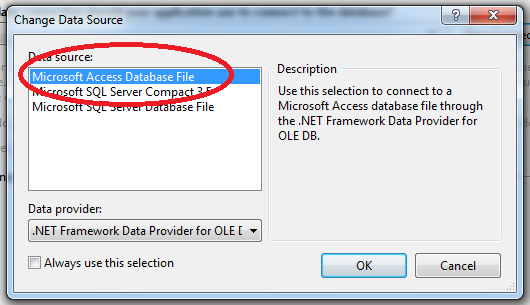
On the change Data Source, choose Microsoft Access Database File. And click “OK”.
Step 5:
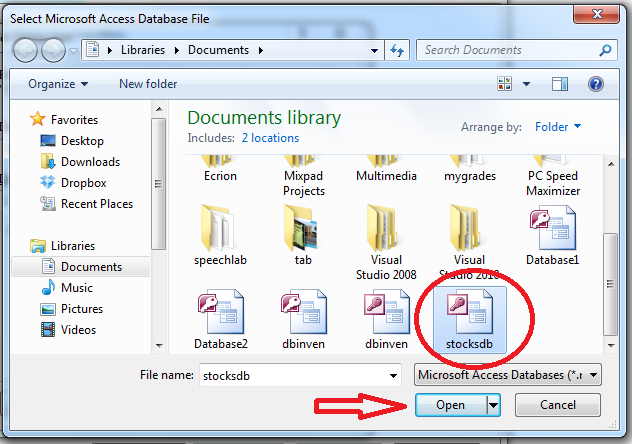
Browse Database File name, click the “Browse” button. And look for your “stockdb” and click “OK”.
Step 6:
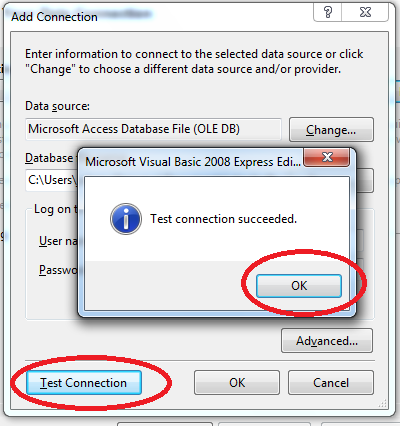
Click “Test Connection”, if you have properly establish the connection, the message box will show “Test connection succeded”.
Step 7:
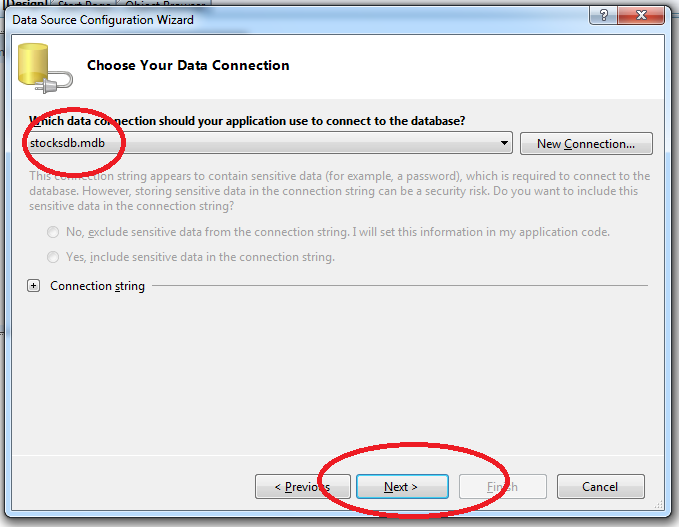
Click “OK”, and on the “Data Source Configuration Wizard” the name of the database we’re going to use will display on the combobox inline with the “New Connection” button. Then click “Next”.
Step 8:
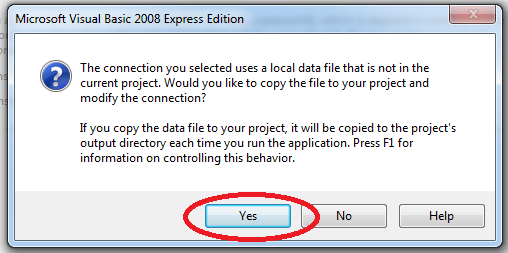
Next, to copy the file to your project and modify the connection were going to click “Yes”.
Step 9:
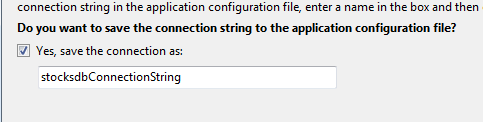
To save the connection string to the application configuration file, then check the checkbox. And click “Next”.
Step 10:
Then we're going to include the database objects in the dataset, simply check the table and the Views. And finally click “Finish”.
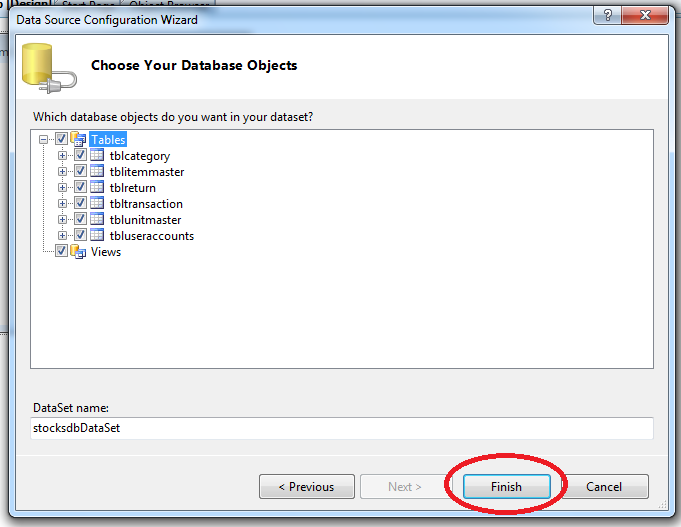
And as you can observe there are new file found in the Solution Explorer. And these are app.config, stocksdb.mdb and stocksdbDataSet.xsd.
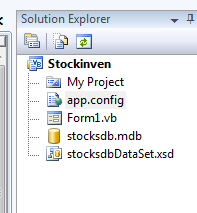
And the app.config will handle our database connection String.
Example:
Were done here for the first part on setting the database connection. Next is were goin to set up our database manually.
And here are the step by step procedure:
Step 1:
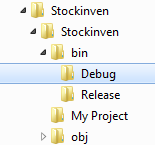
Copy the “stockdb.mdb” and paste it inside debug folder.
Step 2:
Below Public class, we will add the following code:
In this code we are creating a new variable called con and this con is declared as new Oledb.OledbConnection. this oledbconnection is a class represents an open connection to a data source.
Step 3:
Double click the form and add the following code:
In this code we set the the connection string, specifying the provider and the data source.
Step 4:
This time we’re going to test our project by pressing "F5".
And we’re done here, my next topic will disscuss on how to create a Stock master.
To start building our project, let’s open visual basic and we will create a new porject then, we will save it as “Stockinven”. After this, let’s proceed to our main goal for this tutorial on setting the database connection. First I’m going to show you first how how to set up database dynamically.
And here are the steps:
Step 1:
On the menu bar, choose Data menu and click “Add new Data source”.
Step 2:
Data SourceConfiguration Wizard dialog will show, then choose Database and click next.
Step 3:
Choose data Connection. Click “New Connection”, then the Add Connection dialog will appear. And on the Data source, click “change”.
Step 4:
On the change Data Source, choose Microsoft Access Database File. And click “OK”.
Step 5:
Browse Database File name, click the “Browse” button. And look for your “stockdb” and click “OK”.
Step 6:
Click “Test Connection”, if you have properly establish the connection, the message box will show “Test connection succeded”.
Step 7:
Click “OK”, and on the “Data Source Configuration Wizard” the name of the database we’re going to use will display on the combobox inline with the “New Connection” button. Then click “Next”.
Step 8:
Next, to copy the file to your project and modify the connection were going to click “Yes”.
Step 9:
To save the connection string to the application configuration file, then check the checkbox. And click “Next”.
Step 10:
Then we're going to include the database objects in the dataset, simply check the table and the Views. And finally click “Finish”.
And as you can observe there are new file found in the Solution Explorer. And these are app.config, stocksdb.mdb and stocksdbDataSet.xsd.
And the app.config will handle our database connection String.
Example:
- <
connectionStrings>
- <
add name=
"Stockinven.My.MySettings.stocksdbConnectionString"
- connectionString=
"Provider=Microsoft.Jet.OLEDB.4.0;Data Source=|DataDirectory|\stocksdb.mdb"
- providerName=
"System.Data.OleDb"
/>
- </
connectionStrings>
Were done here for the first part on setting the database connection. Next is were goin to set up our database manually.
And here are the step by step procedure:
Step 1:
Copy the “stockdb.mdb” and paste it inside debug folder.
Step 2:
Below Public class, we will add the following code:
In this code we are creating a new variable called con and this con is declared as new Oledb.OledbConnection. this oledbconnection is a class represents an open connection to a data source.
- Dim
con As
New
OleDb.
OleDbConnection
Step 3:
Double click the form and add the following code:
In this code we set the the connection string, specifying the provider and the data source.
- con.
ConnectionString
=
"Provider=Microsoft.Jet.OLEDB.4.0;Data Source="
&
Application.
StartupPath
&
"\stocksdb.mdb"
- 'open the connection
- con.
Open
(
)
- 'it get the current state of the connection,
- If
con.
State
=
ConnectionState.
Open
Then
- 'if it is open then message will that it is connected
- MsgBox
(
"Connected!"
)
- Else
- 'else connected not establich successfully
- MsgBox
(
"Not Connected!"
)
- End
If
- con.
Close
(
)
Step 4:
This time we’re going to test our project by pressing "F5".
And we’re done here, my next topic will disscuss on how to create a Stock master.