LaBrute
Isekai Adventurer
2
MONTHS
2 2 MONTHS OF SERVICE
LEVEL 1
200 XP
This tutorial is a continuation of our previous tutorial called How to create a Sign up Page Using twitter Bootstrap. This time we're going to focus on saving the data posted from the sign up page and we’re going to store it into the MySQL Database. To do this, we need to set first our database and here’s the table structure used in this tutorial.
Next, open our PHP file named “process_singup.php” then, we’re going to change all the codes and here’s it looks like:
In the code above, we set first the MySQL Connection and we choose our database name in our case I use “studentdb”. Then we create a variable and we populate the variable using the “superglobal” variable $_POST containing some initial information. Next, we create an “INSERT INTO” statement and store it into $query variable, then we use mysql_query () function to execute a query on a MySQL Database. Then if the data are successfully saved to our MySQL database, it will be redirected back to SignUp page.
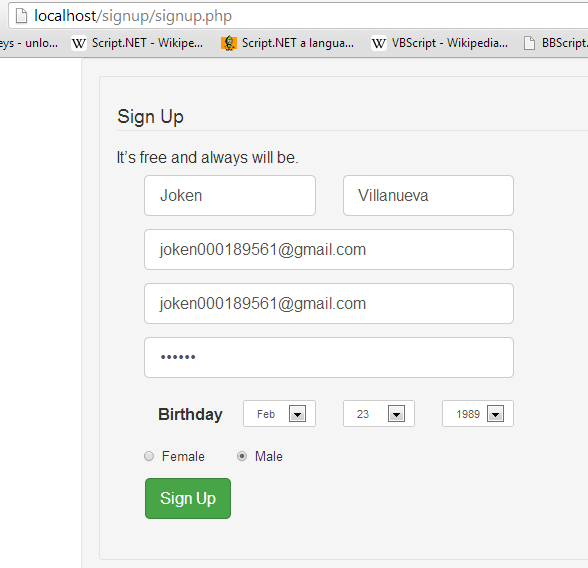
This time, we are going to test our application. First, open any browser then on the address bar type http://localhost/signup/signup.php and fill up the sign up page. It should look like as shown below.
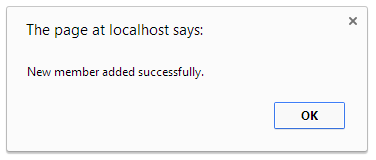
Then click the “Sign Up” button. After clicking the button a message will show. And it looks like as shown below.
And when you click the “OK” button you will be redirected to Sign Up page. Next, we’re going to check if the data has been saved to the database. We will open the phpmyadmin and view the “tblmember” table. And the output should like as shown below.

Take note, the password has been encrypted because we hash it on the “process_signup.php” for security purposes.
Download
- CREATE
TABLE
IF
NOT
EXISTS
`tblmember`
(
- `id`
INT
(
11
)
NOT
NULL
AUTO_INCREMENT
,
- `fName`
VARCHAR
(
30
)
NOT
NULL
,
- `lName`
VARCHAR
(
30
)
NOT
NULL
,
- `email`
VARCHAR
(
50
)
NOT
NULL
,
- `password`
VARCHAR
(
60
)
NOT
NULL
,
- `birthdate`
text NOT
NULL
,
- `gender`
VARCHAR
(
20
)
NOT
NULL
,
- PRIMARY
KEY
(
`id`
)
- )
ENGINE=
InnoDB DEFAULT
CHARSET=
latin1 AUTO_INCREMENT
=
6
;
Next, open our PHP file named “process_singup.php” then, we’re going to change all the codes and here’s it looks like:
- //set up mysql connection
- mysql_connect
(
"localhost"
,
"root"
,
""
)
or die
(
mysql_error
(
)
)
;
- //select database
- mysql_select_db
(
"studentdb"
)
or die
(
mysql_error
(
)
)
;
- $fName
=
$_POST
[
'fName'
]
;
- $lName
=
$_POST
[
'lName'
]
;
- $email
=
$_POST
[
'email'
]
;
- $reemail
=
$_POST
[
'reemail'
]
;
- $password
=
sha1
(
$_POST
[
'password'
]
)
;
- $month
=
$_POST
[
'month'
]
;
- $day
=
$_POST
[
'day'
]
;
- $year
=
$_POST
[
'year'
]
;
- $gender
=
$_POST
[
'optionsRadios'
]
;
- $birthdate
=
$year
.
'-'
.
$month
.
'-'
.
$day
;
- $query
=
"INSERT INTO tblmember(id, fName, lName, email, password, birthdate, gender)
- VALUES (NULL, '{$fName}
', '{$lName}
', '{$email}
', '{$password}
', '{$birthdate}
', '{$gender}
')"
;
- if
(
mysql_query
(
$query
)
)
{
- echo
"<script type=\"
text/javascript\"
>
- alert(\"
New member added successfully.\"
);
- window.location = \"
signup.php\"
- </script>"
;
- }
else
- die
(
"Failed: "
.
mysql_error
(
)
)
;
In the code above, we set first the MySQL Connection and we choose our database name in our case I use “studentdb”. Then we create a variable and we populate the variable using the “superglobal” variable $_POST containing some initial information. Next, we create an “INSERT INTO” statement and store it into $query variable, then we use mysql_query () function to execute a query on a MySQL Database. Then if the data are successfully saved to our MySQL database, it will be redirected back to SignUp page.
This time, we are going to test our application. First, open any browser then on the address bar type http://localhost/signup/signup.php and fill up the sign up page. It should look like as shown below.
Then click the “Sign Up” button. After clicking the button a message will show. And it looks like as shown below.
And when you click the “OK” button you will be redirected to Sign Up page. Next, we’re going to check if the data has been saved to the database. We will open the phpmyadmin and view the “tblmember” table. And the output should like as shown below.
Take note, the password has been encrypted because we hash it on the “process_signup.php” for security purposes.
Download
You must upgrade your account or reply in the thread to view hidden text.