xeryoon
Contributor
2
MONTHS
2 2 MONTHS OF SERVICE
LEVEL 1
300 XP
Getting Started
You may visit the official laravel site for documentations and installation using this link.
First make sure you meet the following requirements:
[*]PHP >= 7.0.0
[*]OpenSSL PHP Extension
[*]PDO PHP Extension
[*]Mbstring PHP Extension
[*]Tokenizer PHP Extension
[*]XML PHP Extension
To get PHP version >=7.0.0, you may download XAMPP that supports PHP 7 or higher using this link.
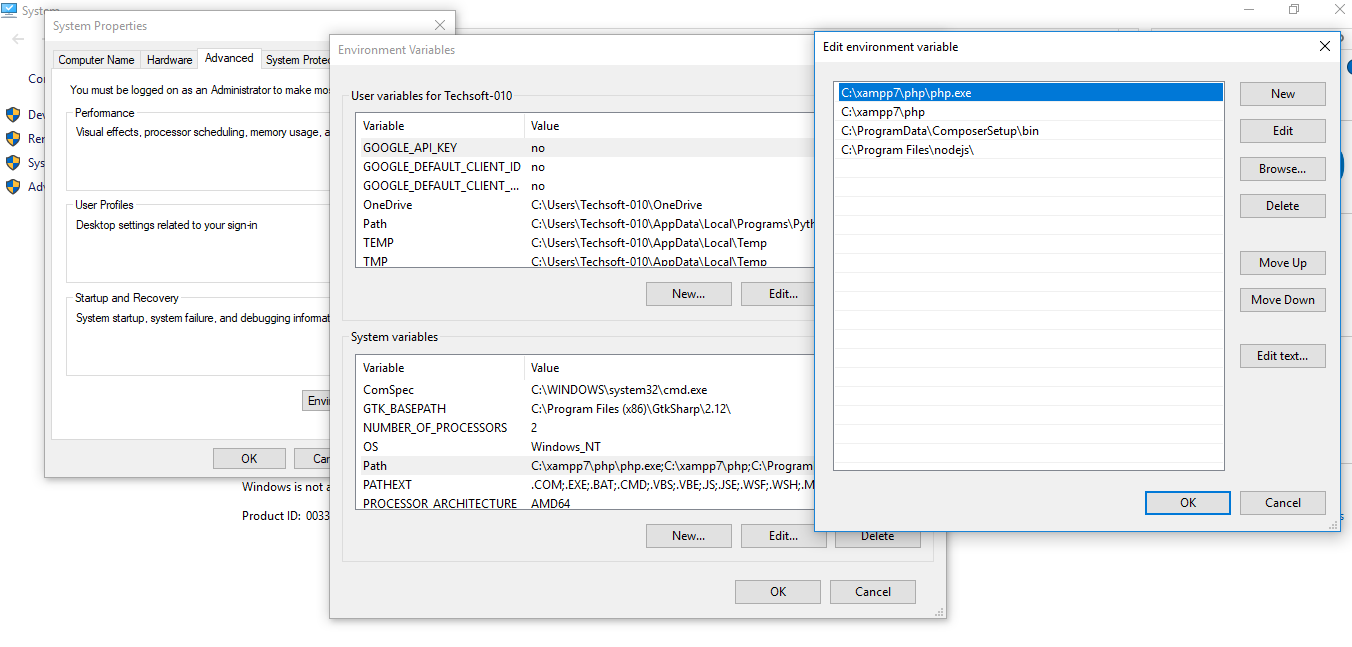
Edit Environment Variable
After getting PHP 7 or higher, take note of its directory because where going to add it in our environment variable.
1. Right click This PC, which is your PC, then click Properties or go to Control Panel > System and Security > System.
2. Click Advanced system settings then click Environment Variables.
3. At System Variables, select Path, click Edit... and select the path of your PHP 7 or higher and click OK.
Install Composer
Next, we need to install composer to manage the dependecies of laravel. You may use this link to download composer.
In the installation of composer, select the path of your PHP 7 in my case in C:/xampp7/php/php.exe.
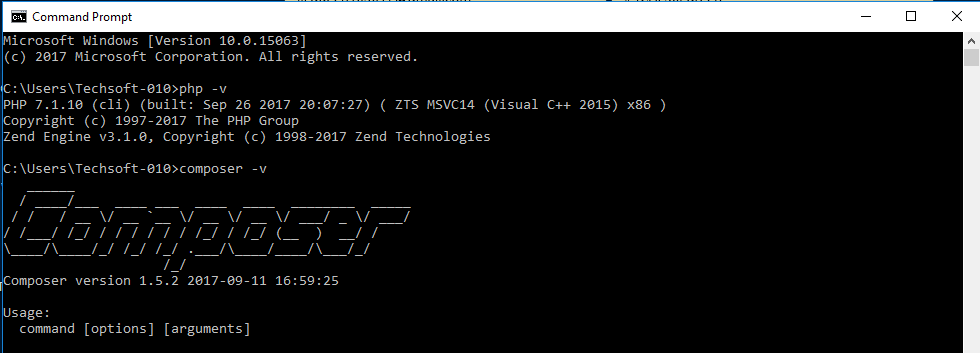
After installation, check you PHP version and composer by typing the code below in command prompt.
to check PHP version:
php -
v
to check composer:
composer -
v
Installing Laravel
To install laravel, we're gonna use our composer by typing the code below in command prompt:
composer global require "laravel/installer"
You may check if laravel is properly installed by typing laravel in command prompt.
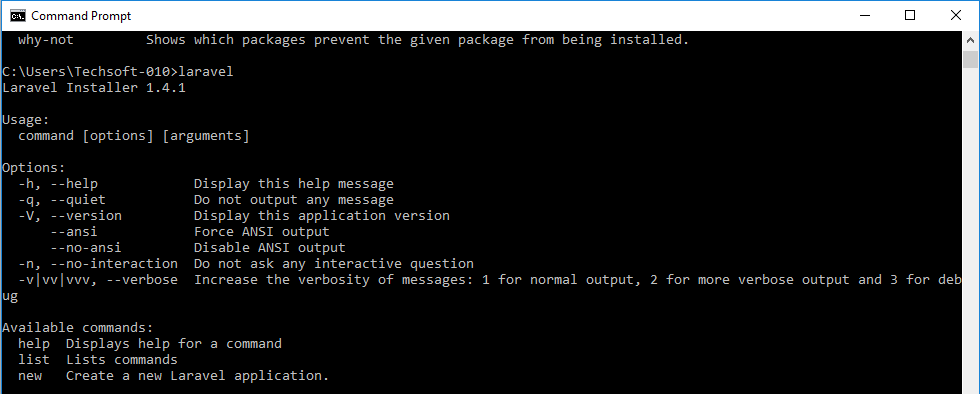
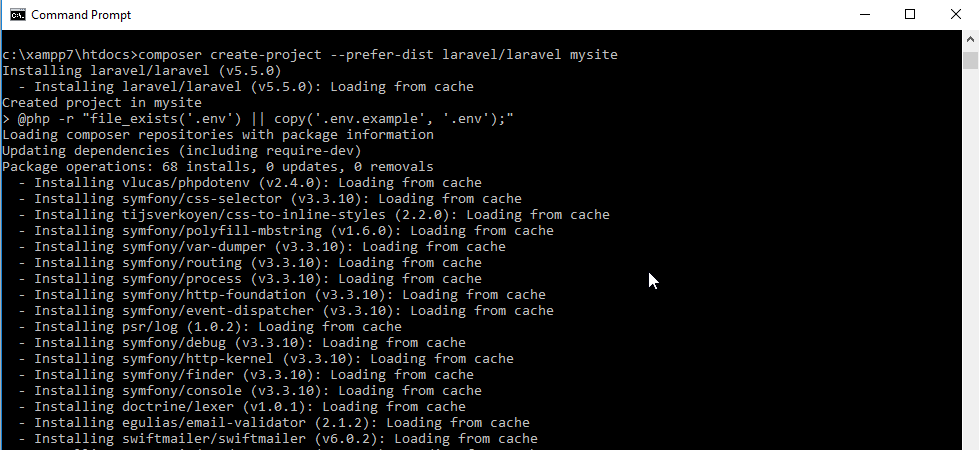
Creating New Project
Select the directory where you want to put your project. In my case, I'm gonna use C:/xampp7/htdocs. In command prompt, navigate to your directory and type: composer create-project --prefer-dist laravel/laravel mysite.
This will create our project named mysite and it will be in the latest version of Laravel. If you want to specify laravel version you want to use, just add "version.*" at the end of the line. For example composer create-project --prefer-dist laravel/laravel mysite "5.4.*" for laravel 5.4.

Adding our Project to Localhost
1. Open your XAMMP directory, in my case, in xammp7. Open in text editor xammp7/apache/conf/extra/httpd-vhosts.conf.
2. Add our project, by adding the code below:
DocumentRoot "C:/xampp7/htdocs/mysite/public"
ServerName mysite.dev
3. Run Notepad as Administrator and open C:/Windows/System32/drivers/etc/hosts. Make sure to select all files in "etc" folder to make hosts file visible. Add the ff. codes at the botton in hosts file.
127.0.0.1 mysite.dev
Running our Project
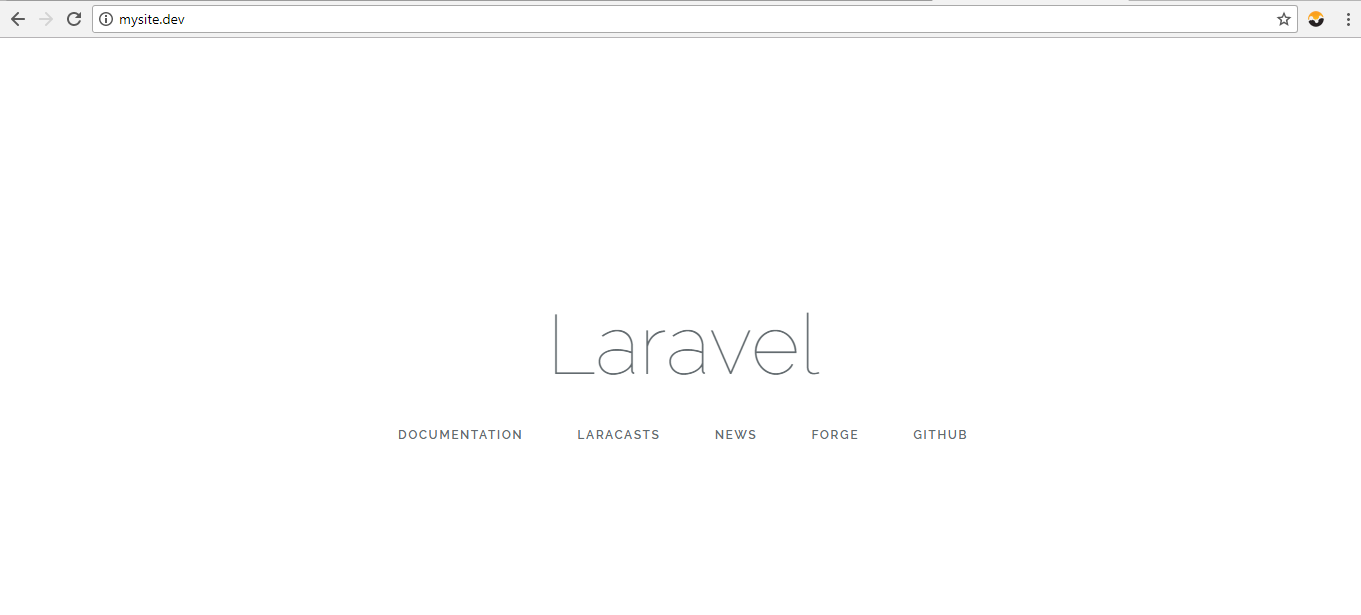
Restart your XAMMP and in your web browser type in your project name. In my case mysite.dev.
It should look like this:
That ends this tutorial. Happy Coding :)
Download
You may visit the official laravel site for documentations and installation using this link.
First make sure you meet the following requirements:
[*]PHP >= 7.0.0
[*]OpenSSL PHP Extension
[*]PDO PHP Extension
[*]Mbstring PHP Extension
[*]Tokenizer PHP Extension
[*]XML PHP Extension
To get PHP version >=7.0.0, you may download XAMPP that supports PHP 7 or higher using this link.
Edit Environment Variable
After getting PHP 7 or higher, take note of its directory because where going to add it in our environment variable.
1. Right click This PC, which is your PC, then click Properties or go to Control Panel > System and Security > System.
2. Click Advanced system settings then click Environment Variables.
3. At System Variables, select Path, click Edit... and select the path of your PHP 7 or higher and click OK.
Install Composer
Next, we need to install composer to manage the dependecies of laravel. You may use this link to download composer.
In the installation of composer, select the path of your PHP 7 in my case in C:/xampp7/php/php.exe.
After installation, check you PHP version and composer by typing the code below in command prompt.
to check PHP version:
php -
v
to check composer:
composer -
v
Installing Laravel
To install laravel, we're gonna use our composer by typing the code below in command prompt:
composer global require "laravel/installer"
You may check if laravel is properly installed by typing laravel in command prompt.
Creating New Project
Select the directory where you want to put your project. In my case, I'm gonna use C:/xampp7/htdocs. In command prompt, navigate to your directory and type: composer create-project --prefer-dist laravel/laravel mysite.
This will create our project named mysite and it will be in the latest version of Laravel. If you want to specify laravel version you want to use, just add "version.*" at the end of the line. For example composer create-project --prefer-dist laravel/laravel mysite "5.4.*" for laravel 5.4.
Adding our Project to Localhost
1. Open your XAMMP directory, in my case, in xammp7. Open in text editor xammp7/apache/conf/extra/httpd-vhosts.conf.
2. Add our project, by adding the code below:
DocumentRoot "C:/xampp7/htdocs/mysite/public"
ServerName mysite.dev
3. Run Notepad as Administrator and open C:/Windows/System32/drivers/etc/hosts. Make sure to select all files in "etc" folder to make hosts file visible. Add the ff. codes at the botton in hosts file.
127.0.0.1 mysite.dev
Running our Project
Restart your XAMMP and in your web browser type in your project name. In my case mysite.dev.
It should look like this:
That ends this tutorial. Happy Coding :)
Download
You must upgrade your account or reply in the thread to view hidden text.