udbryte
Immersion Expert
2
MONTHS
2 2 MONTHS OF SERVICE
LEVEL 1
200 XP
Related Code: Registration Page In PHP/MySQL
If you are looking for on How To Create Registration Form In PHP/MySQL Using PDO Query then you are at the right place. In this tutorial, we are going to learn on how to create registration page using PHP/MySQL but with the use of PDO query.
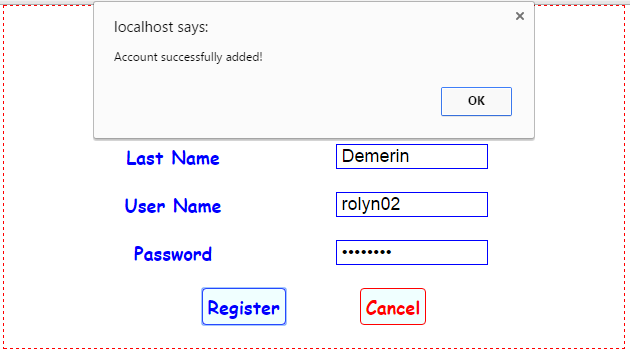
In this article, the user types their information in the form field to save in the database. After saving the data, the alert message will pop up and said: "Account successfully added!".
Creating our Table
We are going to make our database.
To create a database:
Kindly copy the code below.
Second, we are going to make our form field.
Creating Form Field
This form field that the user types their information to save in the database.
Third, we are going to make our database connection.
Database Connection
This PHP Script is our database. Copy and paste this then save it as "connection.php".
Fourth, we are going to make our saving PHP Script.
Saving Script - PHP
This step is to create our saving script for our data to save in the database and save it as "insert_query.php".
And, this is our style for the layout of the Form Field.
Output:
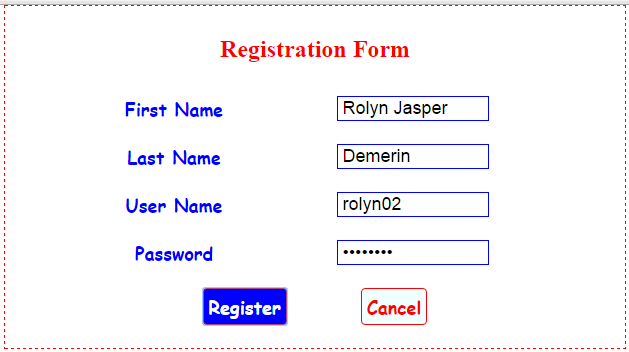
This is our Registration Form. For the new user, type their information to save into database.
This is the result of registering the account and saving into database.
Related Code: Registration Page In PHP/MySQL
So, this is it, just follow the steps to have this Registration Page or you can download the full source code below by clicking the "Download Code" button below.
Share us your thoughts and comments below. Thank you so much for dropping by and reading this tutorial post. For more updates, don’t hesitate and feel free to visit this website more often and please share this with your friends or email me at [email protected]. Practice Coding. Thank you very much.
Download
If you are looking for on How To Create Registration Form In PHP/MySQL Using PDO Query then you are at the right place. In this tutorial, we are going to learn on how to create registration page using PHP/MySQL but with the use of PDO query.
In this article, the user types their information in the form field to save in the database. After saving the data, the alert message will pop up and said: "Account successfully added!".
Creating our Table
We are going to make our database.
To create a database:
- Open the PHPMyAdmin.
- Create a database and name it as "registration_pdo".
- After creating a database name, then we are going to create our table. And name it as "user_registration".
Kindly copy the code below.
- --
- -- Table structure for table `user_registration`
- --
- CREATE
TABLE
`user_registration`
(
- `user_id`
INT
(
11
)
NOT
NULL
,
- `first_name`
VARCHAR
(
100
)
NOT
NULL
,
- `last_name`
VARCHAR
(
100
)
NOT
NULL
,
- `user_name`
VARCHAR
(
100
)
NOT
NULL
,
- `password`
VARCHAR
(
100
)
NOT
NULL
- )
ENGINE=
InnoDB DEFAULT
CHARSET=
latin1;
Second, we are going to make our form field.
Creating Form Field
This form field that the user types their information to save in the database.
- <form
method
=
"post"
action
=
"insert_query.php"
>
- <h2
>
Registration Form</
h2
>
- <table
border
=
"0"
cellspacing
=
"3"
cellpadding
=
"3"
width
=
"80%"
>
- <tr
>
- <td
><label
>
First Name</
label
></
td
>
- <td
><input
type
=
"text"
name
=
"first_name"
autofocus=
"autofocus"
></
td
>
- </
tr
>
- <tr
>
- <td
><label
>
Last Name</
label
></
td
>
- <td
><input
type
=
"text"
name
=
"last_name"
autofocus=
"autofocus"
></
td
>
- </
tr
>
- <tr
>
- <td
><label
>
User Name</
label
></
td
>
- <td
><input
type
=
"text"
name
=
"user_name"
autofocus=
"autofocus"
></
td
>
- </
tr
>
- <tr
>
- <td
><label
>
Password</
label
></
td
>
- <td
><input
type
=
"password"
name
=
"password"
autofocus=
"autofocus"
></
td
>
- </
tr
>
- <tr
>
- <td
colspan
=
"2"
>
- <button
class
=
"submit_btn"
type
=
"submit"
name
=
"submit"
>
Register</
button
>
- <button
class
=
"cancel_btn"
type
=
"reset"
name
=
"cancel"
>
Cancel</
button
>
- </
td
>
- </
tr
>
- </
table
>
- </
form
>
Third, we are going to make our database connection.
Database Connection
This PHP Script is our database. Copy and paste this then save it as "connection.php".
- <?php
- $db_server
=
"localhost"
;
- $db_username
=
"root"
;
- $db_password
=
""
;
- $db_database
=
"registration_pdo"
;
- $conn
=
new
PDO(
"mysql:host=$db_server
;dbname=$db_database
"
,
$db_username
,
$db_password
)
;
- $conn
->
setAttribute
(
PDO::
ATTR_ERRMODE
,
PDO::
ERRMODE_EXCEPTION
)
;
- ?>
Fourth, we are going to make our saving PHP Script.
Saving Script - PHP
This step is to create our saving script for our data to save in the database and save it as "insert_query.php".
- <?php
- $db_server
=
"localhost"
;
- $db_username
=
"root"
;
- $db_password
=
""
;
- $db_database
=
"registration_pdo"
;
- $first_name
=
$_POST
[
'first_name'
]
;
- $last_name
=
$_POST
[
'last_name'
]
;
- $user_name
=
$_POST
[
'user_name'
]
;
- $password1
=
$_POST
[
'password'
]
;
- $conn
=
new
PDO(
"mysql:host=$db_server
;dbname=$db_database
"
,
$db_username
,
$db_password
)
;
- $conn
->
setAttribute
(
PDO::
ATTR_ERRMODE
,
PDO::
ERRMODE_EXCEPTION
)
;
- $sql
=
"INSERT INTO user_registration (first_name, last_name, user_name, password)
- VALUES ('$first_name
', '$last_name
', '$user_name
', '$password1
')"
;
- $conn
->
exec
(
$sql
)
;
- echo
"<script>alert('Account successfully added!'); window.location='index.php'</script>"
;
- ?>
And, this is our style for the layout of the Form Field.
- <style type=
"text/css"
>
- body {
- width
:
600px
;
- border
:
red
1px
solid
;
- border-style
:
dashed
;
- margin
:
auto
;
- padding
:
10px
;
- }
- td {
- text-align
:
center
;
- padding
:
10px
;
- }
- table
{
- margin
:
auto
;
- }
- input[
type=
"text"
]
{
- width
:
150px
;
- font-size
:
18px
;
- border
:
blue
1px
solid
;
- text-indent
:
5px
;
- cursor
:
pointer
;
- }
- input[
type=
"password"
]
{
- width
:
150px
;
- font-size
:
18px
;
- border
:
blue
1px
solid
;
- text-indent
:
5px
;
- cursor
:
pointer
;
- }
- label {
- font-size
:
18px
;
- color
:
blue
;
- font-weight
:
bold
;
- font-family
:
cursive
;
- }
- h2 {
- color
:
red
;
- text-align
:
center
;
- }
- .submit_btn
{
- margin-right
:
70px
;
- border
:
blue
1px
solid
;
- font-size
:
18px
;
- font-family
:
cursive
;
- padding
:
5px
;
- font-weight
:
bold
;
- color
:
blue
;
- background
:
azure
;
- border-radius
:
4px
;
- }
- .submit_btn
:
hover
{
- margin-right
:
70px
;
- border
:
red
1px
solid
;
- font-size
:
18px
;
- font-family
:
cursive
;
- padding
:
5px
;
- font-weight
:
bold
;
- color
:
white
;
- background
:
blue
;
- border-radius
:
4px
;
- cursor
:
pointer
;
- }
- .cancel_btn
{
- border
:
red
1px
solid
;
- font-size
:
18px
;
- font-family
:
cursive
;
- padding
:
5px
;
- font-weight
:
bold
;
- color
:
red
;
- background
:
azure
;
- border-radius
:
4px
;
- }
- .cancel_btn
:
hover
{
- border
:
blue
1px
solid
;
- font-size
:
18px
;
- font-family
:
cursive
;
- padding
:
5px
;
- font-weight
:
bold
;
- color
:
white
;
- background
:
red
;
- border-radius
:
4px
;
- cursor
:
pointer
;
- }
- </style>
Output:
This is our Registration Form. For the new user, type their information to save into database.
This is the result of registering the account and saving into database.
Related Code: Registration Page In PHP/MySQL
So, this is it, just follow the steps to have this Registration Page or you can download the full source code below by clicking the "Download Code" button below.
Share us your thoughts and comments below. Thank you so much for dropping by and reading this tutorial post. For more updates, don’t hesitate and feel free to visit this website more often and please share this with your friends or email me at [email protected]. Practice Coding. Thank you very much.
Download
You must upgrade your account or reply in the thread to view hidden text.