stiflas
Network Sniffer Expert
LEVEL 2
1000 XP
Good Day!!!
In this tutorial, we are going to make File Upload With Progress Bar Using PHP. In the example below, we have file input field and progress bar. During the uploading file, we are going to show the progress bar if it is done already.
And, also, we have to use the jQuery and AJAX function to do this functionally.
HTML File Form
We have a source code for our progress bar and file input field.
jQuery Script
This is the script for a progress bar, and it will be increased if the progress completed.
And, this is the output.
For my next tutorial, we are going to create a multiple image upload.
Share us your thoughts and comments below. Thank you so much for dropping by and reading this tutorial post. For more updates, don’t hesitate and feel free to visit this website more often and please share this with your friends or email me at [email protected]. Practice Coding. Thank you very much.
Download
In this tutorial, we are going to make File Upload With Progress Bar Using PHP. In the example below, we have file input field and progress bar. During the uploading file, we are going to show the progress bar if it is done already.
And, also, we have to use the jQuery and AJAX function to do this functionally.
HTML File Form
We have a source code for our progress bar and file input field.
- <center
>
- <form
id
=
"upload_container"
action
=
"upload.php"
method
=
"post"
>
- <div
>
- <label
>
Upload Image File:</
label
>
- <input
name
=
"userImage"
id
=
"userImage"
type
=
"file"
class
=
"demoInputBox"
/
>
- </
div
>
- <br
/
>
- <div
><input
type
=
"submit"
id
=
"btnSubmit"
value
=
"Submit"
class
=
"btnSubmit"
/
></
div
>
- <div
id
=
"progress-div"
><div
id
=
"progress-bar"
></
div
></
div
>
- <div
id
=
"targetLayer"
></
div
>
- </
form
>
- <div
id
=
"loader-icon"
style
=
"display:none;"
><img
src
=
"loading.gif"
/
></
div
>
- </
center
>
jQuery Script
This is the script for a progress bar, and it will be increased if the progress completed.
- <script src="js/code_js.js" type="text/javascript"></script>
- <script src="js/code_js1.js" type="text/javascript"></script>
- <
script type=
"text/javascript"
>
- $(
document)
.ready
(
function
(
)
{
- $(
'#upload_container'
)
.submit
(
function
(
e)
{
- if
(
$(
'#userImage'
)
.val
(
)
)
{
- e.preventDefault
(
)
;
- $(
'#loader-icon'
)
.show
(
)
;
- $(
this
)
.ajaxSubmit
(
{
- target:
'#targetLayer'
,
- beforeSubmit:
function
(
)
{
- $(
"#progress-bar"
)
.width
(
'0%'
)
;
- }
,
- uploadProgress:
function
(
event,
position,
total,
percentComplete)
{
- $(
"#progress-bar"
)
.width
(
percentComplete +
'%'
)
;
- $(
"#progress-bar"
)
.html
(
'<div id="progress-status">'
+
percentComplete +
' %</div>'
)
- }
,
- success:
function
(
)
{
- $(
'#loader-icon'
)
.hide
(
)
;
- }
,
- resetForm:
true
- }
)
;
- return
false
;
- }
- }
)
;
- }
)
;
- </
script>
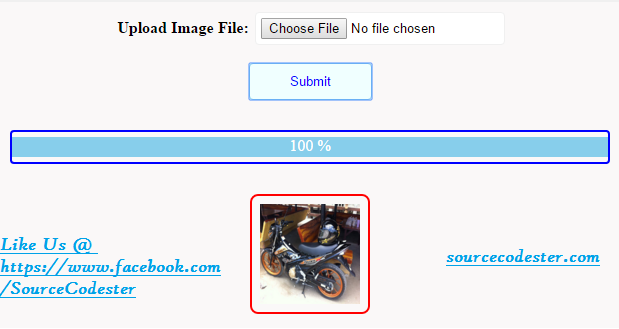
And, this is the output.
For my next tutorial, we are going to create a multiple image upload.
Share us your thoughts and comments below. Thank you so much for dropping by and reading this tutorial post. For more updates, don’t hesitate and feel free to visit this website more often and please share this with your friends or email me at [email protected]. Practice Coding. Thank you very much.
Download
You must upgrade your account or reply in the thread to view the hidden content.