D4RKC40S
Performance Debugging Pro
2
MONTHS
2 2 MONTHS OF SERVICE
LEVEL 1
300 XP
Few days ago I encountered a problem while developing an Android Application. My goal was to get a list of all system ringtones with the user sounds, stored on SD-card. I find some information about it in the web, by the full solution came to me only after some hours of work.
To start the work on these project we will create an application with a blank activity.
The next step is to add a button to show new Activity with the ringtone preferences. Now, navigate to your activity_main.xml which is situated in the res/layout folder. Delete the element TextView
. You need to delete this piece of code:
After this, let's set the background of your activity. For this scope, please, add this line to the RelativeLayout
element:
Now, you can add the button. The button can be added to the Relative Layout in this way:
Notice, that id is assigned to this button:
We will use this attribute letter.
The next step is to handle click event on this button. For this scope, we will use the id of the button and findviewById(
int
id)
method.
Open MainActivity.java and add a private member to the MainActivity class:
After this we can link this button with the button from the xml file. It's done using button id:
Setting the current class to be click listener for this button forces as to implement the interface OnClickListener
.
At this moment, activity class looks in the following way:
We are ready now to start the most interesting part of this project: the implementation of preferences option. For this purpose we will use the PreferenceScreen
with RingtonePreference
We need to add a new activity to the project. So, we need to add a record to the manifest file first:
I called my activity SoundSelect
. Now, we can add the activity to the project and the layout file, called sound_select.xml to the project. The sound select is corresponding for the selection layout and it looks in this way:
The corresponding activity file, that loads the option screen has the following structure:
You can see, that just one line is added to the standard declaration of an activity:
The work is almost done! Now, we come back to the main activity and specify the on click listener for the sound button:
That's all. Now the result is:

The sound names are shown according to the system locale. That's why you can see Russian letters in the screen.
Download
To start the work on these project we will create an application with a blank activity.
The next step is to add a button to show new Activity with the ringtone preferences. Now, navigate to your activity_main.xml which is situated in the res/layout folder. Delete the element TextView
. You need to delete this piece of code:
- <
TextView
- android:
id=
"@+id/textView1"
- android:
layout_width=
"wrap_content"
- android:
layout_height=
"wrap_content"
- android:
text=
"@string/hello_world"
/>
After this, let's set the background of your activity. For this scope, please, add this line to the RelativeLayout
element:
- android:
background=
"#000000"
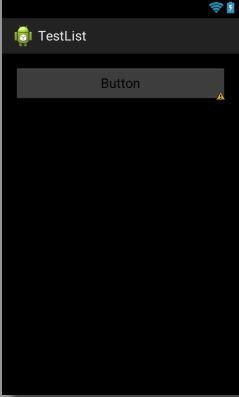
Now, you can add the button. The button can be added to the Relative Layout in this way:
- <
Button
- android:
id=
"@+id/show_music"
- android:
layout_width=
"fill_parent"
- android:
layout_height=
"wrap_content"
- android:
layout_alignParentLeft=
"true"
- android:
layout_alignParentRight=
"true"
- android:
layout_alignParentTop=
"true"
- android:
text=
"Button"
/>
Notice, that id is assigned to this button:
- android:
id=
"@+id/show_music"
We will use this attribute letter.
The next step is to handle click event on this button. For this scope, we will use the id of the button and findviewById(
int
id)
method.
Open MainActivity.java and add a private member to the MainActivity class:
- private
Button
select;
After this we can link this button with the button from the xml file. It's done using button id:
- select =
(
Button
)
findViewById(
R.id
.show_music
)
;
- select.setOnClickListener
(
this
)
;
Setting the current class to be click listener for this button forces as to implement the interface OnClickListener
.
At this moment, activity class looks in the following way:
- package
com.example.testlist
;
- import
android.app.Activity
;
- import
android.os.Bundle
;
- import
android.view.View
;
- import
android.view.View.OnClickListener
;
- import
android.widget.Button
;
- public
class
MainActivity extends
Activity implements
OnClickListener {
- private
Button
select;
- @Override
- protected
void
onCreate(
Bundle savedInstanceState)
{
- super
.onCreate
(
savedInstanceState)
;
- setContentView(
R.layout
.activity_main
)
;
- select =
(
Button
)
findViewById(
R.id
.show_music
)
;
- select.setOnClickListener
(
this
)
;
- }
- @Override
- public
void
onClick(
View
v)
{
- }
- }
We are ready now to start the most interesting part of this project: the implementation of preferences option. For this purpose we will use the PreferenceScreen
with RingtonePreference
We need to add a new activity to the project. So, we need to add a record to the manifest file first:
- <
activity
- android:
name=
".SoundSelect"
- android:
theme=
"@android:style/Theme.Black.NoTitleBar"
/>
I called my activity SoundSelect
. Now, we can add the activity to the project and the layout file, called sound_select.xml to the project. The sound select is corresponding for the selection layout and it looks in this way:
- <?
xml version=
"1.0"
encoding=
"utf-8"
?>
- <
PreferenceScreen xmlns:
android=
"http://schemas.android.com/apk/res/android"
- android:
layout_height=
"wrap_content"
- android:
layout_width=
"fill_parent"
- android:
layout_gravity=
"center"
>
- <
PreferenceCategory
- android:
summary=
"Alarm sound"
- android:
title=
"Select Sound"
>
- <
RingtonePreference
- android:
id=
"@+id/ringtone"
- android:
showDefault=
"true"
- android:
layout_width =
"wrap_content"
- android:
layout_height=
"wrap_content"
- android:
key=
"Alarm"
- android:
summary=
"Alarm"
- android:
ringtoneType=
"notification|alarm"
/>
- </
PreferenceCategory>
- </
PreferenceScreen>
The corresponding activity file, that loads the option screen has the following structure:
- package
com.example.testlist
;
- import
android.os.Bundle
;
- import
android.preference.PreferenceActivity
;
- public
class
SoundSelect extends
PreferenceActivity{
- @Override
- protected
void
onCreate(
Bundle savedInstanceState)
{
- super
.onCreate
(
savedInstanceState)
;
- addPreferencesFromResource(
R.layout
.sound_select
)
;
- }
- }
You can see, that just one line is added to the standard declaration of an activity:
- addPreferencesFromResource(
R.layout
.sound_select
)
;
The work is almost done! Now, we come back to the main activity and specify the on click listener for the sound button:
- Intent intent =
new
Intent(
MainActivity.this
,
- SoundSelect.class
)
;
- startActivity(
intent)
;
That's all. Now the result is:
The sound names are shown according to the system locale. That's why you can see Russian letters in the screen.
Download
You must upgrade your account or reply in the thread to view the hidden content.