carloscarli
Virtual Store Owner
2
MONTHS
2 2 MONTHS OF SERVICE
LEVEL 1
100 XP
In this tutorial, we’re going to focus on how to add a “Save As” command. Since we have already a save command, we still need to add a “Save As” command because the Save command automatically saves the file, while Save As opens a dialog box which can be used to change the name, location of a file as well as the format of a file.
The save and Save As command is essentially the same, that is to save the document. But, Save and Save As has a little difference. The Save Command automatically saves the file using the same name, Location or format of a file as when it was opened or last saved. However, the save as command opens a dialog box in which user can change the file, format as well as the location of where the file is saved.
To start with this application, open our previous project called “File Handling”. Then under the sub menu, add another menu called “Save As”. Then double click this menu and add the following code:
Then press “F5” to run this application. After this open the last example called “Brownfox”. And it will now look like as shown below:

Then under file menu, select “Save As”. And it will look like as shown below:

After clicking this command, the dialog box will open and on the file name write “newBrownFox.doc”, because we’re going to save it as a word document. And finally click save.
Then, if we will look at the my Documents, you can see there the new file called “newBrownFox.doc” in a Microsoft Word Document. And it looks like as shown below:
Finally we’re done for this tutorial, and if want to review about file handling, you can follow this our previous tutorial called “File handling: Writing and Saving a Text File”.
Book traversal links for File Handling: Adding a Save As Command
The save and Save As command is essentially the same, that is to save the document. But, Save and Save As has a little difference. The Save Command automatically saves the file using the same name, Location or format of a file as when it was opened or last saved. However, the save as command opens a dialog box in which user can change the file, format as well as the location of where the file is saved.
To start with this application, open our previous project called “File Handling”. Then under the sub menu, add another menu called “Save As”. Then double click this menu and add the following code:
- 'show the savefiledialog
- SaveFileDialog1.
ShowDialog
(
)
- 'if the user encode the file and click save
- If
SaveFileDialog1.
ShowDialog
=
DialogResult.
OK
Then
- 'it create a streamwriter to write in to the file
- Dim
writer As
New
System.
IO
.
StreamWriter
(
SaveFileDialog1.
FileName
, False
)
- 'get the content of Richtextbox and write to a stream
- writer.
Write
(
RichTextBox1.
Text
)
- 'close the writer
- writer.
Close
(
)
- 'it gets the data contains by the control and save the filename for later use.
- RichTextBox1.
Tag
=
SaveFileDialog1.
FileName
- End
If
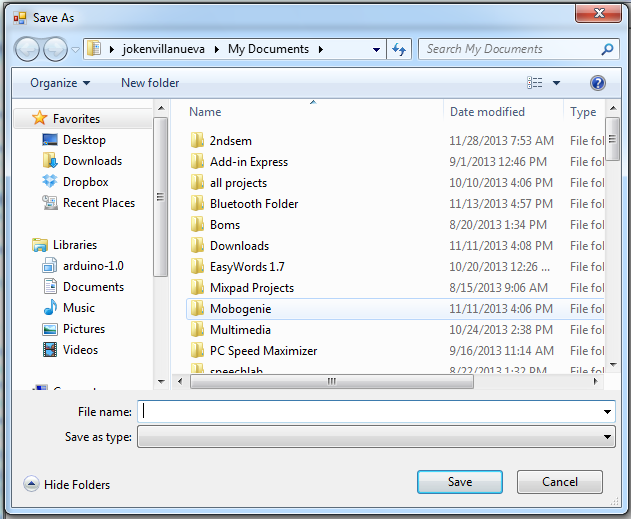
Then press “F5” to run this application. After this open the last example called “Brownfox”. And it will now look like as shown below:
Then under file menu, select “Save As”. And it will look like as shown below:
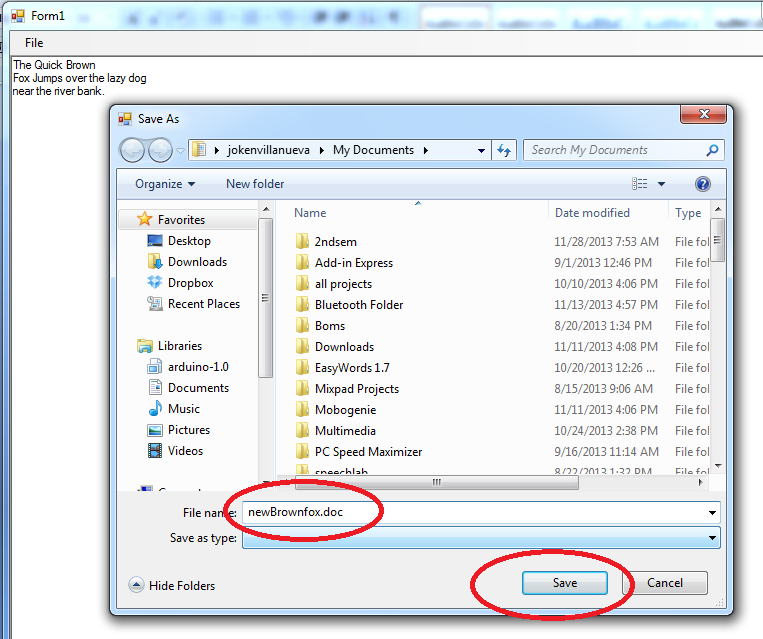
After clicking this command, the dialog box will open and on the file name write “newBrownFox.doc”, because we’re going to save it as a word document. And finally click save.
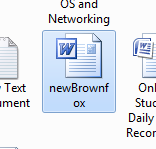
Then, if we will look at the my Documents, you can see there the new file called “newBrownFox.doc” in a Microsoft Word Document. And it looks like as shown below:
Finally we’re done for this tutorial, and if want to review about file handling, you can follow this our previous tutorial called “File handling: Writing and Saving a Text File”.
Book traversal links for File Handling: Adding a Save As Command
- ‹ Exception Handling
- Up
- File Handling: Form Closing Event ›